Showing posts with label almond. Show all posts
Monday, March 18, 2013
Almond Financiers
It's Secret Recipe Club time! This month I had the pleasure of delving into Tandy Sinclair's blog, Lavender and Lime. Tandy resides in South Africa and she is a foodie at heart. Her food inspiration started with her family and recipes and food memories from her grandmother and aunts. Tandy has been blogging since 2009, but her passion for food has been expressed in many other forums, including publishing her own cookbook (super cool!) and some of her recipes in a variety of magazines and publications. What I like most is Tandy's recipes have a simplicity about them that highlight the quality of ingredients. I spent quite a bit of time browsing Lavender and Lime and finally narrowed it down to these Almond Financiers. I have a weakness for sweets.
I have never made financiers before, but I'm so glad that I picked this recipe. In case you are wondering, a financier is a small, moist French cake, typically made with ground almonds, whipped egg whites and browned butter and are often baked in small rectangular shaped molds. I don't have rectangular molds so I baked mine in one of my completely underutilized pans--the mini bundt molds. Yeah for using it twice now! Or you can use a mini muffin tin.
This recipe yields a small portion so I wasn't overwhelmed with tons of mini cakes to try to get rid of--which is a good thing! It made 7 mini bundt cakes (the tops are 1 3/4 inch wide and the bottoms are just under 2 1/2 inches wide). It's the perfect size to satisfy your sweet craving. The exterior of the cake takes on a little bit of crunch which gives way to a soft moist interior. The cake itself is very sweet so I paired it with black tea. I think it would also be nice with a bittersweet chocolate ganache dripping down the sides to balance the sweetness. Next time I make this recipe I may cut the sugar back just a bit. Also, I mentioned above that browned butter is a traditional method for making these little cakes, however this particular recipe doesn't call for it. But feel free to brown your butter if that suits your fancy.
I really love how these tiny cakes came out--and they are pretty! One of these days I'm going to host a tea party and I'm tucking this recipe away for just that occasion. Definitely a keeper. Thanks Tandy!
Enjoy!
Almond Financiers
from Lavender and Lime originally from Larousse Gastronomique
25 grams flour
25 grams finely ground almonds (or almond flour)
85 grams vanilla sugar (I used regular sugar and added 1/2 teaspoon of vanilla extract in with melted butter)
2 egg whites
2 pinches salt
37 grams butter, melted and cooled
Preheat oven to 375 degrees F and spray half of the wells in a mini muffin tin or mini bundt pan with cooking spray.
Combine flour, ground almonds, sugar and one pinch of salt into a medium bowl. Whip egg whites and the other pinch of salt using a stand mixer fitted with the whisk attachment, until stiff peaks are formed (about 6-8 minutes).
Gently fold egg whites into flour mixture. Quickly fold in butter until fully combined. Pour batter into prepared pan and bake for 10-15 minutes (depending on the size of your individual cakes, mine baked for 12 minutes).
Cool on wire rack. Remove from pan and serve with a dusting of powdered sugar, drizzle of chocolate ganache or a dollop of jam.
Thursday, December 6, 2012
Cranberry Orange Almond Biscotti
The cranberry craze continues here. First it was cranberry preserves, then salad with cranberry and other delicious ingredients, and now biscotti.
What are your thoughts on biscotti? Love it? Hate it? Never thought much about it?
Historically I've turned my nose up to biscotti. I always viewed them as boring...and a little too crunchy for my taste. I tried my first homemade biscotti a couple of years ago as part of the Sweet Melissa Baking group. I was pleasantly surprised that I did in fact like these little cookies. For the record, I prefer my biscotti to be a little on the soft side. Meaning, not super crunchy/hard. It's all about the second bake time. I under bake mine a bit to avoid an uber hard biscotti.
Now don't go comparing biscotti to a piece of cake or your favorite fudgy brownie. To fully appreciate biscotti you have to put them in their own category. It's a great snack or light breakfast. What I like is that it's not overly sweet, but is still enough to satisfy my sweet tooth. And no, you don't have to be a coffee drinker to like biscotti. Though I will say it's really perfect with a hot cup of tea if you're into that.
I made this batch of biscotti to send off for November's Operation Baking GALS (where volunteer bakers send home baked goodies to military stationed overseas). And I'm gearing up to make it again this weekend for December's OBG since it travels so well. I'm pretty jazzed about this round of OBG because it's Christmas. On Sunday a few friends and family are gathering at my house with their baked goods and we are going to pack up boxes to send two recipients stationed in Afghanistan. I'm really excited to see how many boxes we can put together to bring a little Christmas cheer to the military personnel who sacrifice so much for us all. I'll be posting more on our baking party next week. :)

In the meantime, if you haven't tried biscotti you might want to give them a shot. And biscotti makes a nice homemade holiday gift if you're looking for ideas.
Enjoy!
Cranberry Orange Almond Biscotti
Adapted from Sweet Melissa Baking Book
1/2 cup dried cranberries
1/2 cup fresh orange juice
4 Tablespoons (1/2 stick) unsalted butter, at room temperature
1 cup sugar
Zest of 2 oranges
1/4 teaspoon salt
2 large eggs
1 teaspoon pure vanilla extract
1 teaspoon almond extract
1/2 teaspoon orange extract
1 3/4 cups all-purpose flour
1 teaspoon baking powder
1/2 cup whole blanched almonds, roughly chopped
Line a cookie sheet with parchment paper or foil. In a small saucepan, heat the orange juice and cranberries and bring to a simmer. Cover and remove heat, allowing the cranberries to reconstitute in the orange juice.
In a medium bowl whisk flour and baking powder and set aside.
In the bowl of an electric mixer fitted with the paddle attachment, cream the butter, sugar, zest, and salt until light and fluffy, 3 to 4 minutes. Add the eggs, one at a time, mixing fully after each addition. Scrape down the sides of the bowl. Add the vanilla, almond and orange extracts and mix until combined.
Add flour mixture to wet mixture in 3 additions, with the mixer on low speed. Drain the cranberries and discard the juice. Stir the cranberries and almonds into the dough. Turn dough out onto plastic wrap and flatten. Refrigerate until firm, about an hour.
Preheat oven to 350 degrees.
Turn dough out on a lightly floured surface and divide in half. Roll each half into a log, patting and shaping it until you reach 14 inches. Place the logs on the prepared baking sheet, about 4 inches apart.
Bake for 30 minutes, until lightly golden and slightly firm. Remove from oven and place the baking sheet on a wire rack to cool for about 10 minutes. Reduce oven temperature to 275 degrees. Transfer the logs to cutting board and cut the logs into 3/4 inch sticks at 45 degree angle. Transfer the cookies to a freshly lined cookie sheet, cut side up. Bake for 15 minutes. Turn cookies over, exposing the other cut side and return to oven and bake for an additional 10 minutes. If you want a really crunchy cookie, bake for a total of 60 minutes.
Friday, June 15, 2012
White Chocolate Blueberry Almond Cookies
I do a lot of stuff in my mind. Like accomplishing way more tasks in a day than humanly possible. In my mind, every night I plan to get up early the next day to start conquering the to do list. The list is all checked off at the end of the day and I beam with satisfaction.
I also exercise a lot (still in my mind). I envision myself running and sweating and feeling so accomplished by the fact I can actually run. It's like I'm running a 5K everyday. And I see my jeans slipping on and buttoning with ease because of all this running I'm doing.
Since I'm exercising it's only natural that I'm also eating really really healthy (yet tasty) foods. Again, we are still in my mind. And I feel all energized and clean from eating such nutritionally rich super foods. I'm practically glowing from all this healthiness.
And of course I still have time to check a few more things off my to do list before I turn in for the night. Then I get up and do it all over again.
I'm sure you can guess where this is going.
Reality. Why does reality always come along and ruin everything?
In real life I'm lucky if I get through 1/3 of my to do list on most days. Even if I actually set my alarm to rise early and tackle a few more projects in my day...I pretty much always snooze. At least 3 times, sometimes more. And I rarely exercise. If I do, it certainly doesn't involve running. Best case scenario it involves a swift walk, occasionally up a hill if I'm feeling really adventurous. It's so much more fun to run in my head I guess! Food is the one area where sometimes I accomplish the lofty goals my mind has in store. I try to eat healthy-ish. But I also do more than my fair share of indulging in cookies, cakes, pies, ice cream....more cookies.
Cookies live in my mind. And thankfully they are a pretty regular reality around here. They are my indulgence of choice. I'm always looking to try new cookie flavor combos. These cookies were completely experimental. I was looking for something different to send for Operation Baking GALS this month. I was very happy with the finished product and hope they made it through 7 days of travel overseas.
I took a white chocolate chip macadamia nut recipe and pretty much went to town. It started with plump dried blueberries (I'm pretty certain blueberries are a super food! Right? Right??) and almonds (good for you too!), along with butter and plenty of brown sugar. Okay, those last two are questionable in the health department, but they make these oh so chewy and caramelly delicious. Don't forget about the sweet, creamy, white chocolate chips. All the flavors work really well together...blueberry pie, meets cheesecake, meets cookie. Good stuff.
I better go back to exercising in my head.
Enjoy!
White Chocolate Blueberry Almond Cookies
from The Ginger Snap Girl
Yields 36 cookies
2 1/4 cups all purpose flour
1 teaspoon baking soda
1 teaspoon salt
2 sticks unsalted butter, room temperature
1/4 cup sugar
1 1/4 cups packed brown sugar
2 eggs
2 teaspoons pure vanilla extract
2 cups white chocolate chips
1 3/4 cups dried blueberries
1 3/4 cups chopped almonds
Preheat oven to 375 and line 3 baking sheets with parchment paper. In a medium whisk flour, baking soda and salt. In the bowl of a stand mixer fitted with the paddle attachment (you can also use a hand mixer) cream butter and sugars on medium speed until pale and fluffy, about 2 minutes. Turn mixer to low and add eggs one at time, until incorporated. Mix in vanilla. Add in flour mixture in three batches and mix on low until just incorporated. Add white chocolate chips, blueberries and almonds and mix on low until evenly distributed.
Using a medium cookie scoop (about 2 tablespoons) scoop out 12 cookies per baking sheet. Bake for 11-13 minutes until lightly golden brown, rotating sheets from front to back and top to bottom halfway through cooking. Allow to cool on baking sheet for 5 minutes and transfer to a wire rack to cool completely.
Sunday, March 4, 2012
Strawberry Tid Bits and a Tart
I did it. I ate all three baskets of strawberries I bought last Sunday at the farmer's market.
By myself.
It took me 6 days and three breakfasts of strawberries, yogurt and granola, one breakfast of berries with a Nutella scone, two desserts of strawberries dipped in Nutella and the finale was this strawberry tart. And surprisingly, I am not sick of strawberries! I am actually a little sad they are gone. I might just be heading back to the farmer's market this week.
Storing Your Strawberries - Tip of the Day
I mentioned earlier this week, I've struggled in the past to store strawberries for more than a day or two without them growing mold or looking sad and sickly. I've tried several methods which have all proven to be unsuccessful. Some of these unsuccessful methods have included, storing them in the fruit drawer of the fridge in the packaging they come in; storing them in a cool, unrefrigerated, spot in the packaging they come in; washing the berries, removing the green tops, allowing them to fully dry and storing them in the fridge in a zip top bag with as much air removed as possible (this is the most successful of the unsuccessful methods).
Now that you know what doesn't work, I am happy to say I can now tell you what does work. The lady who sold me the berries at the farmer's market shared her preferred method for storing these crimson beauties. I tried her suggestion and I got 6 full days of beautiful berries. I had eaten them all by day 6, but I have a feeling they could have gone at least another day or two, possibly more. Here's the method:
- Don't wash the berries until you are ready to use them
- Remove any berries that are already soft or where the skin is broken and discard or set aside to eat (you could use these in a smoothie, strawberry sauce or strawberry puree)
- Place a paper towel on the bottom of a tupperware container (with a tight fitting lid) large enough to hold all your berries
- Place the dry, unwashed, unblemished berries on top of the paper towel, in a single layer, preferably not allowing the berries to touch and top with another paper towel
- Layer paper towels and berries until all your berries are stored, finishing with a paper towel on top of the last layer and store the tupperware in the refrigerator
Strawberry Facts
Did you know....
- 1 cup of strawberries has more vitamin C than an orange?
- Strawberries are high in fiber, potassium and anti-oxidants (all good things from what I'm told)
- 1 cup of halved berries is approximately 50 calories and low in sugar
- Strawberries can be used for beauty purposes too...make a strawberry face mask consisting of berries, heavy cream and honey....sounds a lot like dessert to me!
- Strawberries are delicious (okay, this more my opinion than a fact)
Now let's talk tarts. I pulled together two recipes I've had success with to come up with this personal sized strawberry tart (or you can also make one large 9 inch tart). Back when I made these lemon tarts, I froze two mini tart crusts. Figured it was about time to use them. And remember the Boston cream pie I made late last year? And how I RAVED about the pastry cream? Yep, I made the vanilla pastry cream for this tart (though the chocolate pastry cream would be equally tasty).
The sweet almond shortbread crust from the tart makes a great base to fill with thick, creamy vanilla custard. It's like eating cookies and pudding. Top it with fresh strawberries and you have a pretty irresistable dessert on your hands.
You can make this recipe over two days, making both the tart dough and pastry cream the day ahead. You can either bake off the tart crust the day before and then wrap it in plastic wrap for filling the next day...or bake it the day you serve it.
Enjoy!
Strawberry Tart
Yields 4 mini tarts or 1 nine inch tartNote: If you make the entire recipe in the same day, start by making the pastry cream since it needs to chill for a few hours.
For the vanilla pastry cream filling:
adapted from Matt Lewis and Renato Poliafito's Baked Explorations
Note: Only half a recipe is needed to fill 1 large tart or 4 mini tarts. The full recipe is listed below. This custard is delicious all on its own so feel free to make the full recipe. You could even dip berries in it.
7 egg yolks
3/4 cup sugar
1/4 teaspoon salt
1/3 cup cornstarch
3 cups whole milk
3 tablespoons unsalted butter
1 tablespoon pure vanilla extract
2 tablespoons light rum (I omitted)
Set aside a medium heatproof bowl and fine mesh strainer.
Whisk egg yolks, half of the sugar, salt and cornstarch in a medium bowl until the mixture is pale, thick and smooth.
Bring the milk and remaining half of sugar to a boil in a medium saucepan over medium heat. Once the mixture boils remove the pan from the heat and very slowly whisk 1/3 of the hot mixture into the egg mixture, whisking continuously (you don't want scrambled eggs). Slowly pour the tempered egg and milk mixture back into the saucepan with the remaining milk while continuously whisking. Place the pan back on the stove over medium heat and continue to stir until mixture boils for 2 minutes (or until thick, like pudding). Be careful not to overcook or burn the pastry cream or it will have a bitter aftertaste.
Remove the pan from the heat and strain the pastry cream into the medium bowl you previously set aside. Stir in the butter and vanilla (and rum if using) until butter is melted and fully incorporated. Allow the mixture to cool for 15 minutes and then place plastic wrap directly on the surface to keep a skin from forming on the pastry. Refrigerate until fully chilled and set, about 4 hours or overnight.
For the tart dough:
adapted from Dorie Greenspan's Baking: From My Home to Yours
1 ½ cups all purpose flour (or 1/4 finely ground almonds or another nut and 1 ¼ cups flour) - I used nuts and flour
½ cup confectioners’ sugar
¼ tsp salt
1 stick plus 1
tablespoon (9 T) very cold (or frozen) unsalted butter, cut into small
pieces
1 large egg yolk
Place the flour (and ground nuts), sugar, and
salt in a food processor and pulse to combine. Drop in pieces of cold butter and pulse until mixture has pea size lumps of butter. Stir the yolk in small bowl and add it slowly to the flour mixture through the feeding tube,
pulsing after each addition. Once the egg is in, hold the pulse button down for 10 seconds at time until the dough looks like curds. Once you reach this point, turn the dough out onto a clean work surface. Using your hands, knead the dough very lightly to incorporate all the dry ingredients.
Dorie recommends pressing the dough into a buttered 9-inch tart pan (or 4 mini tart pans) with a removable bottom, pressing the dough evenly into the bottom and up the sides of the pan. Be gentle with pressing the dough into the pan allowing the pieces to just come together. Prick the bottom of the crust several times with a fork. Freeze the crust for at least 30 minutes prior to baking.
The method I used is to gently roll the dough to 1/4 thick between two pieces of waxed paper or parchment, laying the dough into the buttered pan(s).
Preheat oven to 375 degrees
F. Use cooking spray or butter to coat the shiny side of aluminum foil and place it buttered side down, against the crust. Place the tart pan(s) on a baking sheet and bake for 15 minutes for mini tarts and 25 minutes for a large tart. Remove from oven and gently remove the foil. If the crust puffs up just gently press it back down with the back of a spoon. Return to oven and cook for an additional 5 to 8 minutes or until set and golden brown. Cool completely on a wire rack before filling.
For the strawberry topping:
3 cups of sweet, ripe, strawberries, washed, dried, hulled and sliced vertically into 1/8 - 1/4 inch slices.
Assemble the tart:
Wait until you are ready to serve your tart(s) before assembling so the crust does not get soggy. Fill the tart(s) full with vanilla pastry cream. Top the tart(s) with the sliced strawberries, in a circular pattern starting from the outside of the crust and working your way in, allowing the strawberries to overlap slightly. Serve immediately.
Tuesday, January 31, 2012
Asian Salad with Red Peppers
I've been blogging for almost 2 years now. Back in the early days, when I had no idea what I was doing, I posted a recipe that has always been a big hit in my family for an asian slaw/salad. Though the salad is great, I cringe a
Somehow nearly two years has passed since I've made this salad. Which is a shame, because I remembered how much I love it when my family served it at our Christmas day dinner this past year. It's refreshing. It's crunchy. It's green onion-ey. It's sweet and tangy all at the same time. And it's incredibly easy to make.
When I saw a head of cabbage at our local farmer's market, it was on. I decided to waiver slightly from the original recipe by adding some finely sliced red peppers. I had an excess of red peppers in the fridge from a Costco run. I thought they would complement the other flavors in the salad nicely, not to mention bringing a pretty burst of red among a rather monotone landscape of colors. Hubby and I enjoyed the addition of the peppers and I will plan to include them going forward.
We typically eat this salad as a side dish, but if you add some grilled chicken or rotisserie chicken, this could easily be a main course. I like to toss the dressing with the salad about 10 minutes before I plan to serve it to allow the dressing to slightly soften the hearty cabbage. This dish is a crowd pleaser and would be great for a party. Did I mention this is easy to make? It is super easy. And you should totally make it and thank me later. ;)
Enjoy!
Asian Salad with Red Peppers
Serves 6-8 people
Serves 6-8 people
1/2 head thinly sliced cabbage or 16 oz bag of cabbage mix
1 package chicken Top Ramen
2 Tablespoons sesame seeds
1/2 cup slivered almonds
4 green onions thinly sliced
1 red pepper, stem and seeds removed, thinly sliced
Dressing:
Whisk together the following and chill
3 Tablespoons sugar
3 Tablespoons white vinegar
1/3 cup vegetable oil (do not substitute olive oil)
1/4 teaspoon freshly ground black pepper
1/2 teaspoon salt
Flavor packet from Top Ramen
Place uncooked ramen noodles in a ziploc bag and crush into small pieces using a meat mallet or rolling pin. Place crushed ramen, sesame seeds and almonds on a baking sheet. Toast in a 350 degree oven for 10-12 minutes until lightly golden. Toss slaw, red peppers, green onions, ramen, sesame seeds, almonds in dressing. Let the salad sit for about 10 minutes before serving to allow dressing to soften the cabbage a bit.
Monday, November 21, 2011
Danish Pastry Braid
I have never made pastry. When I was assigned Gitte's blog, My Danish Kitchen for this month's Secret Recipe Club I saw Danish pastry and there was no turning back.
Danish Pastry, also called Wienerbrød, is one of many Danish recipes on Gitte's blog. Gitte is from Denmark but has made a home in the United States with her husband and son. She writes that she experienced challenges cooking in a foreign country with unfamiliar ingredients over the years. She has tapped into her family back home to help her learn to cook. She has a lovely blog filled with an array of recipes both Danish and American inspired. I'm totally intrigued by Danish treats and see some others on Gitte's site I need to make, like Danish Træstammer, like a marzipan covered cake truffle or Danish Hindbærsnitter, Danish cookies filled with raspberry preserves. Yum! Pop over to My Danish Kitchen and check out the great recipes.
Making pastry takes planning and patience, two things I could be a lot better at. So I knew I wanted to give this a go.
The first order of business was to purchase cardamom. My local chain grocery store had it....for $11.79 for a 1.25 ounce bottle! I didn't really want to invest that much money for a spice I wasn't sure I would use again. So I went to a nearby Persian grocery store where I knew they would have an array of spices. I was able to get 0.75 ounce for $1.99. Now that's what I'm talking about! Cardamom has a spicy fragrence that reminds of spices similar to allspice and cloves. I was worried it might be overpowering, but the cardamom flavor was extremely mild in the finished product.
The dough needs resting time so plan to make it the night before you want to have it for breakfast. And then get up (really early) to roll and fold the dough (3 times), chill it again for 30 minutes and then roll it one last time, fill it, braid it, glaze and top it, bake it, ice it and finally cut and serve it. Phew...I'm out of breath! It's really not that bad. Each step is pretty straightforward. I would plan to allow at least 90 minutes of prep and cook time the morning you want to make this. I didn't get up as early as I wanted to, but the Danish pastry was done technically done in the (late) morning hours.
A few notes. I accidentally omitted the sugar in the dough. I didn't even notice until I was typing up Gitte's recipe. Whoops. It still turned out great despite this omission. There is plenty of sweetness from the filling and icing to make up for it. Speaking of filling I used ollalieberry preserves that I had on hand in place of raspberry preserves. Use your favorite preserves. I had a little trouble braiding the pastry. First off, I rolled it out too long (about 18 inches instead of 12). I had too many strips to braid so I ended up cutting about 6 of them off. This error wasn't noticeable in the finished product either. My braid baked for 15 minutes exactly and could have used 2 more minutes in the oven.
![]() |
| Check out the big pieces of butter in the dough...this was the first of three times rolling and folding the dough |
![]() |
| This is after 3 times of rolling and folding the dough...it goes back into the fridge to chill for another 30 minutes |
![]() |
| Ready for braiding |
![]() |
| The braid gets glazed with egg wash and topped with pearl sugar and sliced almonds |
![]() |
| Fresh out of the oven |
The result? Despite things not coming together perfectly, it was still a delicious, flaky fruit filled pastry. This beautiful pastry would be great for a special breakfast or for brunch. The recipe makes two 12 inch braids. I made one and froze the dough for the second one. So another Danish pastry is in my future. I'm already thinking about filling it with apple pie filling. Mmmmm.
Enjoy!
Danish Pastry Braid {Wiernerbrød)
from My Danish Kitchen
Makes two 12 inch pastry braids
Pastry Ingredients:
3 1/2 cups all purpose flour
1 1/2 cups cold unsalted butter
2 packages active dry yeast (4 1/2 teaspoons)
1/2 cup warm water (105 - 115 degrees F)
1/2 cup heavy cream
1/2 teaspoon cardamom
1/2 teaspoon salt
2 eggs, room temperature
1/4 cup sugar
Filling:
Seedless raspberry preserves
Glaze:
1 egg, lightly beaten
2 tablespoons water
Pearl sugar, for topping
Slice almonds, optional, for topping
Icing:
1 cup powdered sugar
2-3 teaspoons warm milk
1/2 teaspoon almond extract
Directions:
Place flour in the bowl of (an 11 cup) food processor fitted with the steel blade. Cut butter into 1/4 slices and add to flour. Pulse until the butter is the size of kidney beans.
Dissolve yeast and warm water in a large blow. Let stand for 5 minutes and stir yeast until smooth. Add in cream, cardamom, salt, eggs and sugar and stir until combined. Turn the butter flour mixture into the liquid mixture and use a rubber spatula to carefully mix until the dry ingredients are moistened. Dough will have large pieces of butter and may look slightly crumbly. Cover dough and refrigerate for 4 hours or overnight or up to 4 days.
Place dough on a lightly floured surface and dust the dough and your rolling pin with flour. Roll out the dough to make a 16 to 20 inch rectangle. Fold the dough in thirds longwise, rotate dough 1/4 turn and fold into thirds again, make a small rectangle. Turn the dough over. Repeat the rolling and folding 2 more times (making it a total of rolling and folding 3 times). You will end with a small rectangle of dough. Wrap dough and chill for 30 minutes to overnight. (I chilled for an hour)
Preheat oven to 400 degrees F. Line 2 baking sheets with parchment paper.
Divide the chilled dough into two parts. Roll each half into a 6 x 12 inch rectangle. If you are not making both braids at the same time, wrap the second half of dough and place in the refrigerator until ready to roll. Dough can also be frozen and unthawed in the refrigerator overnight.
Spread the filling down the length of the center 1/3 of each rectangle. Cut slanting (45 degree angle) 3/4 inch strips along both sides such that there are equal number of strips on each side. Carefully transfer the braids to the baking sheets and let dough rise for 15-30 minutes until it appears slightly puffy (it not double in size). Lightly beat the egg and water for the glaze. Once the dough has risen, brush the pastry with the glaze and sprinkle with pearl sugar and/or sliced almonds.
Bake for 12-15 minutes or until golden brown. Make icing by mixing powdered sugar, milk and almond extract until silky smooth. Drizzle icing on the top and let set. Cut crosswise into 2 inch slices.
Tuesday, September 13, 2011
Cherry Chocolate Chip Cookies
I made these tasty cookies for my Dad's birthday. Happy Birthday Dad! No, I did not present them to my Dad with this cute red ribbon. I dressed them up a little more "manly"...in a glad ware container with a blue lid. I did tie a thick blue ribbon around the container for a little pizazz. I couldn't resist.
These cookies start with a chocolate chip cookie base and have white chocolate chips, semi-sweet chocolate chips, toasted almonds, almond and vanilla extracts and dried cherries added in. All the mixins make for a nice chunky cookie. The almonds add a nice crunch and pair well with the cherries. The tartness of the cherries bring balance to the sweetness of the white chocolate chips. All said and done, a pretty solid cookie.
Even though these cookies were for Dad, I couldn't resist dressing them up for fun photo shoot. Over the last several months I have been making a conscious effort to improve my photos. I have a nice camera, a Nikon D-5000, but I can't say I really know what to do with it. I know I am "supposed" to use the manual settings and figure out F stops and apertures and stuff like that, but instead I usually just switch my camera to the "Food" setting mode. That, along with shooting most things on the kitchen counter during daylight hours where a window lets in natural light, is about all I do. For the most part it works pretty well....but I think it can only take me so far.
That is why I am over the moon excited that I won a spot to participate in the White on Rice Couple's photography workshop in mid October courtesy of Food Gawker! Todd and Diane of the White on Rice Couple offered
Food Gawker helped support the cause by securing one of the spots in the workshop and held a giveaway on their site last week. I entered my comment for a chance to win, thinking maybe, just maybe, I would be the lucky one. (I also think that for every other giveaway I enter (but don't win)). The giveaway stated that you must be able to get yourself to and from Orange County, California. Guess who lives in Orange County? Me! I do!
Low and behold, on September 7th (which also happens to be my Dad's birthday) I received an email from founder of Food Gawker, Chuck Lai, telling me I was the winner! Holy smokes! Really?? I couldn't believe it. I was smiling from ear to ear. I found out when I was at work and resisted every urge to get up a do a little dance at my desk. But I might have done a little dance in my chair. Ok I did. But no one was around. Anyway, Dad and I both had a good day on September 7th!
I cannot thank Chuck Lai and Todd and Diane enough for their generosity and this fabulous opportunity.
If you haven't heard Jennie's story, it's a sad one. Jennie is a food blogger, writer and mother of two little girls. I didn't know Jennie, but I've come to learn a lot about her over the last few weeks. My first encounter with Jennie was when I saw this peanut butter pie over on the Brown Eyed Baker on August 12th. That same day, I started seeing peanut butter pies all over different blogs. Not just one or 2, more like 20 plus pies. And that is just on the blogs I follow. The pies were made for Jennie's husband, Mikey, who unexpectedly passed away on August 7th of a heart attack. Jennie shared the pie on her blog and invited people to make this pie in honor of her husband and all post on Friday, August 12th, the day his family would be celebrating his life. It was completely moving to see the out pour of support for Jennie during such a tragic time.
I cannot imagine what Jennie must be going through. She is sharing her thoughts on her blog, In Jennie's Kitchen, as she tries to come to terms with the loss of the love of her life. I have been following her blog and the posts are touching and heart wrenching all at the same time. Definitely keep your tissue box nearby.
The food blogging community took their support to the next level by starting a fundraising effort for Jennie. Non profit organization Bloggers Without Borders (BWOB) started A Fund for Jennie with a goal of raising $25,000. Little did they know they should have gone bigger! In just a couple of short weeks, BWOB raised over $63,000 for Jennie. Pretty amazing. To read more about the project and Jennie's story, click here.
Now, go kiss and hug your loved ones. And make them a peanut butter pie or these cherry chocolate chip cookies to celebrate family, love and life.
Cherry Chocolate Chip Cookies
highly adapted from Baking Bites
Ingredients:
1 1/2 cups all purpose flour
3/4 teaspoon baking soda
1/4 teaspoon salt
1/2 cup sugar
1/2 packed brown sugar
1/2 cup (1 stick) unsalted butter at room temperature
1 egg
1/4 teaspoon almond extract
1 1/4 teaspoons vanilla extract
1 cup dried cherries (if cherries are large, chop so they are similar in size as the chocolate chips)
2/3 cup white chocolate chips
2/3 cup semi-sweet chocolate chips
2/3 cup toasted slivered almonds (see instructions below)
Getting Ready:
Bring your butter to room temperature:
To soften your butter quickly, place the butter in a microwave proof bowl and heat for 1 minute at power 2. You want your butter to be soft, but not melted. Test your butter and if it's not soft microwave in 30 second blasts at power of 2.
Get out your measuring cups, spoons, a whisk and a rubber spatula, cookie scoop or two spoons to drop cookie dough onto the baking sheets.
Toast almonds:
Heat a small non stick skillet on medium and add slivered almonds to the dry pan. Stir almonds frequently to prevent burning and cook about 5 minutes or until almonds are lightly golden.
Preheat oven to 375 and line two baking sheets with parchment paper and set aside.
In a small bowl whisk together flour, baking soda and salt together and set aside.
Get out your egg, butter, almond and vanilla extracts. Measure out cherries, chocolate chips and set aside.
Make it:
In stand mixer fitted with a paddle attachment or using a hand mixer, mix butter and sugars together on medium speed for 2 minutes until light and fluffy. Turn mixer to low and add the egg, almond and vanilla extracts until just combined. With mixer on low speed slowly add the flour mixture until just combined. Stop mixer and add dried cherries, white chocolate chips, semi-sweet chocolate chips and slivered almonds. Turn mixer on low until all ingredients are thoroughly combined.
Using a medium scoop (about 1 1/2 tablespoons) scoop out dough placing about 2 inches apart on the baking sheet. Use your hand to press down on the dough and flatten the cookie slightly.
Bake it:
Bake for 10-12 minutes or until cookies are very lightly golden brown on top. Cool on cookie sheets for 10 minutes and transfer to a wire rack to cool completely.
Saturday, July 23, 2011
Shaved Zucchini Summer Salad
Hubby and I are lucky enough to have a fabulous small farmer's market just a few miles from our home. We went for the first time this season last weekend and the market was in full swing with the delicious fruits of summer. And veggies of course. Zucchini and other squash was available in abundance and we brought home an armful!
Zucchini usually gets prepared just a handful of ways at our house. Grilled. Baked with Parmesan cheese. Stuffed. Cut into discs and coated with crispy panko breadcrumbs and Parmesan cheese and baked (hopefully a future blog post). And now I have a new preparation to add to the rotation. Shaved (raw) zucchini salad with fresh Parmesan, almonds and lemon dressing. I shared a preview on Thursday with the Trio of Summer Salads.
I first saw this salad on Paige's blog, A Cooking Life and I was immediately intrigued. Paige is a professional chef and cooking teacher and provides wonderful posts chalked full of detailed instructions on how to prepare her recipes along with a wealth of food knowledge weaved in. Her dishes often focus on what is in season, making her zucchini post very timely! (She has several other zucchini recipes too if you are looking for ways to use up your zucchini and squash...but I have my eye on Summer Squash Gratin to try next).
What I love about this salad is the zucchini is raw, yet is so tender it is as if it were cooked. The key to this salad is choosing squash on the small side as well as getting a very thin shave on your zucchini, 1/16 of inch thick. I think the only way to really achieve this with any consistency is by using a mandoline slicer. A basic mandoline can be purchased for between $20 - $40. I acquired a mandoline from my pal Amy for Christmas this past year and I haven't had a chance to really break it in yet, so I was thrilled to use it for this salad. It worked like a charm. Though it took me a good solid 10 minutes to figure out how to disassemble it to wash it and just as long to put it back together again!
Paige's post talks about 2 different approaches to dressing the salad. The recipe featured on Paige's blog comes from the cookbook The Vineyard Kitchen by Maria Helm and uses the method of squeezing fresh lemon juice straight onto the salad and then finishing the salad with olive oil. The other method is to prepare a lemon vinaigrette and then dressing the salad. I followed Paige's recommendation to go with the method from The Vineyard Kitchen. It allows the lemon to really soak into the squash without the oil being a barrier. It was delicious and the lemon brings a wonderful bright flavor to the salad without being overly lemony.
I made only 2 minor modifications. I used fresh basil rather than flat leaf parsley. And I added yellow summer squash in addition to the zucchini. I love the sunny yellow splash the squash brings to the salad. The ingredients are simple and really sing when brought together--the tender zucchini softened by the lemon, with a nice crunch from the toasted almonds and saltiness of fresh shaved Parmesan cheese tied up with sweet ribbons of basil. I absolutely loved this salad. It's light and refreshing and perfect for a summer day.
A couple of notes. The zucchini releases quite a bit of water as it marinates in the lemon juice and olive oil. That being said, you can really be generous with the lemon juice so that it retains it's flavor. Leftovers don't do so well the next day. This salad is best eaten shortly after it's made.
Thanks for sharing such a great recipe Paige!
Shaved Zucchini with Toasted Almonds, Parmesan and Basil
Adapted from The Vineyard Kitchen via A Cooking Life
Serves 6 to 8
2 pounds small (3 to 4 oz. each) zucchini and or yellow squash, washed and ends trimmed
3 ounces of fresh Parmesan cheese, shaved with a vegetable peeler
1/2 cup sliced or slivered toasted almonds (toast lightly in a pan on the stove over medium heat for 5 minutes stirring occasionally)
2 - 4 tablespoons fresh squeezed lemon juice
2 - 4 tablespoons extra virgin olive oil
Salt and pepper to taste
1/4 cup thinly sliced fresh basil
Slice zucchini/squash lengthwise 1/16th inch thick using a mandoline slicer. Place shaved zucchini in a medium/large bowl. Add 2/3 of the shaved Parmesan, the toasted almonds, basil and season (generously) with salt and pepper. Drizzle with 2 tablespoons of lemon juice and toss gently and taste for seasoning. Add more lemon juice and salt as needed. The salad should be a bit tangy. Add 2 tablespoons of the olive oil and toss again and taste and adjust the seasoning as needed. Serve salad and finish with a drizzle of olive oil remaining Parmesan.
Thursday, July 21, 2011
Trio of Summer Salads
I heart farmer's markets. Hubby and I made a trip to our local farmer's market this past Sunday morning. The market was bustling with people and bursting with abundant colorful harvests of summer. We picked up a few things, with no particular recipes or meals in mind. We selected our small bounty based on what looked most ripe and delicious! They had stunning large red tomatoes, a mountain of zucchini and yellow squash, fresh herbs, corn on the cob and perfectly sweet white nectarines that all made it into our bags along with small container of fresh made goats cheese seasoned with basil.
Both of us were recovering from a completely glutenous and indulgent meal from the previous day. See, we had gone to a new gourmet burger restaurant and started off with a truly evil appetizer called "Vampire Dip" which is served in a toasted bread bowl alongside hunks of fresh crusty bread and fried pita wedges. The vampire dip is a super cheesy, creamy concoction laced with an obscene mount of garlic (which we love) and diced artichoke hearts. It was insanely delicious. We devoured it and only a couple of hunks of bread and 1/3 of the bread bowl remained on the plate.
Then....let's just say I ate (half of) their famous 50/50 burger (50% ground beef and 50% ground bacon). Yes, ground bacon! That was a first for me. The burger was topped with avocado mash, pepper jack cheese and chipotle mayo all nestled between a warm, soft brioche bun. Wow. It was pretty tasty, but was almost too decadent. I think my tummy went into shock after all that crazy rich food. I shudder to think about the number of calories we consumed! I am certain we set some type of record!
Needless to say, we had been detoxing from that ridiculous meal for the next 24 hours and a light farmers market meal seemed like the right thing to do for the following night's dinner. As I inspected our farmers market haul I started thinking about fresh summer salads. And the trio of salads was born...
3. Tomato salad with basil, goat cheese and balsamic reduction
It was a delicious meal. Light. Refreshing. Yet satisfying (despite the absence of meat/protein). And healthy to boot! A chiffonade of basil tied all three salads together beautifully. Hubs didn't care for the shaved zucchini salad for reasons he can't quite put his finger on. Not to worry, I ate his portion. He did, however like the others. I really enjoyed all the salads and would make them all again. Though they all ranked highly in my book, my favorite salad by a hair was the shaved zucchini (went back for thirds), followed by the tomato salad (went back for seconds) and then the corn salad (also went back for seconds). Good stuff! And my conscience was magically cleared (after the dip and burger induced food coma), so I finished off my meal with a generous scoop of homemade strawberry ice cream. What's a meal without dessert?
Check back over the next several days to see individual posts featuring each salad and the recipes.
Have you been to your local farmer's market this summer? Let the market tell you what yummy dishes to create in your kitchen. :)
Tuesday, April 12, 2011
Crystal's Chocolate Chip "Oops" Cookies
Have you ever flubbed up a recipe? Left out a key ingredient? Added too much or too little of something? I certainly have. In cooking you can most times get away with it. In baking a major diversion from the recipe can result in a vastly different product. My first attempt at making Grammy's Chocolate Cookies a couple years back resulted in an incredibly thin cookie....because I added an extra 3/4 stick of butter. It was still tasty as you might imagine but not the result I was expecting.
My best friend Crystal (pictured on the left) recently had her own "Oops" recipe. She was making Melissa Murphy's Chocolate Chip Cookies with Toasted Almonds and noticed the baked cookie didn't match up with the "chewy" description in Melissa's recipe. After thinking back on her steps she realized that she added an extra 3/4 stick of butter and forgot to add in the one and only egg called for in the recipe. She made a couple of intentional changes too. She replaced the semi sweet chocolate chunks with large milk chocolate chips and formed the dough into two 10 inch rather than 12 inch logs, still slicing off 1 inch cookies.
Her "Oops" cookies turned out to be what she thinks might be the "one". You know that special cookie that knocks your socks off, makes you say, "wow" and keeps you coming back for more. She said to me, "You have to try these!" I had made Melissa Murphy's original version a while back and wasn't wowed. But the Oops version sounded pretty enticing.
I replicated Crystal's version to the tee (despite my urge to use semi-sweet chips and keep the egg as I did here). These really are special cookies. The milk chocolate is sweet with caramel undertones. The crunch of the toasted almonds adds a nice layer of texture to these thick yet tender cookies. They are a bit pale in color for a chocolate chip cookie (turns out that eggs help achieve that nice golden brown color, something I didn't know until researching what an egg contributes to baking). I enjoyed these cookies A LOT and felt that wow factor after biting into one. They had a gourmet quality about them in taste and appearance. I think I would enjoy them even more with semi-sweet chocolate chips or chunks, but that's just my preference in chocolate.
I am officially on a quest to find my perfect chocolate chip cookie. Though this cookie was impressive, my quest continues. This weekend I also made Alton Brown's Chewy Chocolate Chip recipe which is highly rated by many food bloggers. I took the two cookies to my office for a head to head cookie face off today. Check back in a couple of days to see the Chewy Chocolate Chip cookies and find out how they stacked up with Crystal's Chocolate Chip "Oops" cookies.
To be continued...
Chocolate Chip Cookies with Toasted Almonds
by Crystal adapted from Melissa Murphy
Makes 20 three inch cookies
1/2 cup whole natural (or slivered) almonds, toasted (see below)
2 sticks unsalted butter, softened
1/2 cup granulated sugar
1/2 cup firmly packed light brown sugar
1/2 tsp pure vanilla extract
1 2/3 cups all purpose flour
3/4 tsp baking soda
1/4 tsp salt
8 oz. best-quality milk chocolate chips (Crystal and I used Ghiradelli's large milk chocolate chips)
Preheat the oven to 350 degrees and line two cookie sheets with parchment paper or foil. Chop almonds and set aside (we used slivered toasted almonds).
In a medium bowl whisk together the flour, baking soda, and salt. In a stand mixer or using a hand mixer, cream together the butter, both sugars and vanilla until light and fluffy for about 3 minutes at medium speed. Turn the mixer on low speed and add the flour mixture in three batches, mixing each batch until flour is no longer visible. Stir in the chopped almonds and chocolate chips or chunks.
Place 2 large pieces of plastic wrap on your work surface and dump the dough out onto the first piece of plastic wrap. Form dough into square and then divide the square in two equal pieces. Place one piece on the second sheet of plastic wrap, form it into a 10 inch log and wrap tightly in the plastic. Repeat with the other piece of dough and plastic wrap. If the dough is too warm to form into logs, refrigerate for 30 minutes to an hour until dough firms up. Place wrapped logs in the refrigerator for about an hour until dough is firm enough to slice without smashing the log.
Remove the logs from the refrigerator and slice them into 1 inch cookies and place them 1 1/2 inches apart on the prepared cookie sheets. Bake at 350 for 12 to 14 minutes or until thethe bottom edge has a lightly browned appearance and the dough in the center no longer has a raw appearence. Note, this eggless version will be pale in color, so be sure not to overcook.
To toast nuts: Preheat the oven to 350 degrees and spread the almonds in a single layer on a foil lined cookie sheet. Bake for 10 to 12 minutes, or until lightly browned and you can smell them. Set aside and cool before adding to cookie dough.
Monday, February 21, 2011
French Fridays with Dorie: Orange Almond Tart
The group made Dorie's Orange Almond Tart on February 11th. So I'm only a couple of weeks behind. I'm clearly engaging the bake along as it suits you concept. This recipe was a stand out and I knew I wanted to make it, even if it's a little bit late. I love oranges and have had a constant supply of them in the fridge for the last month and half. I've never a seen a recipe with baked oranges, so this was definitely intriguing. This is also my first time making a tart so I had to go out and purchase a tart pan.
This recipe has been described many of the FFwD folks as "fussy". And it is. This isn't something you can just throw together. It's best made over the course of 2 days. You can do all the prep on day 1 and then assemble and bake on day 2.
The preparation starts with making a sweet tart dough. The dough is made in a food processor and then can either be pressed into a buttered tart pan or it can be chilled then rolled out and laid into the pan. I opted for the press in method.
I don't think I got the same thickness all around, but it still worked out ok. Once the dough is pressed in, you prick the bottom all over with a fork and then freeze it for at least 30 minutes. It bakes for about 25 minutes until the crust is lightly golden.
The second step in preparation is cutting and segmenting the oranges. This also has to be done in advance because the oranges need to dry out on paper towels for an hour or more, or Dorie even suggests overnight. I went for overnight.
The third step is preparing the almond cream. This part of the recipe also comes together in a food processor. The almond cream really isn't technically a cream, however, has a creamy texture. It's a mix of almond flour, butter, sugar, vanilla and egg.
The fourth step is assembly. The cream goes in the tart shell.
The orange segments get distributed in a design of your choosing on the top.
Finally, you are ready to bake!
60 minutes in the oven or until the almond cream puffs up around the oranges and turns lightly golden brown. Mine took the full 60 minutes.
So? How did it turn out? To be honest, it was a little weird. The almond cream is amazing. It's almondy and creamy and has a rich brown sugary taste (even though there is no brown sugar). It almost reminded me a little of pecan pie filling. The tart dough was thick and on the "tough" side. I think I overworked the dough (Dorie warns against this). But the taste of the tart dough is nice, just slightly sweet and shortbread like. The oranges were the "weird" part. When baked they had a slight bitter flavor. They were hard to cut through and were almost chewy. Dorie also suggests trying this tart with other fruit, such as pears or plums. Both would be a wonderful compliment to the oh so delicious almond cream.
Good enough to make again? Yes! With variations and hopefully a little more finesse on my tart dough.
For the recipe check out Dorie's book, Around My French Table.
Sunday, January 9, 2011
Sweet Melissa Sundays: Almond Cupcakes with Raspberry Buttercream and Lemon Glaze

Sweet Melissa Sundays is back! The group of online blogging bakers is almost done baking our way through the Sweet Melissa Baking Book...only 16 recipes left (15 after today). We've been on hiatus over the holidays. The new year is here and it's great to back baking with my SMS pals.
Even though I'm still winding down from the holiday sugar high...I was excited to make this recipe. Melissa Murphy's recipe is actually for Hazelnut Raspberry Layer cake. I changed things up a bit. I used almonds instead of hazelnuts....I burned my hazelnuts as I was trying to toast them. I halved the recipe and opted for cupcakes which are easy to take to the office and give away (the half recipe made 12 cupcakes).

The cake consists of nut flour (almond in my case), all purpose flour, baking powder, vanilla extract, browned butter and meringue. It is moist with a nice nutty flavor and comes together pretty easily with just a few steps.

The frosting on the other hand was not my friend today. The recipe calls for making a meringue and then streaming in hot sugar liquid (sugar and water that has reached 240 degrees on a candy thermometer). That step didn't happen for me. My sugar liquid did not stay in liquid form after 2 attempts. I couldn't bear the thought of dirtying yet another pan. I also didn't have raspberry liqueur on hand so I mixed (frozen) raspberries with a generous amount of sugar until they macerated and broke down into a liquidy state. Though I realized later that I should have cooked it down on the stove with the sugar to prevent the need for refrigerating the cupcakes. Melissa's original recipe calls for using raspberry preserves in between the layers of the cake. I thought about filling the cupcakes...but they were super tasty without it so I figured why not save a step. After my burned hazelnuts, and 2 pans of hardened sugar, I quite frankly didn't have the energy for another step.

Despite all my alterations, the frosting turned out pretty tasty. It had just the right amount of raspberry...which is a perfect compliment to the almond cake.
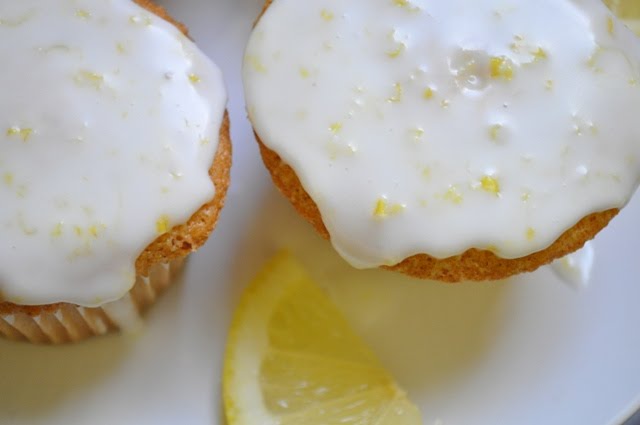
You know what else goes nicely with almond? Lemon. Mmmmm. I went a little more simple here and made a glaze to put on half the cupcakes.

It's just powdered sugar, lemon juice and lemon zest. Simple. Easy. And most importantly, delicious!

Thanks to Candy Girl for choosing such a delicious recipe! You can find the recipe on her site. To see how other SMS bakers cakes turned out click here.
Subscribe to:
Posts (Atom)