Showing posts with label mexican. Show all posts

Monday, July 8, 2013

7 Layer Nacho Dip


Growing up I ate dinner at my Grandma and Grandpa's house about once a week for several years.  Grandma was a good cook and I always looked forward to meals at her house.  With a dozen or so regular recipes, her style was simple and pretty all American...some of my favorite dishes were pan fried pork chops served with rice and gravy, spaghetti and meatballs and her good old fashioned potato salad.  Grandma rarely veered from her rotation of recipes.


But lucky for my family she found a recipe in the newspaper one day that she had to try.  I'm not sure when the dip made it's first appearance, but I do remember being surprised she made it.  It was definitely not part of her normal repertoire and neither were the ingredients.  It was a pleasant and very tasty surprise!  The 7 layer nacho dip was an immediate hit and went on to grace a number of family events through the years.
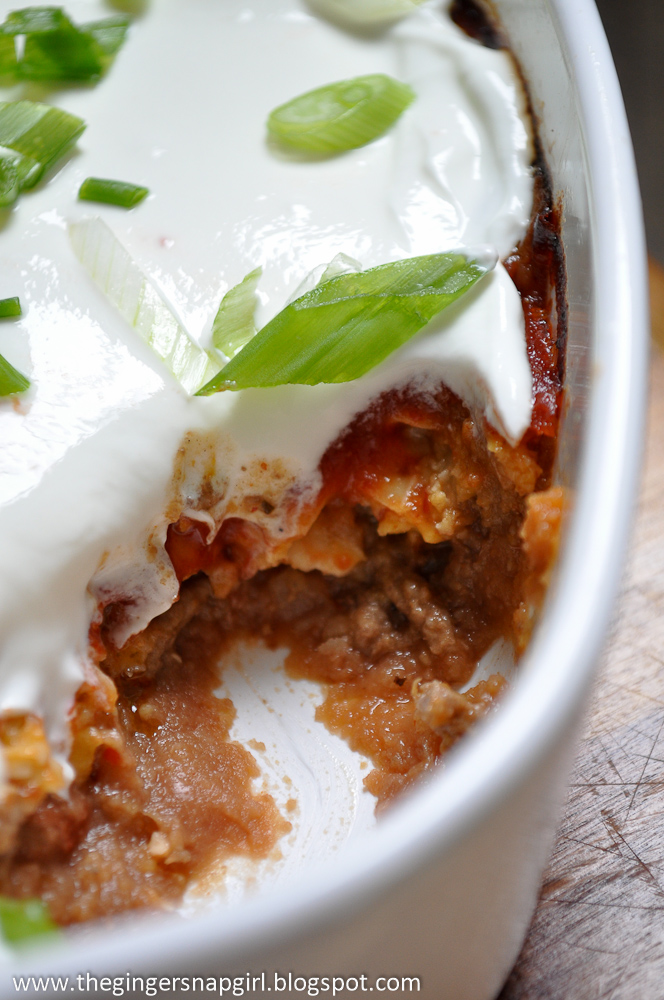

Last month Grandpa turned 96 (wow!) and my parents hosted a big party to celebrate.  Happy Birthday Grandpa!!!  :) When deciding what appetizer to bring to the party, I immediately thought of Grandma's 7 layer nacho dip.  It's been a few years since I've had it, but it was just as tasty as I remembered.  Thanks Grandma!  Miss you bunches!

Enjoy!

7 Layer Nacho Dip
source unknown

1 lb ground beef
Salt and pepper to taste
2 15 ounce cans refried beans
1 small can of mild diced green chiles
2 1/2 cups grated cheddar cheese
1 15 ounce bottle of red taco sauce (such as La Victoria)
1 pint sour cream
4 green onions, thinly sliced

Optional items: You can personalize the dip to your tastes.  Some other suggestions would be using canned sliced jalapenos in place of green chiles for extra heat.  Or sprinkle top with sliced black olives in addition to the green onions. My family usually serves the dip with Nacho cheese Doritos...but any chip will work!

Preheat oven to 375 degrees.  Spray a 9 x 13 glass or ceramic baking dish with cooking spray.

In a non stick skillet brown the ground beef until cooked through.  While beef is cooking, season with salt and pepper to your taste.  Drain off fat.

Spread refried beans evenly across the baking dish to start the first layer.  Top with ground beef.  Scatter green chiles over the beef.  Top with cheese and use your hand to lightly pat it down.  Pour taco sauce over the cheese so that all the cheese is completely covered.  Bake for about 25-30 minutes until edges start to brown and the taco sauce is bubbling.  Remove from the oven and cool for at least 30 minutes (you will be putting cold sour cream on top so you don't want it to melt).

Just before serving, spread sour cream evenly over the cooled dip.  Sprinkle green onions on top.  Serve at room temperature with tortilla chips. 

Friday, August 5, 2011

Restaurant Style Salsa


Earlier this week I posted Nancy's Mexican Cornbread.  A recipe I received from my close friend, Shannon's Mom, Nancy.  When Shannon sent me her Mom's cornbread recipe, I found it was not your standard side of cornbread...it was in fact a main dish attraction, filled with ground beef, onions, jalapenos and lots of cheese.  Nancy and Shannon both recommended serving this dish with a good salsa.  I decided a jarred salsa would not do, and remembered that I had bookmarked a recipe from Brown Eyed Baker for homemade restaurant style salsa a few months back.  Both the cornbread recipe and the salsa shared some of the same ingredients (onions and jalapenos), so I figured why not make them both at the same time.  Homemade cornbread deserves homemade salsa, right?


When I saw the recipe called for canned tomatoes, I was a bit skeptical.  I had assumed most fresh made salsas were made from fresh tomatoes.  But my skepticism was unfounded because this salsa is as fresh tasting as it gets and totally delicious.  I loved this salsa!  It is light years and universes away from anything that comes out of a jar.  It really is like the fresh salsa you get in a good Mexican restaurant.  What I like most about this recipe is how easy it is to make.  No cooking involved...just throw everything into your food processor.  Pulse, pulse, times 3 and done!  All future salsa served at this house will be fresh made.  Or at least I'll try my best.  Cause this is the good stuff.


If you haven't popped over to read the post about Nancy's Mexican Cornbread yet, go take a peek.  It's about more than cornbread (which is yummy, by the way) and tells the story of mine and Nancy's recent battles with breast cancer and how my friend Shannon was inspired to take on a 60 mile walk to support a great cause.  Shannon is walking in the 3-Day for the Cure as I type this post and will be doing so today, tomorrow and Sunday.  See Shannon below at the opening ceremony.  She is front and center with a cutout of Nancy, both sporting cute pink bows in their hair!  Go Shannon!


I want to extend my sincerest thanks to everyone who left comments, well wishes and contributed to Shannon's 60 mile walk.  She has now raised a total of $3,385!  My friends, family and readers are awesome!

Thank you!!!


Restaurant Style Salsa
adapted from Pioneer Woman via Brown Eyed Baker

28 ounce can whole peeled tomatoes with juice
2 10 ounces cans Rotel (diced tomatoes with green chiles)
1/3 cup chopped white onion (original recipe calls for 1/4 cup)
1 clove garlic, minced
1 jalapeno, stem removed, quartered and sliced thin (I also removed the seeds and ribbing to reduce the heat...even with the seeds gone, this is still a very spicy salsa.  If you like a milder salsa try using 1/2 a jalapeno or even use a milder chile such as anaheim or poblano)
1/2 cup cilantro
Juice from 1/2 lime (if large or whole lime if small)
1/4 teaspoon salt
1/4 teaspoon granulated sugar
1/4 teaspoon ground cumin

Place all the ingredients in a food processor and pulse to desired consistency. (Note: I have an 11 cup food processor and this was pushing max capacity...if you have a smaller food processor, be sure to work in batches).  Transfer salsa to a bowl or resealable container, cover, and refrigerate for at least an hour.  The salsa keeps well in the refrigerator for up to 5 days.