Showing posts with label appetizer. Show all posts

Monday, August 5, 2013

Spring Rolls


Chocolate chip cookies or spring rolls?  Cookies or spring rolls? 

Big decisions going on over here! 

I am sure you are thinking those two options really aren't even from the same planet.  And they aren't.  I've been dropping hints recently that I would be posting the ever so popular New York Times chocolate chip cookie soon.  I really anticipated "soon" would have been here by now. 

But I just couldn't get behind something decadent and sweet this week.  Words I never thought I would write. Things have been a little Twilight zone lately--but in a good way!  

The past week was busy...I officially started in my new job with 4 days of travel, seeing old friends, meeting new ones, getting to know a new client and sending off a co-worker and mentor into a well deserved retirement.  All this activity translated into 5 solid days of eating every single meal out.  I haven't stepped on the scale yet, but it can't be good. Very doubtful I made it through the week unscathed. 


Given the many over indulgences of the past week, I had to choose the spring rolls.  No, I didn't make them this weekend, but just the thought of them is making me feel lighter already. 

I've made these spring rolls several times over the past few months.  My best friend turned me on to the recipe and it's now one of my go to light meals.  Spring rolls are almost like a salad wrapped up in a nice little bundle.  They are...

Easy to make
(once you get the rolling part down...don't worry if you tear the wrapper, it's forgiving)
Light
Fresh
Crunchy
Creamy
Refreshing
Low calorie
Delicious!
and
Healthy

Yep, food can be both delicious and healthy!  Who knew? 

It took a little coaxing, but I even got Hubby on board with this pure veggie delight!


A few notes...I have tried a couple of variations of this recipe by adding in additional elements like red pepper and mango.  The red pepper is okay, but doesn't really add anything special to the rolls.  But.  The addition of mango is AWESOME.  It brings in a juicy sweetness that pairs perfectly with the creamy avocado, fresh herbs, crunchy cucumber and carrot and the soy dipping sauce.  So tasty.  My photos are without mango as I didn't have any on hand this time.  But DO give mangoes a shot if you decide to make these spring rolls!  You could easily substitute peach or nectarine (white or yellow) if you can't find mango.   

I also made some adjustments to the dipping sauce adding extra soy sauce, brown sugar and red pepper flakes.  Feel free to add or subtract according to your own tastes. 

The original recipe calls for using 2 pieces of rice paper for each roll, however I find it's unnecessary.  The reason they suggest two, is to prevent the roll from breaking during the construction process.  To me, it's a waste of a few extra calories especially when the rice paper itself isn't the star of the flavor show.  With a little practice, using one paper does the job just fine.  Rice paper can be found at your local Asian food market or most large grocery stores. 

This tasty, fresh, light, healthy spring roll is calling your name! 

Enjoy!

Spring Rolls
adapted from Williams Sonoma

Makes 10 rolls

Dipping Sauce:
Juice from 1/2 lime
2 tablespoons canola oil
1 tablespoon rice vinegar
1/4 teaspoon Dijon mustard
1 tablespoon soy sauce
1 teaspoons brown sugar
Pinch of red pepper flakes

Whisk all ingredients together and set aside.

Rolls:
10 rice paper rounds (6 or 8 inches) - Or 20 rice papers if using two per roll
10 green lettuce leaves, such as bibb, butter, red leaf or green leaf lettuce
2 avocados, peeled, pitted, and cut into 1/2 inch thick strips
Fresh basil leaves (10-20 leaves)
Fresh mint leaves (10-20 leaves)
2 carrots cut into thin matchsticks (or coarsely grated)
1/2 - 3/4 English cucumber, seeds removed, cut into thin strips (about 4 inches long)
1 large mango cut into 1/2 inch strips (about 4 inches long) (optional)
2-3 green onions thinly sliced

To assemble rolls be sure all your ingredients are cleaned, cut and prepped before starting.  Fill a pie plate with warm water.  Place a clean kitchen towel next to the plate.  Dip 1 sheet of rice paper in the water for a couple of seconds, until the entire surface is just softened.  Place the softened paper on the towel.  (If using 2 rice papers per roll, use a second towel to pat the surface of the first round dry and then dip a second paper in the water and place on top of the first). 

Place one leaf of lettuce about 1/3 of the way up the bottom of the rice paper (closest to you).  Lay 1-2 leaves of both basil and mint across the lettuce.  Arrange carrots, cucumber, avocado and mango in rows on top of the herbs, keeping all the filling within the parameters of the lettuce leaf.  Sprinkle with green onions.

Lift the bottom of the rice paper up and over to just cover the filling gently and tightly tuck it under the filling.  Fold the sides of the rice paper towards the center creating a mini burrito.  Continue to roll tightly until a cylinder is formed.  Place the roll seam side down on a plate or cutting board.  Serve whole, or slice in half and serve with dipping sauce.

Note: If not serving immediately place a barely damp paper towel over the rolls until ready serve, up to 2 hours.

Monday, July 8, 2013

7 Layer Nacho Dip


Growing up I ate dinner at my Grandma and Grandpa's house about once a week for several years.  Grandma was a good cook and I always looked forward to meals at her house.  With a dozen or so regular recipes, her style was simple and pretty all American...some of my favorite dishes were pan fried pork chops served with rice and gravy, spaghetti and meatballs and her good old fashioned potato salad.  Grandma rarely veered from her rotation of recipes.


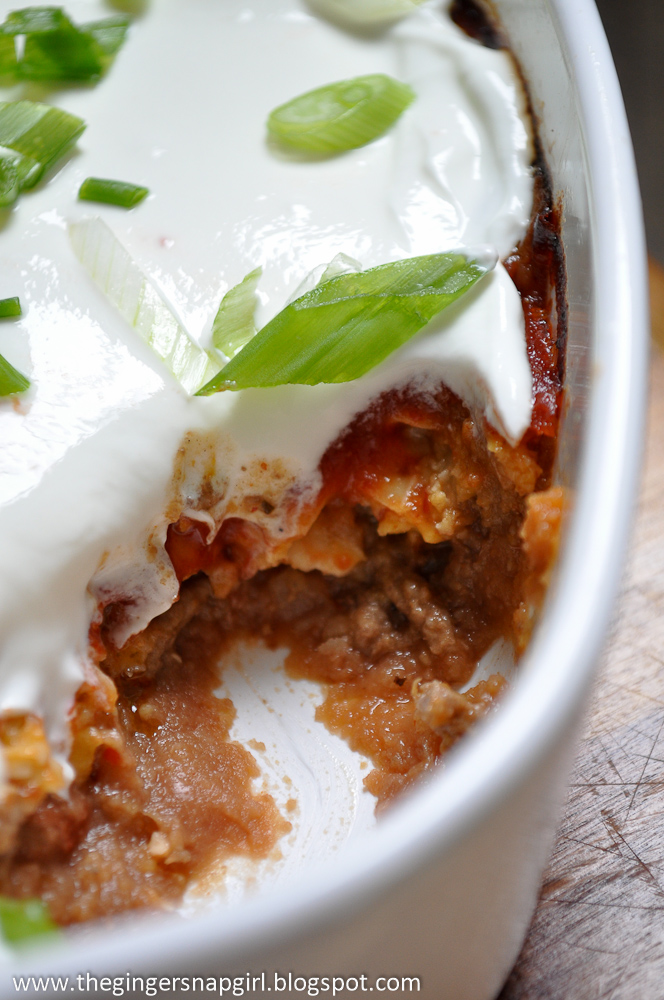
But lucky for my family she found a recipe in the newspaper one day that she had to try.  I'm not sure when the dip made it's first appearance, but I do remember being surprised she made it.  It was definitely not part of her normal repertoire and neither were the ingredients.  It was a pleasant and very tasty surprise!  The 7 layer nacho dip was an immediate hit and went on to grace a number of family events through the years.


Last month Grandpa turned 96 (wow!) and my parents hosted a big party to celebrate.  Happy Birthday Grandpa!!!  :) When deciding what appetizer to bring to the party, I immediately thought of Grandma's 7 layer nacho dip.  It's been a few years since I've had it, but it was just as tasty as I remembered.  Thanks Grandma!  Miss you bunches!

Enjoy!

7 Layer Nacho Dip
source unknown

1 lb ground beef
Salt and pepper to taste
2 15 ounce cans refried beans
1 small can of mild diced green chiles
2 1/2 cups grated cheddar cheese
1 15 ounce bottle of red taco sauce (such as La Victoria)
1 pint sour cream
4 green onions, thinly sliced

Optional items: You can personalize the dip to your tastes.  Some other suggestions would be using canned sliced jalapenos in place of green chiles for extra heat.  Or sprinkle top with sliced black olives in addition to the green onions. My family usually serves the dip with Nacho cheese Doritos...but any chip will work!

Preheat oven to 375 degrees.  Spray a 9 x 13 glass or ceramic baking dish with cooking spray.

In a non stick skillet brown the ground beef until cooked through.  While beef is cooking, season with salt and pepper to your taste.  Drain off fat.

Spread refried beans evenly across the baking dish to start the first layer.  Top with ground beef.  Scatter green chiles over the beef.  Top with cheese and use your hand to lightly pat it down.  Pour taco sauce over the cheese so that all the cheese is completely covered.  Bake for about 25-30 minutes until edges start to brown and the taco sauce is bubbling.  Remove from the oven and cool for at least 30 minutes (you will be putting cold sour cream on top so you don't want it to melt).

Just before serving, spread sour cream evenly over the cooled dip.  Sprinkle green onions on top.  Serve at room temperature with tortilla chips. 

Monday, February 18, 2013

Houston Style Green Salsa


Tomatillos are a funny little fruit.  They look like green tomatoes but come wrapped in a papery husk.  Though they look like tomatoes, they have a very tangy taste.  I guess I would describe the taste and texture as a hybrid of a tomato and a lime--heavy on the lime in terms of flavor and a lot like a tomato in terms of texture.  Tomatillos are the basis of many green salsas.  I find these days I am reaching for green salsa over traditional tomato based salsas.  When I came across this Houston style green salsa I knew I had to try it.


I discovered this green salsa through Secret Recipe Club.  This month I was connected with Karen's blog, Cinnamon Freud.  Isn't that a cool name for a blog?  Even more so because Karen is a "counseling psychology doctoral student who loves food, cooking, and baking."  Her blog was new to me and it was such a treat to browse all her delicious looking recipes.  Karen has a nice mix of sweet and savory offerings.  And for once in my life, I gravitated to the savory recipes.  Once I saw the green salsa, my recipe for this month was a done deal.


Hubby and I enjoyed this delicious salsa during Super Bowl, alongside homemade tortilla chips and carne asada.  I've never been to Houston so I don't know what their green salsa tastes like.  But according to Karen this is reminiscent of a salsa she ate many times at her favorite local restaurant.  I loved it.  It's got tang from the tomatillos and lime juice and a lush creaminess from the avocados. An awesome flavor combination.  I topped it with a little cotija cheese to bring a little saltiness to the mix. All in all it was a hit!

Enjoy! 

Houston Style Green Salsa
adapted from Cinnamon Freud (originally adapted from Homesick Texan via Foodie Bride)

4 medium to large tomatillos
1/2 onion finely chopped
1-2 jalapenos, seeds and ribs removed and finely chopped
3 small cloves garlic peeled and minced
1 teaspoon olive oil
2 small avocados, pits and skin removed
1 tablespoon fresh lime juice
1/4 cup cilantro, chopped
Cotija cheese for garnish (optional)

Bring a medium sauce pan of water to a boil (large enough to hold the tomatillos).  Remove husks from tomatillos and boil 5 minutes until softened.  Drain and set aside.  Once cooled chop into quarters.

In a small skillet heat olive oil and add onion and jalapeno and cook for about 5 minutes until soft.  Add garlic and cook for an additional minute.

Using a food processor or blender, blend tomatillos, onion, jalapeno, garlic and lime juice until smooth.  Add avocado and cilantro and blend again until desired consistency is reached.

Serve with homemade chips and garnish with cotija cheese.

Friday, December 28, 2012

Jalapeno Cheese Crackers


I contemplated writing a non food post. 

I'm kind of fooded out. 

Christmas was a whirlwind of baking, cooking, driving, ribbons, wrapping, eating, kids running around, unwrapping, laughing, a wee bit of sleeping, more baking, more cooking, more ribbons and wrapping, eating, more kids, more unwrapping, eating again, and maybe just a little more eating.   

I may have eaten more than my share of cookies.  I'm certain I've gained some holiday poundage.  I want to know.  Yet I don't.

The scale can wait a few days.

I'm sure it's no surprise I love baking.  December is by far my biggest baking month of the year.  This year was even a little bigger than usual.  It started with a baking frenzy for December Baking GALS.  The following weekend was dedicated to baking for friends and co-workers (pictures below).  And this past weekend was the final push to bake for Christmas Eve and Christmas Day with family. 

Every year I pick several cookies to make.


Clockwise starting in the upper left: Ginger Snaps, Snowball cookies are buried in those bags of powdered sugar in the middle, Red Velvet Crinkles, Jalapeno Cheese Crackers, Linzers and Peppermint Brownies

I have a couple of regulars that make an appearance every year....

Ginger snaps...


And raspberry and lemon linzers... 


Then I try out some new recipes. 

This brownie recipe (double the recipe and bake in a sheet pan) received a holiday twist by spreading melted milk chocolate on top and finishing with crushed candy canes to make a peppermint brownie. 


I made traditional snowballs this year.  If you've ever had trouble getting powdered sugar to stay on these types of cookies, I have tip for you.  This tip comes from my Aunt who is a master cookie maker.  Store the cookies overnight in a bag full of powdered sugar.  The cookie soaks in the powdered sugar and you will not have the problem of disappearing powdered sugar ever again!  It's kind of genius.

Red velvet crinkles were a new addition as well.  They turned out nice and chewy and were easy to make as they started with a boxed cake mix.  I just love that dusting of powdered sugar on top with the deep red cookie peeking through.  But next time I want to take it up level and try Two Peas and Their Pod's red velvet cheesecake cookies.  Check them out.  They look seriously sinful.


And lastly, to mix things up, for the first time, I threw in a savory "cookie" of sorts.  Jalapeno cheese crackers.  These are easy to make slice and bake crackers.


Of the new additions to the holiday baking roster this year, the jalapeno crackers were pretty popular.  I received a few comments from girlfriends, saying their male counterparts really enjoyed them.  A salty spicy treat is a nice departure from the sea of sweetness that takes over the holidays.  Don't get me wrong, I love the sea of sweetness.  But these spiced crackers will be a very strong contender for next year's holiday round up. 


The recipe comes from Ina Garten's latest cookbook, Foolproof.  Or perhaps I should clarify that the base for this recipe comes from Ina's new book.  I adapted it a bit.  Initially I followed the recipe pretty darn closely.  The only change was using regular chili powder in place of chipotle chili powder.  The first go round I found the jalapeno and spice to be on the light side.  I made a couple more batches and tweaked it along the way.  The version I settled on has double the jalapeno, double the chili powder and the addition of cayenne for an extra kick.  Oh, and I decided a little extra cheese couldn't hurt either. 


These cheesy spicy crackers would make a perfect snack for your New Year's menu.  Any fun plans to ring in the new year?  Hubby and I will be enjoying a quiet New Year's Eve at home.  Mostly because Hubby is under the weather and on antibiotics so that means no drinking.  For him anyway! 

If we don't talk before the year closes, I hope you have a very HAPPY NEW YEAR!

Enjoy!

Jalapeno Cheese Crackers
Adapted from Ina Garten's Foolproof Jalapeno Cheddar Crackers

I added additional cheese, jalapeno, chili powder and cayenne to Ina's original recipe.

2 cups all purpose flour
1 teaspoon kosher salt
1/8 teaspoon baking powder
14 tablespoons (1 3/4 sticks) cold unsalted butter, cut into 1/2 inch pieces
4 ounces extra sharp white cheddar cheese, grated
2 ounces gruyere cheese, grated
2 heaping tablespoons finely minced seeded jalapenos
1/2 teaspoon chili powder
1/4 teaspoon ground cayenne pepper
3 tablespoons ice water

For topping:
1 egg beaten with 1 tablespoon milk
Fleur de sel

In a food processor pulse flour, kosher salt and baking powder.  Add butter pieces and pulse again until the mixture is a coarse meal.  Add cheese, jalapeno, chili powder and cayenne and pulse again until just combined.  With food processor on, add ice water all at once and continue to process until the dough forms a ball. 

Turn dough out onto a lightly floured surface.  Roll into a log about 14 inches long.  Wrap tightly in parchment or plastic wrap and chill for at least an hour.

Preheat oven to 400 degrees and line two baking sheets with parchment paper.  Slice the log into 1/4 to 3/8 inch discs and place on parchment leaving about 1/4 - 1/2 inch space between crackers.  Brush crackers with egg wash and sprinkle with fleur de sel to taste.

Bake for about 12-15 minutes until golden brown.

Monday, September 17, 2012

Fig Balsamic Jam

 
Secret Recipe Club has arrived for September.  A big smile spread across my face when I received my blog assignment for this month.  Authentic Suburban Gourmet is one of my favorite blogs to visit and has been a long standing regular in my Google Reader.  Lisa is the gourmande behind this inspiring blog and hails from the San Fransisco area.  Her recipes are bursting with fresh and simple ingredients.  They are elegant and gourmet, yet really approachable.    Authentic Suburban is one of those blogs you read and you immediately want to invite yourself over to Lisa's house to sample the gorgeous food that grace her posts.  I don't know Lisa personally, but I guarantee you she throws a kick butt dinner party. 

I'm pretty familiar with Lisa's blog, so I knew I would have a hard time choosing a recipe.  There are worse problems to have, right?  Her appetizers are always making me drool.  She does a crostini up like no one's business.  But ultimately I was drawn to her recipe for fig balsamic jam.  Lisa has a number of recipes that incorporate the jam, including a crostini.  Lucky for me I have 2 half pint jars to use up and I will be making her fig jam straws next.


I think you all know I'm a big fan of making jam and preserves.  It is up at the top of my list of favorite things to make. There is something completely satisfying about taking a pile of fresh seasonal fruit, combining it with a little a sugar and citrus and next thing you know you have jars of your fresh made fruit preserves lined up on your kitchen counter. And you if make a big enough batch, the process of canning and preserving isn't as hard as you might think.   Lisa also has a love for making her own jams and chutneys...including making up to 40 jars at once!  How do I get on Lisa's jam gift list???

The funny thing about being drawn to Lisa's fig jam recipe is I've never worked with or eaten figs.  I really don't count the one time I tasted a fig newton as a kid.  I immediately decided they weren't for me.  But now that I'm grown up, I've been wanting to give real figs a try.  I found a flat of beautiful mission figs at Costco and off I went. 

The jam was easy to make and I loved the result.  Figs on their own are fairly mild in flavor.  The balsamic vinegar really punches it up.  The end product was reminiscent of a lush raisin like flavor.  To make the crostini, Hubby and I visited the farmer's market this weekend and picked up a fresh baked baguette and locally made basil goat cheese.  The flavors went perfectly with the sweet and tangy jam.   After the fact, I thought adding a bit of crisp pancetta or bacon would be pretty outstanding.  Because everything is better with bacon.  Next time!

 
This jam is very versatile and I'm looking forward to more adventures with both fresh figs and this awesome jam.

Enjoy!

Fig Balsamic Jam
from Authentic Suburban Gourmet

1 pound of figs, stems removed and coarsely chopped
3/4 cup sugar
1/4 cup balsamic vinegar
Fresh lemon juice (about a Tablespoon)

Combine figs, sugar and balsamic vinegar in a medium heavy bottomed sauce pan over medium high heat.  Bring to a simmer and reduce to medium low, maintaining a gentle simmer.  Continuing simmering until jam thickens (this took me about 15-20 minutes).  Stir in a tablespoon of lemon juice and taste the jam (be sure to cool your taste first).  Add more lemon juice if desired.  You can leave your jam chunky or use an immersion blender (stick blender) to puree until desired texture is achieved.  I prefer a smoother consistency so I pureed the jam.  

Store in a sealed container or jar in the refrigerator for up to a month.  Or use a canning method to process the jam.  This recipe yielded exactly 2 one half pint jars of jam.  However I did not process them as I plan to eat them asap.

Friday, July 13, 2012

Guacamole


My Husband is from the midwest, the Chicago suburbs to be more specific.  Apparently Mexican food wasn't one of the food genres that his family ate.  It was more of a meat, potato, veg situation.  And the veg did not include avocados (though technically a fruit).  Hubby moved to Southern California to finish out his college years in the late 90's.  A place where you can find an abundence of little taco stands and Mexican restaurants.  We first met during my last semester of college, his second to last.  When I found out that Hubs didn't really do Mexican food, I took it as a personal challenge to introduce him to some of my favorite local Mexican inspired flavors, including guacamole. 

I have a funny story to share that really doesn't have anything to do with guac, but recalling the humble beginnings of Hubs and my relationship reminded me of this.  The first time I met my Hubby's family (including Mom, Dad, sister, aunts, cousins, etc.) was when Hubs and I were graduating from college(even though we finished school a semester apart, they only hold one walking ceremony per year).  His whole family came to town for the graduation and one evening we were planning to have dinner with his Dad. I suggested we go to a steak house.  His Dad with a surprised expression said, "You eat steak?".  With a somewhat puzzled look I said, "Yes, of course!"  He replied something to the effect of, "oh I thought most California girls were vegetarians."  Ha! Stereotypes run the gamut I guess with all us granola crunching, liberal, veg heads in So Cal.  Which couldn't be further from the way I grew up.

But let's get back to stereotyping my Hubs with his midwestern meat and potato ways.  For the record, he doesn't eat that much meat, but he is a total carb junkie, namely pasta and bread.  Over the years, I've gotten Hubs to eat at Mexican restaurants and he always orders the same thing, fajitas.  Okay, it's a start.  He does venture into the occasional burrito if we are more of casual dining place.  But Mexican food is by no means his favorite.


I cannot pinpoin where and when it happened, but my avocado hating husband magically started eating and enjoying guacamole.  First at family events (guac has always been a popular dip).  Then even at restaurants.  He actually asks me to make guacamole.  Which I'm more than happy to do.  But please note, despite is fondness of guac, he still stands strong on not liking avocados that are not mashed up with onions, spices and herbs.  When I tried to serve him an avocado cup salad in place of a side salad for dinner one night, he ate everything off the avocado and handed me his naked avocado.


Small victories though.  Maybe in the next decade he will embrace the avocado in all its creamy rich goodness.  In the meantime, we'll keep eating guac!

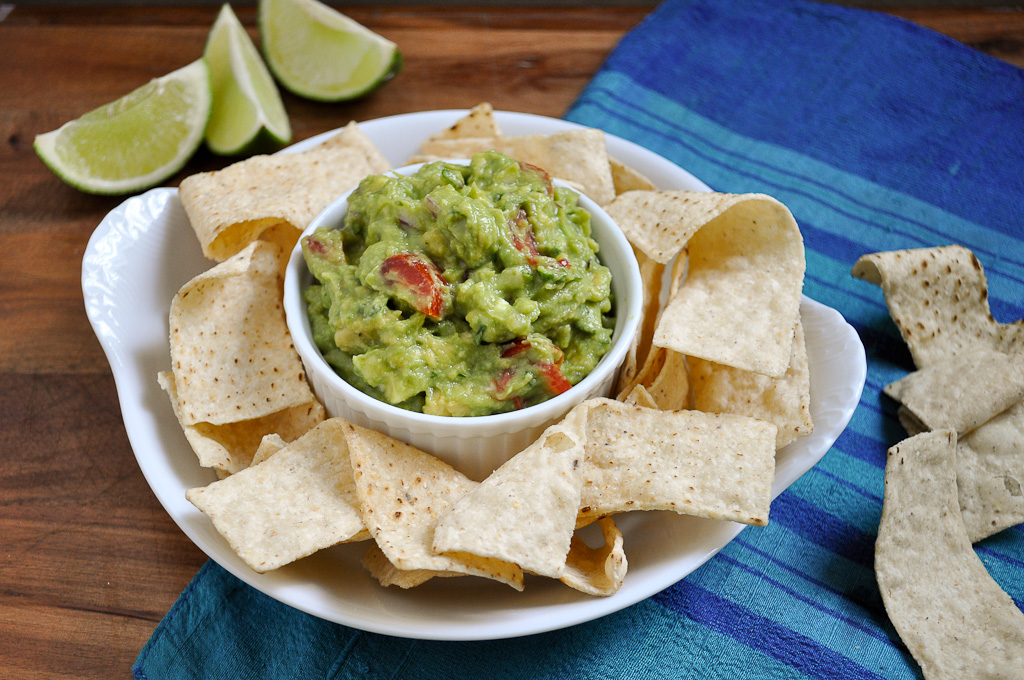
As the heat indexes continues to soar across the nation, I wanted to share something requiring no cooking or baking.  This guacamole is easy to make and very tasty.  It's a mild version, so if you like to heat things up add in half (or whole if your're really brave) finely diced jalapeno and/or a few dashes of hot sauce.

Enjoy!

Guacamole
from The Ginger Snap Girl

4 ripe medium avocados
1/2 cup finely diced red onion
Juice from 1 1/2 limes
1/2 teaspoon salt (I use fine sea salt)
1/2 teaspoon garlic powder
1/4 teaspoon freshly ground black pepper
3/4 cup of finely chopped tomato, seeded (I use grape tomatoes and squeeze out the excess juice and seeds)
1 tablespoon of finely chopped cilantro

To cut your avocado, hold the avocado standing on its long end and run your knife through the top middle cutting lengthwise around the pit until you come full circle.  Place the avocado in both hands and twist to reveal two halves.  To remove the pit, hold the avocado pit side up on your cutting board and take the fat end of a chef's knife and give it a little whack it into the dead center of the pit.  Be careful here! You don't want  to lose any digits! Once the knife is in the pit, twist the knife around to release the pit. 

Scoop out avocado with a spoon or peel away the skin.  Place the peeled, pitted, avocado halves in a medium bowl.  Using a fork lightly mash the avocado until you have large chunks.  I like to keep my guac somewhat chunky.  Stir in remaining ingredients and taste for seasoning.  You may need to add more lime juice or salt and pepper depending on your preferece.  Serve immediately with chips or fresh veggies. 

If you want make your guacamole ahead, I recommend doing so the day you want to serve it, a few hours ahead.  Take your finished guacamole and place plastic wrap directly on the surface on the guac, pressing down so that no air is between the plastic and the dip.  Air makes guac turn brown pretty quick.  Place another sheet of plastic over the top of the bowl (or close with a lid if you have one).

Saturday, April 28, 2012

Avocado Cup Salad


From the looks of my blog it might appear like I eat desserts for every meal with an occasional shrimp dish or salad tossed in here and there.  It's true I have been known to eat a dessert or two as my breakfast.  And when I'm not eating desserts, I'm not always eating the most healthy thing I can get my hands on.  A girl likes homemade nachos after all!  But.  In order to eat the number of desserts I do, I try to eat somewhat healthy meals most of the time.  If I didn't, I would have to buy a new wardrobe.  And that would be expensive.  So in the spirit of continuing to fit into my current wardrobe, I bring you a healthy recipe. 


I came across this salad at Corner Bakery a few weeks ago.  It's one of their trio side salads called the Southwest Avocado Wedge.  I'm not sure if it's new to their menu or I just never paid attention before.  Regardless, I'm glad I discovered it.  Actually the thanks go to my friend Crystal who ordered this little beauty and was kind enough to extend me a bite.  I immediately knew I wanted to recreate it at home.

What drew me into this salad was how refreshing, bright, creamy and crunchy it was.  And did I mention, healthy?  Plus I adore avocados and the avocado is the main centerpiece in this one. 

The first layer of this salad is a crisp, tangy, jicama slaw dressed simply with fresh lime juice and minced cilantro. 


A half of an avocado sits atop the slaw and fresh roasted sweet corn salsa...


...fills up the avocado cup and spills over the sides.  The final touch is a crumble of tortilla chips for a little salty crunch and sliced green onions.


This is a nice alternative to a lettuce based side salad.  I have made it a couple times, once as an accompaniment to shrimp with mango salsa for dinner and another time as lunch.  For lunch it was on the light side so you may want to add some grilled chicken or shrimp on the side to round out your meal.


I see many more avocado cup salads in my future. 

And don't worry.  The desserts aren't going anywhere.

Enjoy!

Avocado Cup Salad
by The Ginger Snap Girl, inspired from Corner Bakery

This side dish starts with a bed of jicama cilantro slaw.  A half of an avocado is nestled on the slaw and topped with roasted corn salsa, finished with crushed tortilla chips.  Easy.  Simple.  Refreshing.

Serves 4 side salads
1 teaspoon olive oil
1 cup fresh or frozen sweet corn (if fresh corn is not available I use C&W frozen petite white sweet corn)
1/2 red, yellow or orange pepper, diced
2 roma or plum tomatoes, cut in half, seeded and diced
1/4 cup red onion finely diced
1 teaspoon plus 1/4 teaspoon cilantro
1/2 anaheim green chile or jalapeno (if you like spicy), finely diced
2 limes
1 small jicama, peeled and cut into matchstick size strips (about 2 cups)
2 small to medium sized ripe avocados, peeled, pitted and sliced in half lengthwise
2 green onions, thinly sliced at an angle
12 round tortilla chips broken into small pieces

Start by making the corn salsa.  Heat a small non stick skillet on medium high heat and add the olive oil frozen corn, red, yellow or orange pepper, and the chile.  Saute stirring occasionally until the corn, pepper and chile begin to take on roasted appearance, about 10 minutes.  Set aside to cool.
Once mixture is cool, add tomato, red onion, 1 teaspoon of cilantro, the roasted corn, pepper and chile mixture to a medium bowl and stir together.  Squeeze the juice of one lime on the salsa and season with salt and pepper if desired and stir.

Next make the jicama slaw by combining the jicama, juice of one lime and remaining 1/4 teaspoon of cilantro in a small bowl.  Stir to combine.

Assemble by diving the jicama slaw amongst 4 plates.  Create a well in the center of the slaw and place a half of avocado cup on top, nestled in the well.  Top the avocado generously with corn salsa, allowing it flow over the sides.  Finish each salad with 3 crushed tortilla chips and a sprinkle of green onions.

Serve immediately.

Monday, February 20, 2012

Parmesan and Black Pepper Biscotti


I missed my kitchen while we were away in Chicago last week.  And I'm already missing my kitchen this coming week knowing I will be in New Jersey for work Monday through Thursday.  I do enjoy eating out, but it can get old.  Since I knew that I would be home for just a few days before hitting the road again, I was anxious to jump into the kitchen and getting cooking. 

One of the recipes I made was for Secret Recipe Club (to learn about SRC pop over to their website).  You may have noticed it's been awhile since you've seen a Secret Recipe Club post.  That's because the group went on hiatus during the month of January to undergo a few changes.  Nothing major, just some logistical fine tuning.  Amanda, the founder of SRC is always looking for ways to enhance the group.  If you're interested you can now follow SRC on Facebook, Twitter and Pinterest.  Though a little break was nice, I am glad we are back in business.

This month I was assigned Erin's blog, A Tale of One Foodies Culinary Adventures.  From the minute I started browsing her blog, I knew I would have a hard time choosing what recipe to make.  With a nice variety of sweet and savory recipes, everything was making me hungry.  Some of the front runners were chocolate tea cakes with earl grey icing, cranberry oat scones, lemon cheesecake mousse tart, gingerbread biscotti, roasted garlic and feta walnut dip, ultimate spaghetti and meatballs and Parmesan and black pepper biscotti.  They all looked delicious.  It's evident that Erin loves food and cooking and I'm thrilled to have a new blog to follow in my Google Reader.

It was a tough decision, but in the end I decided the Parmesan and black pepper biscotti would be "the one."  I wanted something Hubby would enjoy and as a bonus it would be the perfect accompaniment to a creamy mushroom soup I was also planning to make.  And I was intrigued by the idea of a savory biscotti.  Somehow I had never thought of biscotti being savory, but it's genius really!  Erin makes this recipe on a regular basis, so I was pretty confident it would be a hit here. 


I wasn't disappointed.  The Parmesan and black pepper are both prominent flavors.  The biscotti have a firm crunch, but crumble nicely when you bite into them (no teeth breaking here!).  These savory biscuits pair well with soup (next time I'd like to make them to go alongside creamy tomato soup) or salad.  You could cut them into small chunks and use them as croutons on your favorite salad.  Or just eat them straight up.   This is good stuff!  Thanks to Erin for sharing this tasty recipe!  I'm already envisioning several repeat appearances at our house.


Parmesan and Black Pepper Biscotti
from Food & Whine via A Tale of One Foodies Culinary Adventures

2 cups flour
1 cup finely grated fresh Parmesan cheese (use highly quality, such as Parmigiano Regiano)
1 1/2 teaspoon baking powder
1 1/2 teaspoon freshly ground coarse black pepper
1/2 teaspoon kosher salt
1/8 teaspoon cayenne pepper
1/2 cup (1 stick) cold, unsalted butter, cut into small cubes
2 eggs
1/2 cup whole milk
Additional Parmesan cheese and black pepper for sprinkling

Preheat oven to 350 degree F and line large baking sheet with parchment paper.  Combine flour, Parmesan, baking powder, black pepper, salt and cayenne pepper in the bowl of a large food processor and pulse until mixed.  Add butter and pulse until the mixture resembles coarse meal.

In a small whisk together eggs and milk.  Turn food processor on and stream egg and milk mixture into he bowl through the feeder tube until a sticky dough forms.  Divide dough in half and roll out each half on a lightly floured surface into a 10 inch log.  Place each log on the baking sheet and pat down to slightly flatten.  Brush each log with additional milk and sprinkle with Parmesan cheese and black pepper.  Bake for 30 minutes until golden and slightly firm.  Remove from oven and place the baking sheet on a cooling rack for about 10 minutes.

Transfer each log to a cutting and board and cut 1/2 inch slices at a 45 degree angle using a serrated knife.  Place slices back on the baking sheet 1/2 inch apart, cut side up.  Return to oven and cook for 10 minutes.  Flip biscotti, exposing the other cut side and cook for an additional 10 minutes.  Remove from oven and cool completely on a cooling rack.

Biscotti can be stored in an airtight container between layers of waxed paper for up to a week or frozen up to a month.

Tuesday, February 7, 2012

Mango Salsa


Hubby and I spent Super Bowl at a friends house this year.  They had quite the set up, including an enormous spread of food, tons of cold beverages and multiple TV viewing areas.  We spent most of the afternoon/evening lounging on their backyard patio watching the game, one of the benefits of living in Southern California in January.  The other cool thing about being outside was we were close to the grill and the deep fryer.  Yes.  A deep fryer.  There was ALL sorts of fried goodness going on.  We arrived a little late so we missed the corn dogs (which I'm sad about), but we were there for krinkle cut fries, wings, chimichangas, funnel cake and....

Wait for it.

Deep fried Twinkies. 

I have to be honest.  I had my doubts about the deep fried Twinkie.  I have had one at the Orange County Fair in the past and I wasn't impressed.  But this Twinkie was pretty stinkin good.  It was coated with a pancake batter base with cinnamon, vanilla and other ingredients I can't recall at the moment.  I shared a very small bite of this tasty fried concoction with Hubby and scarfed the rest myself.  It was yummmmmmy. 

There were a few non fried foods at the party too, including this mango salsa.  This salsa is fresh, sweet, spicy and bursting with flavor.  It's super duper healthy, making me feel a little better about eating that Twinkie (and the weenies in BBQ sauce, hot dog, chips and onion dip, fries, funnel cake, strawberry whipped cream cake--good lord!).  This mango salsa is all fresh fruit, veggies and herbs.  It's great on chips of course.  But it also makes a tasty topping for grilled fish or grilled chicken.  Or use it to finish homemade nachos or tacos.  So many possibilities. 


Choose mangos that are ripe, that have a slightly soft given when you press the skin.  The skin may be green in spots but should also have rosy tones too.  I will say that preparing mangoes can be a bit of chore.  I start by peeling it.  But I've seen some people leave the skin on and then score the fruit and pop it off the skin, like seen here.  I prefer to peel it and then cut it so I can get a nice small even dice, which I like for salsa.  Also, a thin, wide seed runs nearly the length of the mango.  It's not a seed like you find in a peach or plum where you can slice down the middle, twist the fruit and pop it out.  You have to cut around the seed.  I usually start by cutting from top to the bottom on the widest part of the mango.  This is where you'll get the most fruit off in one piece.  Click here to see an example.  Despite the extra effort required to cut a mango, it's absolutely worth a little extra work to make this awesome salsa. 

Enjoy!

Mango Salsa
from Weight Watchers

1 large (or 2 medium) mangoes, finely diced
1 sweet red pepper, finely diced
1/2 medium red onion, finely chopped
1/2 jalapeno, seeds and ribs removed and finely minced (for a spicy version, use the whole jalapeno and leave in seeds)
1 tablespoon cilantro, finely chopped
1 1/2 tablespoons lime juice
1/8 teaspoon salt, or to taste
1/8 teaspoon fresh ground black pepper, or to taste

Combine all ingredients in a medium sized bowl.  For a less spicy version you can leave out the jalapeno.  I like to make it a few hours before I serve it to allow the flavors to meld together.  Given it a good stir before serving.  Serves 8 people about 1/3 cup of salsa each for 1 Weight Watchers point per serving.

Friday, January 20, 2012

Roasted Red Pepper Pesto Crostini


I haven't told you all this yet, but one of my goals in 2012 is to have more regularly scheduled posting on the blog.  In my fantasy world I would like to post 5 days a week.  But in the real world I thought I should just commit to 2 days to start.  Since January rolled around I've been trying to post every Tuesday and Thursday and then a few Sundays have been thrown in for good measure.  As you can see, today is not any of those days.  It's Friday. 

I'm a little disappointed that I'm day late so early on in the game.  I don't even have a good excuse.  I had the pictures for this post done last weekend. I knew this would be a busy week and I should have written the post ahead of time.  But my usual procrastination set in and things came up.  You know, life, work, family, my cats, a business trip to Las Vegas.....and in between all that I've been completely consumed with reading the Hunger Games whenever I can get a chance.  Have you read this book yet?  It's addicting.  It's actually the first in a trilogy and I'm already on to the second.  But I have managed to pull myself away long enough to get this post up, even if it is a day later than I planned. 

Seems like this has been appetizer month around our house.  Between New Years and football games we've tried several new appetizers over the last few weeks.  This roasted red pepper crostini was born out of the need to get rid of some peppers that were reaching their peak ripeness in our fridge.  After an internet search on "red pepper appetizers" I was quickly intrigued by this recipe I found on Williams-Sonoma's website.  Hubby and I love traditional pesto made with basil, pine nuts, garlic, Parmesan cheese and olive oil.  This sounded like a fun twist, using roasted red peppers, almonds, garlic, Parmesan cheese, olive oil and parsley.  It has bold, strong and somewhat spicy flavors.  Since the garlic is raw, it, along with the cayenne, add a nice spice layer to the pesto.  The texture is rich and thick and easy to spread on the toasted baguette.

The Williams-Sonoma recipe makes it even more decadent by starting with a layer of goat cheese on the crostini and warming it in the oven before topping it with the pesto.  Since Hubby and my father-in-law aren't cheese eaters, I skipped that step.  But it's noted in the directions below and next time I make this I will do a few with cheese for me.   The recipe makes just over a cup of pesto.  One other note, I actually used 1 red pepper and 1 yellow pepper which is why the pesto is more orange and pale in color (but not in flavor!). 

If you have any leftover pesto (which we did not), it could be used to turn a sandwich or homemade panini into something special.  It would also be great with pasta (but you would have to make a whole batch just for that) or it could also kick up a steamed vegetable, like broccoli. 

Since I skipped the goat cheese, I served our pesto and crostini separately and let people put as much or little as they wanted on top.  If you are looking for a fresh bold appetizer for your next football watching party, this is a great choice. 

Enjoy!
 

Roasted Red Pepper Crostini
adapted from Williams-Sonoma

Yields 24 crostini (1 cup pesto)

Ingredients:

1 baguette cut in 1/4 inch thick slices
1/4 cup plus 2 tablespoons extra virgin olive oil (I used a garlic flavored olive oil)
2 garlic cloves, peeled
2 red bell peppers, roasted, seeds and stem removed and roughly chopped*
2 tablespoons toasted slivered almonds (to toast, place almonds in small skillet on medium low heat.  Stir until almonds are very lightly browned and become fragrant, about 5-7 minutes)
3 tablespoons grated fresh Parmigiano Reggiano cheese
1/4 cup finely chopped flat leaf parsley, divided
1 tablespoon fresh lemon juice
Pinch of cayenne pepper
Salt and fresh ground black pepper to taste
4 ounces of soft goat cheese (optional)

Directions:

Preheat oven to 350 degrees and place the slices of bread on the baking sheet.  Lightly brush the top sides of the bread with the olive oil.  Bake for 10-12 minutes until bread is toasted.  Bake 3 minutes longer for very crispy bread.  When bread comes out of the oven and is still warm rub each slice with one of the cloves of garlic.  Set aside.

To make the pesto, place 2 tablespoons of extra virgin olive oil, the remaining clove of garlic, peppers, almonds, Parmigiano cheese, 3 tablespoons of the parsley, lemon juice and cayenne pepper into a food processor and pulse until the pesto is thick but somewhat smooth.  Pulse longer for a smoother pesto.  Season with salt and pepper to your taste and pulse a few more times to fully combine. 

When you are nearly ready to serve pre-heat your oven to 350.  Spread goat cheese on each crostini and bake for about 5 minutes until the goat cheese is soft and the bread is warmed through.   Top each crostini with the red pepper pesto and sprinkle with remaining parsley.  Serve immediately.


*We roast our peppers on the barbeque.  Just place the peppers directly on the grill over high heat and turn every 5 minutes until peppers are soft and the exterior skin will turn black.  Takes 20-25 minutes.  Transfer the peppers to a bowl and cover the the bowl with plastic wrap.  Set aside and let the pepper steam for about 15 minutes.  Remove the plastic and let the peppers cool enough to handle them.  Remove the skins, stems and seeds.  Do not rinse the peppers under water.

Tuesday, January 17, 2012

Baked Turkey Meatball Bites


This past weekend we watched 3 of 4 NFL playoff games.  I'm not a sports girl.  Normally there is very little sports going on in our household unless the Chicago Bears or Cubs (from Hubby's home town) are in some kind of playoff or final game.  Chicago was not in any of the games we watched. But Hubby's Dad was in town and he follows football.  I won't lie, I have zero interest in the game of football.  What does interest me is an occasion to cook and bake.  And football watching is perfect for whipping up some finger foods.  Seems like we've been on an appetizer kick lately.  Our New Years Eve eve was an appetizer feast.  And so was day 1 of football watching.  I tried out two new recipes, roasted red pepper crostini and these baked turkey meatballs.  Both were a hit with Hubby and his Dad. 

As I was getting everything together for the game, Hubby came into the kitchen and grabbed a finished meatball hot off the baking sheet.  He said, "these are really good!"  Score!  Hubby is a big fan of turkey as an alternative to beef.  It's been a slow conversion for me, but I am finally getting to a place where I don't mind using ground turkey in place of beef.  And in many cases I'm really starting to like it. 

These meatballs fall into that category.  They pack a lot of flavor with onions, garlic and Parmesan cheese.  I really like using fresh herbs in meatballs because they bring a bright flavor that you don't get with dried herbs.  In this recipe I used fresh Italian parsley.  Next time I will add basil in too. 

What I like about this recipe is it's a good base recipe and you can add flavors to suit your tastes.  I served them with barbecue sauce, but I think they would also be great with your favorite marinara sauce or even a basil pesto.  I also like that these meatballs are baked and not fried, making them a fairly healthy option.

The meatballs are easy to put together once you get the chopping out of the way.  If you have a small cookie scoop it's a cinch to portion out equal size meatballs.  Basting the meatballs with sauce for the final 5 minutes of baking gives them a nice color and a lightly glazed crust.  You can serve them straight from the oven with some extra sauce on the side.  Or you can throw them in a small crock pot or a medium saucepan with some extra sauce to keep them nice and warm until your party starts.  Stick a toothpick in them and these bite size meatballs are ready to go.

Our appetizer trend continued on day 2 of the football bonanza.  However they came from the restaurant/bar where we set up camp for the last of the 4 games.  Apparently none of the teams my father-in-law picked to win, won.  Sorry Jerry!

At least we were well fed. 

Enjoy!

Baked Turkey Meatball Bites
adapted from bakespace.com

Yields about 42 small meatballs

Ingredients:

1 pound lean ground turkey
1 egg, lightly beaten
3/4 cup breadcrumbs (plain or seasoned)
3 tablespoons freshly grated Parmesan cheese
1/2 cup finely diced white or sweet onions
2 tablespoons finely chopped fresh flat leaf (Italian) parsley
3 cloves of garlic, minced
1 teaspoon kosher salt
1/4 teaspoon freshly ground black pepper

1 cup of your favorite barbecue sauce, divided into 1/4 and 3/4 cups.  You could also use marinara sauce in place of barbecue sauce.

Directions:

Preheat oven to 350.  Line 2 baking sheets with foil and spray with non stick cooking spray. 

In a large bowl, combine all ingredients except barbecue sauce and gently mix together until fully combined.  Using a small cookie scoop or a tablespoon, portion out 1 1/2 inch size meatballs and gently roll them between your hands to round them out.  Place on baking sheets about 1 inch apart.  Bake for 8 minutes and turn meatballs using a metal spatula.  Return to the oven and cook for an additional 6 minutes.  Remove sheets from oven and lightly brush each meat ball with 1/4 cup of the barbecue sauce.  Return to oven and cook for an additional 5 minutes.

Warm the remaining 3/4 cup of barbecue sauce in small saucepan or in a small bowl in the microwave.  Serve immediately.  Or you can add the sauce along with 1/4 cup water to a small crock pot and add the meatballs to keep warm for a party.


For other healthy Super Bowl snacks check out the round up on Eat Yourself Skinny.

Thursday, January 12, 2012

Sun-dried Tomato BLT Bites


When I was planning our menu of New Year's Eve appetizers I wanted to include a little something green.  But I wasn't sure what.  I had planned to make Ina Garten's sun-dried tomato dip with rosemary crackers.  I was also making a baked sweet onion dip with crackers and rosemary cheese straws.  Too many carbs. 

I opened up the fridge for inspiration. 


Persian cucumbers jumped out.  I knew they would be a good alternative for crackers and serve as a nice canvas for the tangy sun-dried tomato dip. I was going to leave it at that. But then I caught a glimpse of pre-cooked bacon slices that I had bought to use in salad...

Bacon, Cucumber, Tomato...BCT

Cucumber is green, cool and crisp....a lot like lettuce, right? A play on the BLT came together in this little crunchy, creamy, tomatoey bite. It was a refreshing veggie addition to our all appetizer dinner.


These flavorful bites are easy to put together and can be made ahead and stored in the fridge.   I used a decorating tip to pipe on the sun-dried tomato dip.  If you don't have a tip, you can place the dip in a zip top bag and cut the corner off and pipe it on the cucumber slices.  It doesn't need to be perfect because it gets topped with bacon bits and sliced green onions. 

The sundried tomato dip recipe makes a lot of dip.  You can serve it with crackers or cut up veggies.  It would also make a nice spread on a turkey sandwich or really gear up a classic BLT sandwich. 

Enjoy!

Sun-dried Tomato Dip
from Ina Garten's Barefoot Contessa Cookbook

1/4 cup sun-dried tomatoes packed in oil, drained and chopped (about 8 tomatoes)
8 ounces cream cheese, at room temperature
1/2 cup mayonnaise
1/2 cup sour cream
10 dashes hot red pepper sauce (such as Tabasco)
1 teaspoon kosher salt
3/4 teaspoon freshly ground pepper
2 scallions, thinly sliced

Add all the ingredients except the scallions to a food processor and puree.  Add scallions and pulse twice.  Serve dip at room temperature

To make sun-dried tomato BLT Bites

Quantities can vary depending on how many you want to make.  I cut up 4 Persian cucumbers and used 2 slices of bacon and 1 scallion for Hubby and me.

Persian cucumbers cut into 1/2 inch rounds
Slices of crisp bacon broken into small pieces
Sun-dried tomato dip
Scallions, thinly sliced

To assemble:

Place sun-dried tomato dip in a pastry bag fitted with a large star attachment.  Pipe a dollop of dip on each cucumber slice.  It doesn't have to be perfect because....the next step is to top each bite with a piece of bacon and sprinkle with scallions to garnish.

These can be assembled ahead and stored in the fridge until you are ready to serve.

Thursday, January 5, 2012

Rosemary Cheese Straws


Hubby and I spent a quiet New Year's Eve at home this year.  We started our day with a little pre-new year's cleaning by washing the all the windows in our townhouse, inside and out.  Not an easy feat since it has never been done since we've lived here...for nearly 8 years.  Eeek! I know.  That's really bad.  And kind of gross.  And I don't have any good excuses as to why it took us so long.  We clean the inside of our house once a week (really, we do!), but apparently the windows are on the once every decade schedule!  Kind of embarrassing.  Now that we can actually see the outside world with some clarity, we might just be inspired to up the window washing schedule to once every half decade? 

Anyway, after a long morning filled with Karate Kid style "wax on" "wax off" cleaning, we spent the afternoon shopping and stocking up our fridge with fun foods to ring in the New Year. 

Originally I planned to make chicken piccata and Parmesan roasted zucchini for dinner accompanied by a bottle of Riesling.  Simple. Tasty. 

But then my mind couldn't stop thinking about a spread of appetizers instead.   Mmmmm.  An array of delicious nibbles....so many possibilities!  Appetizers seemed like the right thing to do on New Year's Eve.

Our meal of finger foods consisted of baked sweet onion dip with crackers and sweet onion stuffed mushrooms, mini lox and bagel sandwiches (for Hubby), sun dried tomato BLT bites, sauteed chicken fingers with piccata dipping sauce and these rosemary cheese straws.  They were one of the easiest things to make and one of the tastiest. 


Store bought puff pastry is the canvas for a mixture of cheeses and this fragrant, woody herb that I've been slowly warming up to over the past year.  Just a handful of ingredients are transformed into light, airy bread sticks with baked in cheesey crunch.  This recipe is versatile and you could substitute your favorite cheeses and fresh herbs.  Rosemary cheese straws would be great served simply with a glass of wine, or as an accompaniment to a soup or  salad. 

A couple of baking notes.  Don't get too carried away with rolling dough out.  I found that it was actually easier to work with the dough on a very lightly floured surface and simply stretch it with my hands to the size/shape I was looking for.  Generously brush the pastry with the egg wash and pack on the cheese/herb mixture on.  When you cut and twist each straw, some of it will fall off.  Not to worry!  Though you can make these ahead, they are really great served warm from the oven.  I made mine a bit ahead of time and just kept them wrapped in foil in a 200 degree oven to stay nice and toasty.  Who doesn't love warm bread?

We cracked open the wine, cozied up on the couch, turned on a movie and chowed down on our appetizer feast to ring in 2012.  My kind of New Year's Eve! 

How did you spend your New Year's Eve?


Rosemary Cheese Straws
adapted from Handle the Heat

Ingredients:

2 sheets puff pastry, defrosted overnight in the fridge (or on the counter in 40 minutes to an hour)
1 large egg, beaten with 1 tablespoon of water
1 cup freshly grated Parmesan cheese (original recipe called for 1/2 cup)
1/2 cup finely grated Gruyere cheese (original recipe called for 1 cup of grated white cheddar cheese)
2 teaspoons chopped fresh rosemary
1 teaspoon kosher salt
freshly ground black pepper to taste

Directions:

Preheat oven to 375 degrees F.  Line 3 baking sheets with parchment or foil. 

In a small bowl, combine cheeses, rosemary, salt and pepper and set aside.

Unfold the puff pastry on a lightly floured surface and gently use a rolling pin to stretch pastry into a 10x12 inch sheet.  Use a kitchen/pastry brush and brush egg wash over the surface of the puff pastry until completely covered.  Divide the cheese mixture in half and sprinkle evenly over each puff pastry sheet.  Gently press the mixture into the sheets. 

Using a pizza cutter or sharp knife cut the pastry dough in half across the long side.  Cut each half into 3/4 inch strips.  Hold the ends of each pastry strip and twist moving your hands in the opposite direction and lay each strip on the baking sheet about 1 inch apart. 

Bake for 15 minutes or until pastry puffs and turns golden brown.  Cool on baking sheets.


Tuesday, January 3, 2012

Blue Cheese Wedge


Every year my family gathers at my Aunt's house for a Christmas Eve feast and celebration.  Most every year we have the same delicious meal...prime rib with horseradish cream sauce, twice baked potato casserole, a salad, a veggie and dinner rolls.  And every year it's my job to bring the salad.  Though we have a similar meal each year, I always hem and haw about what kind of salad to bring.  What will most people like? (This year there were 16 adults and 8 kids).  I mean let's be real, the salad is not the star of the meal.  It's an accompanying side show.  But I always want it to be just right.   

As I was thinking about what salad to bring, I was inspired by my Grandma.  When Hubby and I spent a few days with my Grandparents this past Thanksgiving, they took us out to dinner one night at Sullivan's Steakhouse.  If you've never been to Sullivan's, it's a treat.  It's a traditional steakhouse with most everything served a la cart.  Except the salad.  A blue cheese wedge salad comes with each entree.  It's a big wedge and the dressing is cheesy and creamy with a bit of tang, which is what makes it different from most blue cheese dressings I've had in the past.  Grandma said one of the reasons she liked coming to Sullivan's was for the salad.  Forget the steak and fork over the wedge!

I consulted Bing and searched for a copy cat recipe of Sullivan's famous blue cheese wedge.  And I think this is pretty darn close.  The dressing gets its tang from the buttermilk, sour cream and red wine vinegar.  It's rich and creamy from the mayonnaise, olive oil and blue cheese.  And it's rounded out with minced garlic and freshly cracked black pepper.     


I love the cool crisp iceberg lettuce drenched in cheesy dressing.  The Sullivan's wedge is served simply with lettuce, dressing and tomatoes.  I added sliced green onions and bacon pieces to the salad I served on Christmas Eve (bacon not pictured above).  I think the addition of the fresh mild green onion and salty crisp bacon finish off the salad nicely.

A mark of a good recipe is if I will make it again.  This salad hits the mark.  In fact I've already made it once since Christmas Eve.  I'm sad to say Grandma didn't get to taste the dressing to give her seal of approval because she came down with a bad cold the morning of Christmas Eve.  But luckily she will get to taste it next year since I have officially decided this salad is "the one."

This one's for you Gram!


Blue Cheese Wedge Salad
adapted from foodiekitchen.com

Serves 4-6

Ingredients

Dressing:
7 ounces crumbled blue cheese
2/3 cup mayonnaise
1/3 cup buttermilk, well shaken
1/4 cup red wine vinegar
3 tablespoons sour cream
2 tablespoons oil
1 1/2 tablespoons sugar
1/2 teaspoon minced garlic
1/4 teaspoon freshly ground black pepper

Salad:
1 large head of iceberg lettuce, with core removed, washed and chilled
6 ounces crumbled blue cheese
3 diced seeded plum tomatoes
6 green onions thinly sliced, white and green parts

Place all the dressing ingredients in a food processor and process until you reached the desired consistency.  Process longer if you want a smoother dressing.  I left mine with a little bits of blue cheese in it.  Refrigerate for 24 hours or up to 3 days.

To prepare the salad, cut the head of lettuce in half.  Cut each half in 3 wedges, or 2 if the head is small.  Place the wedges on chilled salad plates.  Spoon about 1/3 cup of the dressing over each wedge allowing the dressing to run over the sides.

Sprinkle each wedge with tomatoes, green onions and crumbled blue cheese, divided equally among each salad.  Finish with a crack or two of freshly ground black pepper. Serve chilled.

Optional: Brown 1/3 pound of bacon until crisp in a frying pan, on a baking sheet in the oven or in the microwave.  Crumble bacon into small bits and sprinkle over each wedge.