Showing posts with label vegetable. Show all posts

Monday, August 5, 2013

Spring Rolls


Chocolate chip cookies or spring rolls?  Cookies or spring rolls? 

Big decisions going on over here! 

I am sure you are thinking those two options really aren't even from the same planet.  And they aren't.  I've been dropping hints recently that I would be posting the ever so popular New York Times chocolate chip cookie soon.  I really anticipated "soon" would have been here by now. 

But I just couldn't get behind something decadent and sweet this week.  Words I never thought I would write. Things have been a little Twilight zone lately--but in a good way!  

The past week was busy...I officially started in my new job with 4 days of travel, seeing old friends, meeting new ones, getting to know a new client and sending off a co-worker and mentor into a well deserved retirement.  All this activity translated into 5 solid days of eating every single meal out.  I haven't stepped on the scale yet, but it can't be good. Very doubtful I made it through the week unscathed. 


Given the many over indulgences of the past week, I had to choose the spring rolls.  No, I didn't make them this weekend, but just the thought of them is making me feel lighter already. 

I've made these spring rolls several times over the past few months.  My best friend turned me on to the recipe and it's now one of my go to light meals.  Spring rolls are almost like a salad wrapped up in a nice little bundle.  They are...

Easy to make
(once you get the rolling part down...don't worry if you tear the wrapper, it's forgiving)
Light
Fresh
Crunchy
Creamy
Refreshing
Low calorie
Delicious!
and
Healthy

Yep, food can be both delicious and healthy!  Who knew? 

It took a little coaxing, but I even got Hubby on board with this pure veggie delight!


A few notes...I have tried a couple of variations of this recipe by adding in additional elements like red pepper and mango.  The red pepper is okay, but doesn't really add anything special to the rolls.  But.  The addition of mango is AWESOME.  It brings in a juicy sweetness that pairs perfectly with the creamy avocado, fresh herbs, crunchy cucumber and carrot and the soy dipping sauce.  So tasty.  My photos are without mango as I didn't have any on hand this time.  But DO give mangoes a shot if you decide to make these spring rolls!  You could easily substitute peach or nectarine (white or yellow) if you can't find mango.   

I also made some adjustments to the dipping sauce adding extra soy sauce, brown sugar and red pepper flakes.  Feel free to add or subtract according to your own tastes. 

The original recipe calls for using 2 pieces of rice paper for each roll, however I find it's unnecessary.  The reason they suggest two, is to prevent the roll from breaking during the construction process.  To me, it's a waste of a few extra calories especially when the rice paper itself isn't the star of the flavor show.  With a little practice, using one paper does the job just fine.  Rice paper can be found at your local Asian food market or most large grocery stores. 

This tasty, fresh, light, healthy spring roll is calling your name! 

Enjoy!

Spring Rolls
adapted from Williams Sonoma

Makes 10 rolls

Dipping Sauce:
Juice from 1/2 lime
2 tablespoons canola oil
1 tablespoon rice vinegar
1/4 teaspoon Dijon mustard
1 tablespoon soy sauce
1 teaspoons brown sugar
Pinch of red pepper flakes

Whisk all ingredients together and set aside.

Rolls:
10 rice paper rounds (6 or 8 inches) - Or 20 rice papers if using two per roll
10 green lettuce leaves, such as bibb, butter, red leaf or green leaf lettuce
2 avocados, peeled, pitted, and cut into 1/2 inch thick strips
Fresh basil leaves (10-20 leaves)
Fresh mint leaves (10-20 leaves)
2 carrots cut into thin matchsticks (or coarsely grated)
1/2 - 3/4 English cucumber, seeds removed, cut into thin strips (about 4 inches long)
1 large mango cut into 1/2 inch strips (about 4 inches long) (optional)
2-3 green onions thinly sliced

To assemble rolls be sure all your ingredients are cleaned, cut and prepped before starting.  Fill a pie plate with warm water.  Place a clean kitchen towel next to the plate.  Dip 1 sheet of rice paper in the water for a couple of seconds, until the entire surface is just softened.  Place the softened paper on the towel.  (If using 2 rice papers per roll, use a second towel to pat the surface of the first round dry and then dip a second paper in the water and place on top of the first). 

Place one leaf of lettuce about 1/3 of the way up the bottom of the rice paper (closest to you).  Lay 1-2 leaves of both basil and mint across the lettuce.  Arrange carrots, cucumber, avocado and mango in rows on top of the herbs, keeping all the filling within the parameters of the lettuce leaf.  Sprinkle with green onions.

Lift the bottom of the rice paper up and over to just cover the filling gently and tightly tuck it under the filling.  Fold the sides of the rice paper towards the center creating a mini burrito.  Continue to roll tightly until a cylinder is formed.  Place the roll seam side down on a plate or cutting board.  Serve whole, or slice in half and serve with dipping sauce.

Note: If not serving immediately place a barely damp paper towel over the rolls until ready serve, up to 2 hours.

Saturday, April 28, 2012

Avocado Cup Salad


From the looks of my blog it might appear like I eat desserts for every meal with an occasional shrimp dish or salad tossed in here and there.  It's true I have been known to eat a dessert or two as my breakfast.  And when I'm not eating desserts, I'm not always eating the most healthy thing I can get my hands on.  A girl likes homemade nachos after all!  But.  In order to eat the number of desserts I do, I try to eat somewhat healthy meals most of the time.  If I didn't, I would have to buy a new wardrobe.  And that would be expensive.  So in the spirit of continuing to fit into my current wardrobe, I bring you a healthy recipe. 


I came across this salad at Corner Bakery a few weeks ago.  It's one of their trio side salads called the Southwest Avocado Wedge.  I'm not sure if it's new to their menu or I just never paid attention before.  Regardless, I'm glad I discovered it.  Actually the thanks go to my friend Crystal who ordered this little beauty and was kind enough to extend me a bite.  I immediately knew I wanted to recreate it at home.

What drew me into this salad was how refreshing, bright, creamy and crunchy it was.  And did I mention, healthy?  Plus I adore avocados and the avocado is the main centerpiece in this one. 

The first layer of this salad is a crisp, tangy, jicama slaw dressed simply with fresh lime juice and minced cilantro. 


A half of an avocado sits atop the slaw and fresh roasted sweet corn salsa...


...fills up the avocado cup and spills over the sides.  The final touch is a crumble of tortilla chips for a little salty crunch and sliced green onions.


This is a nice alternative to a lettuce based side salad.  I have made it a couple times, once as an accompaniment to shrimp with mango salsa for dinner and another time as lunch.  For lunch it was on the light side so you may want to add some grilled chicken or shrimp on the side to round out your meal.


I see many more avocado cup salads in my future. 

And don't worry.  The desserts aren't going anywhere.

Enjoy!

Avocado Cup Salad
by The Ginger Snap Girl, inspired from Corner Bakery

This side dish starts with a bed of jicama cilantro slaw.  A half of an avocado is nestled on the slaw and topped with roasted corn salsa, finished with crushed tortilla chips.  Easy.  Simple.  Refreshing.

Serves 4 side salads
1 teaspoon olive oil
1 cup fresh or frozen sweet corn (if fresh corn is not available I use C&W frozen petite white sweet corn)
1/2 red, yellow or orange pepper, diced
2 roma or plum tomatoes, cut in half, seeded and diced
1/4 cup red onion finely diced
1 teaspoon plus 1/4 teaspoon cilantro
1/2 anaheim green chile or jalapeno (if you like spicy), finely diced
2 limes
1 small jicama, peeled and cut into matchstick size strips (about 2 cups)
2 small to medium sized ripe avocados, peeled, pitted and sliced in half lengthwise
2 green onions, thinly sliced at an angle
12 round tortilla chips broken into small pieces

Start by making the corn salsa.  Heat a small non stick skillet on medium high heat and add the olive oil frozen corn, red, yellow or orange pepper, and the chile.  Saute stirring occasionally until the corn, pepper and chile begin to take on roasted appearance, about 10 minutes.  Set aside to cool.
Once mixture is cool, add tomato, red onion, 1 teaspoon of cilantro, the roasted corn, pepper and chile mixture to a medium bowl and stir together.  Squeeze the juice of one lime on the salsa and season with salt and pepper if desired and stir.

Next make the jicama slaw by combining the jicama, juice of one lime and remaining 1/4 teaspoon of cilantro in a small bowl.  Stir to combine.

Assemble by diving the jicama slaw amongst 4 plates.  Create a well in the center of the slaw and place a half of avocado cup on top, nestled in the well.  Top the avocado generously with corn salsa, allowing it flow over the sides.  Finish each salad with 3 crushed tortilla chips and a sprinkle of green onions.

Serve immediately.

Tuesday, February 14, 2012

Mushroom and Herb Chunky Tomato Sauce


I had every intention of getting this post published last Thursday night, desperately trying to stay on the schedule I committed to at the beginning of the year.  As you can see, that just didn't happen.  A busy week at work and preparing for a trip to Chicago, while fighting a cold, got in the way. 

Preparation for this trip was a little more involved because we had to get the house ready for my sister who graciously agreed to babysit our three kitty cats while we were away.  This is the first multi-day trip Hubby and I have taken since our newest feline family member, Oliver, joined us last June.  We have been on a couple of local trips, but those don't count since we we took little buddy with us. 
Oliver is technically still a kitten and quite frankly he can't be trusted when left alone for long periods of time.  I've mentioned before he loves to act quite a bit like a dog, eating toilet paper, rooting around in trash cans and even fetching.  His newest trick is pulling the drain stopper out of the bathroom sink and carrying it around in his mouth like a bone or the prey he just conquered.  He carried the thing all the way downstairs to show Hubby and I what he did last week. 

"Look guys! Look what I found!  Isn't it cool?"

He was so proud, I just couldn't be angry with him.  But I must admit, I am completely perplexed at his choice of "prey". Of all the potential things he could have gone after in the house, how did he decide the bathroom sink drain plug was the way to go?   An answer I'm sure I'll never know. 

But isn't he just adorable?  I may be a little biased. 

What I do know for certain is our little guy still needs a watchful eye, so I was thrilled when my sister agreed to supervise the three musketeers.  Thanks Katie (& Luis)!

These three have a rough life huh?

From top to bottom: Kit Kat, Oliver and Chloe
With our kitties well taken care of, we set off for the mid west last Friday morning.  Luckily we landed in Chicago just in time for a snow storm. Guess that's what we get for visiting the windy city in February!  This trip was busy with family activities (Hubby is from Chicago),  catching up with friends (we lived in Chicago for a brief 3 1/2 year stint), lots and lots of eating and trying to squeeze in some time in the city.  Internet connectivity was spotty, so my hope of finishing this post when we arrived was put off a few days.  Despite the chilly weather, we have had a great time.  We spent Monday afternoon at the Art Institute in downtown Chicago and we managed to eat at our our favorite sandwich place, Potbelly's, 3 days in a row!  (I really wish Potbelly's would come to California.)  I do love Chicago.  But I don't miss the weather.  Next time we'll come back in the fall, when the temperature is a little more moderate for this wimpy California girl.

Now that I've brought you up to speed on our kitty cats and our trip, you probably want to hear about the food?  I saw this recipe for mushroom and herb pasta sauce on Sally's blog, A Food Centric Life and it caught my eye for 2 reasons.  One, it looked like a warm, rich, hearty sauce.  Two, I had all the ingredients in house already and it would be a great way to use up a lot of left over parsley (that otherwise would have ended up in the garbage).  I also liked that this chunky sauce was meatless (though I am certain it would taste pretty amazing spooned over homemade meatballs).


The sauce lived up to my expectations of being hearty and flavorful.  Hubby gave it a thumbs up too! And it was easy to make (once you get all the chopping out of the way).  The sauce is very versatile in that you can tweek it to your liking.  If you like more garlic, throw in a couple of extra cloves.  If you like other veggies, such as red peppers, toss those in too.  I did a few tweeks myself, which are noted in the recipe below.  You could easily freeze the sauce in ziploc bag and defrost it in the fridge the evening before you want to get a quick meal together. 

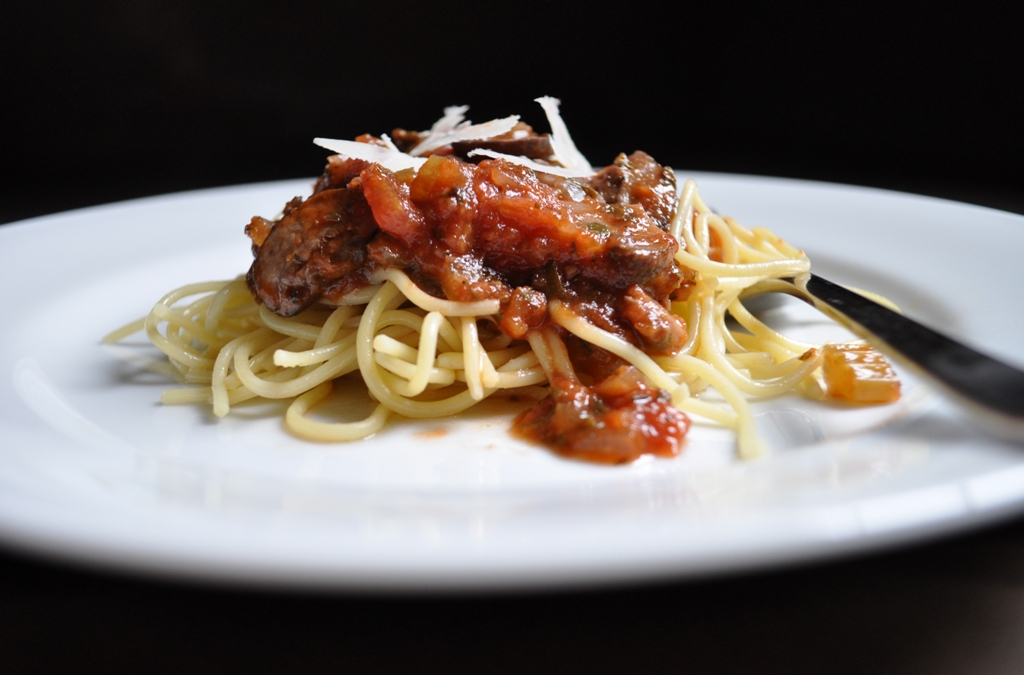
I definitely plan to make this sauce again.  We served it over thin spaghetti topped with a few shavings of fresh Parmesan cheese, alongside a simple green salad.  But it doesn't have to be limited to just pasta or a pure vegetarian approach.  As mentioned above, it would be great with meatballs or for a meatball sandwich.  It would also pair nicely with a panko crusted eggplant or chicken cutlets, Parmesan style.  So many options!

Enjoy! 

Mushroom and Herb Chunky Tomato Sauce
Adapted from A Food Centric Life

Yields about 1 1/2 - 2 quarts sauce

2 tablespoons olive oil
1 1/2 cups finely chopped fresh parsley, about 1-2 bunches (it was one for me)
1/2 small onion, finely diced
1 shallot, finely diced (I added to the original recipe because I had some shallot to use up)
3 celery ribs, finely diced
2-3 cloves of garlic, minced
8 ounces mushrooms, cleaned, trimmed and thinly sliced
1 28-ounce can of crushed or diced tomatoes
1 28-ounce can of tomato puree
1 teaspoon sugar (I added this to the original recipe because my tomatoes had a very acidic bite)
1 teaspoon dried basil
1 teaspoon dried oregano
1 teaspoon salt
1/2 teaspoon fresh ground black pepper
1/4 teaspoon red pepper flakes (I omitted)
1/2 cup dry red wine

Heat oil in large saucepan or a dutch oven.  Add parsley, onion, shallot and celery and saute until just tender, about 5 minutes.  Add garlic and cook for an additional minute.  Add all remaining ingredients (mushrooms through wine) and bring to boil.  Reduce to low and simmer covered for 45 minutes.  Remove cover and continue to simmer uncovered for an additional 20-30 minutes, allowing some of excess liquid boil off.  Serve with pasta, chicken cutlets or meatballs.

Tuesday, January 31, 2012

Asian Salad with Red Peppers


I've been blogging for almost 2 years now.  Back in the early days, when I had no idea what I was doing, I posted a recipe that has always been a big hit in my family for an asian slaw/salad.  Though the salad is great, I cringe a little lot when I go back and look at my early posts.  The pictures are pretty awful.  Hard to believe I was using the same camera then as I do now.  I'm always working to improve my photography skills and I still have a lot to learn, but looking back makes me realize just how far I've come.  Wonder what things will look like in another two years...

Somehow nearly two years has passed since I've made this salad.  Which is a shame, because I remembered how much I love it when my family served it at our Christmas day dinner this past year.  It's refreshing.  It's crunchy.  It's green onion-ey.  It's sweet and tangy all at the same time.  And it's incredibly easy to make.

When I saw a head of cabbage at our local farmer's market, it was on.  I decided to waiver slightly from the original recipe by adding some finely sliced red peppers.  I had an excess of red peppers in the fridge from a Costco run. I thought they would complement the other flavors in the salad nicely, not to mention bringing a pretty burst of red among a rather monotone landscape of colors.  Hubby and I enjoyed the addition of the peppers and I will plan to include them going forward. 


We typically eat this salad as a side dish, but if you add some grilled chicken or rotisserie chicken, this could easily be a main course.  I like to toss the dressing with the salad about 10 minutes before I plan to serve it to allow the dressing to slightly soften the hearty cabbage. This dish is a crowd pleaser and would be great for a party.   Did I mention this is easy to make?  It is super easy.  And you should totally make it and thank me later. ;) 

Enjoy!

Asian Salad with Red Peppers

Serves 6-8 people
1/2 head thinly sliced cabbage or 16 oz bag of cabbage mix
1 package chicken Top Ramen
2 Tablespoons sesame seeds
1/2 cup slivered almonds
4 green onions thinly sliced
1 red pepper, stem and seeds removed, thinly sliced
Dressing:
Whisk together the following and chill
3 Tablespoons sugar
3 Tablespoons white vinegar
1/3 cup vegetable oil (do not substitute olive oil)
1/4 teaspoon freshly ground black pepper
1/2 teaspoon salt
Flavor packet from Top Ramen
Place uncooked ramen noodles in a ziploc bag and crush into small pieces using a meat mallet or rolling pin. Place crushed ramen, sesame seeds and almonds on a baking sheet. Toast in a 350 degree oven for 10-12 minutes until lightly golden. Toss slaw, red peppers, green onions, ramen, sesame seeds, almonds in dressing. Let the salad sit for about 10 minutes before serving to allow dressing to soften the cabbage a bit.

Friday, January 20, 2012

Roasted Red Pepper Pesto Crostini


I haven't told you all this yet, but one of my goals in 2012 is to have more regularly scheduled posting on the blog.  In my fantasy world I would like to post 5 days a week.  But in the real world I thought I should just commit to 2 days to start.  Since January rolled around I've been trying to post every Tuesday and Thursday and then a few Sundays have been thrown in for good measure.  As you can see, today is not any of those days.  It's Friday. 

I'm a little disappointed that I'm day late so early on in the game.  I don't even have a good excuse.  I had the pictures for this post done last weekend. I knew this would be a busy week and I should have written the post ahead of time.  But my usual procrastination set in and things came up.  You know, life, work, family, my cats, a business trip to Las Vegas.....and in between all that I've been completely consumed with reading the Hunger Games whenever I can get a chance.  Have you read this book yet?  It's addicting.  It's actually the first in a trilogy and I'm already on to the second.  But I have managed to pull myself away long enough to get this post up, even if it is a day later than I planned. 

Seems like this has been appetizer month around our house.  Between New Years and football games we've tried several new appetizers over the last few weeks.  This roasted red pepper crostini was born out of the need to get rid of some peppers that were reaching their peak ripeness in our fridge.  After an internet search on "red pepper appetizers" I was quickly intrigued by this recipe I found on Williams-Sonoma's website.  Hubby and I love traditional pesto made with basil, pine nuts, garlic, Parmesan cheese and olive oil.  This sounded like a fun twist, using roasted red peppers, almonds, garlic, Parmesan cheese, olive oil and parsley.  It has bold, strong and somewhat spicy flavors.  Since the garlic is raw, it, along with the cayenne, add a nice spice layer to the pesto.  The texture is rich and thick and easy to spread on the toasted baguette.

The Williams-Sonoma recipe makes it even more decadent by starting with a layer of goat cheese on the crostini and warming it in the oven before topping it with the pesto.  Since Hubby and my father-in-law aren't cheese eaters, I skipped that step.  But it's noted in the directions below and next time I make this I will do a few with cheese for me.   The recipe makes just over a cup of pesto.  One other note, I actually used 1 red pepper and 1 yellow pepper which is why the pesto is more orange and pale in color (but not in flavor!). 

If you have any leftover pesto (which we did not), it could be used to turn a sandwich or homemade panini into something special.  It would also be great with pasta (but you would have to make a whole batch just for that) or it could also kick up a steamed vegetable, like broccoli. 

Since I skipped the goat cheese, I served our pesto and crostini separately and let people put as much or little as they wanted on top.  If you are looking for a fresh bold appetizer for your next football watching party, this is a great choice. 

Enjoy!
 

Roasted Red Pepper Crostini
adapted from Williams-Sonoma

Yields 24 crostini (1 cup pesto)

Ingredients:

1 baguette cut in 1/4 inch thick slices
1/4 cup plus 2 tablespoons extra virgin olive oil (I used a garlic flavored olive oil)
2 garlic cloves, peeled
2 red bell peppers, roasted, seeds and stem removed and roughly chopped*
2 tablespoons toasted slivered almonds (to toast, place almonds in small skillet on medium low heat.  Stir until almonds are very lightly browned and become fragrant, about 5-7 minutes)
3 tablespoons grated fresh Parmigiano Reggiano cheese
1/4 cup finely chopped flat leaf parsley, divided
1 tablespoon fresh lemon juice
Pinch of cayenne pepper
Salt and fresh ground black pepper to taste
4 ounces of soft goat cheese (optional)

Directions:

Preheat oven to 350 degrees and place the slices of bread on the baking sheet.  Lightly brush the top sides of the bread with the olive oil.  Bake for 10-12 minutes until bread is toasted.  Bake 3 minutes longer for very crispy bread.  When bread comes out of the oven and is still warm rub each slice with one of the cloves of garlic.  Set aside.

To make the pesto, place 2 tablespoons of extra virgin olive oil, the remaining clove of garlic, peppers, almonds, Parmigiano cheese, 3 tablespoons of the parsley, lemon juice and cayenne pepper into a food processor and pulse until the pesto is thick but somewhat smooth.  Pulse longer for a smoother pesto.  Season with salt and pepper to your taste and pulse a few more times to fully combine. 

When you are nearly ready to serve pre-heat your oven to 350.  Spread goat cheese on each crostini and bake for about 5 minutes until the goat cheese is soft and the bread is warmed through.   Top each crostini with the red pepper pesto and sprinkle with remaining parsley.  Serve immediately.


*We roast our peppers on the barbeque.  Just place the peppers directly on the grill over high heat and turn every 5 minutes until peppers are soft and the exterior skin will turn black.  Takes 20-25 minutes.  Transfer the peppers to a bowl and cover the the bowl with plastic wrap.  Set aside and let the pepper steam for about 15 minutes.  Remove the plastic and let the peppers cool enough to handle them.  Remove the skins, stems and seeds.  Do not rinse the peppers under water.

Sunday, October 2, 2011

Baked Eggplant Parmesan


I have made some feeble attempts to cook with eggplant in the past.  This is my very first post with eggplant in it, which means my first successful eggplant dish.  Those folks over at Cook's Illustrated really know what they are doing.  They spend hours testing recipes up one side and down the other, figuring out the best way to get the most desirable outcome.  What I was missing from my previous eggplant attempts was salting the cut eggplant and allowing it to sit to remove excess liquid (apparently a basic step in preparing eggplant that I was not aware of).  This recipe also has a wonderful method for getting a nice crisp bread eggplant round without frying.


This recipe is no 30 minute meal so allow plenty of time to prepare it.  I made it on a leisurely Sunday afternoon so I wouldn't feel rushed. 

The recipe starts by cutting the eggplant into 1/4 inch rounds and coating them generously with salt.  They go into a colander over a bowl and sit to allow liquid to drain.  This process takes up to 45 minutes.  I used this time to make the sauce (the recipe recommends making the sauce while the eggplant bakes).  Once the eggplant releases about 2 tablespoons of liquid they get transferred to a triple layer of paper towels to further remove excess liquid.  Then the eggplant gets dredged in flour, egg and a breadcrumb mixture.  Instead of frying the eggplant to get a nice crispy coating, they go onto a baking sheet preheated to 425 degrees and lightly coated with olive oil.  The rounds go into the oven and with a little rotating and flipping, come out beautifully browned and crisp. 


I did a little tweaking with the sauce...I followed the directions as noted below but found it to be a bit acidic.  I added a bit of sugar and a bit of heavy cream to reduce the acid.  I also found the red pepper flakes to be too much heat for my taste and would cut the amount in half next time.  Though the sauce was tasty, I will play around with it a little more next time I make this.

The last step is to layer the crispy eggplant rounds with sauce and mozzarella cheese in a baking dish and go back into the oven to melt the cheese. 

The result?  Hubby and I both loved it.  It's warm.  It's hearty.  And most importantly, it's delicious!  Eggplant has a very mild flavor that pairs perfectly with marinara sauce and melted cheese.  If you have not tried eggplant, I urge you to give it shot.  It's good stuff!


Another approach would be to plate the crispy eggplant in individual servings, top with sauce and cheese and put it under the broiler for a few minutes until the cheese turns golden brown. 

This will be repeat dish in our house. And now that I know Hubs likes eggplant, a whole new avenue of recipes has opened up!

Enjoy!


Baked Eggplant Parmesan
from Cook's Illustrated from the New Best Recipe via Smells Like Home (via Ezra Pound Cake)

Ingredients

Eggplant:
2 medium eggplant (about 2 pounds), cut into 1/4 thick rounds
1 tablespoon kosher salt
4 cups breadcrumbs (I used 3 cups of panko crumbs and 1 cup of Italian Seasoned breadcrumbs)
1 cup finely grated Parmesan cheese (about 2 ounces)
Salt and freshly ground black pepper
1 cup all purpose flour
4 large eggs
6 tablespoons vegetable oil

Tomato Sauce:
2 cans diced or pureed or crushed tomatoes (14 1/2 ounces each) - I used diced
2 tablespoons extra virgin olive oil
4 medium garlic cloves minced (about 1 tablespoon)
1/4 teaspoon red pepper flakes
1/2 cup coarsely chopped fresh basil leaves
Salt and freshly ground black pepper

For baking:
8 ounces grated mozzarella (about 2 cups)
1/2 cup finely grated Parmesan cheese (about 1 ounce)
10 fresh basil leaves for garnish

Make the eggplant:
1.  Toss half of the cut eggplant rounds in a large bowl with 1 1/2 teaspoons of kosher salt.  Transfer the salt eggplant to a colander that is set over a a bowl.  Repeat with the remaining eggplant and salt.  Let the eggplant stand in the colander for 30 to 45 minutes or until the eggplant releases about 2 tablespoons of liquid.  Place the eggplant rounds on a triple layer of paper
towels.  Place another triple layer of paper towels over the eggplant and firmly press each slice to remove as much liquid as possible.  Wipe off excess salt.
2.  About 20 - 30 minutes into the eggplant draining adjust your oven racks placing one in the upper third and one in the lower third of the oven.  Place 1 large rimmed baking sheet on each rack and then heat oven to 425 degrees F.
3.  In pie plate or large shallow dish, combine breadcrumbs, Parmesan cheese and salt and pepper to taste.
4. Set aside a large baking sheet and place a wire rack over the top.  Combine the flour and 1 teaspoon black pepper in a large zip top bag and shake to combine.  In a second pie plate or large shallow dish, beat egg.  Place 8 to 10 eggplant rounds in the bag and and shake to coat.  Dredge each round in the eggs, evenly coating both sides.  Then coat the round in the breadcrumb mixture, evenly coating both sides.  Place each coated eggplant round on the wire rack and repeat with remaining rounds until they are all breaded.
5. Remove one of the preheated baking sheets from the oven and add three tablespoons of olive oil to the sheet, tilting to evenly coat the sheet with oil.  Place half of the breaded eggplant rounds onto the sheet in a single layer and set aside.  Repeat process with the second baking sheet and remaining eggplant rounds.  Return both sheets to the oven.  Bake until the eggplant is browned and crisp about 30 minutes, switching and rotating the baking sheets after 10 minutes and flipping the eggplant slices with a spatula after 20 minutes.  Do not turn oven off.

Make the sauce (I made my sauce while my eggplant was draining):
1. While the eggplant bakes, puree 2 cans of diced tomatoes in a food processor or blender until almost smooth.  If you are using pureed or crushed tomatoes, skip this step.
2.  Heat olive oil, garlic and red pepper flakes in a large heavy-bottomed saucepan over medium-high heat, stirring periodically until garlic is lightly browned (about 3 minutes).  Stir in processed tomatoes and bring sauce to a boil.  Reduce heat to medium-low and simmer until reduced and slightly thickened, about 15 minutes.  Stir in the basil and season with salt and pepper to taste.

Assemble:
1. Spread 1 cup of tomato sauce in the bottom of a 13x9 inch baking dish.  Layer in half of the eggplant slices, overlapping to fit.  Spread 1 cup of sauce over the eggplant and sprinkle half the mozzarella on top.  Layer the remaining eggplant and dot with 1 cup of sauce, leaving much of it exposed so it will remain crisp.  Sprinkle with remaining mozzarella cheese and Parmesan cheese.
2. Bake until bubbling and cheese is lightly browned, about 13 to 15 minutes.  Cool for 10 minutes and scatter basil leaves over the top. 

Sunday, September 11, 2011

Cheesy Zucchini Rice


Looking for an easy side dish?  This is it.  It's simple, tasty and the cheese takes this rice into the comfort food category.  Hubby and I had cheesy zucchini rice alongside grilled mahi mahi with mango avocado salsa on Friday night.  Whenever I serve a new dish, I anxiously await the verdict from my somewhat picky particular husband.  Apparently I'm not the only one. 

Have you seen the Pioneer Woman's new show on Food Network yet?  Hubby and I watched the third episode on Saturday morning and she shared some of the things her husband won't go near.  Like goat cheese and sauces containing wine.  I had to laugh when I heard this.  Especially with Hubby sitting right next to me.  He can't stand goat cheese and has a number of other particular food preferences.  (Though, I must give him credit, he does like wine based sauces.)  The Pioneer Woman decided to do a blind taste test with her husband and had him try her penne alla vodka. She didn't tell him it had vodka in it (just in case he carried over his aversion to wine in sauce to other alcohols).  He ate it and....drum roll please.....he liked it! 

And that's what happened with my Hubby and the cheesy zucchini rice.  Though I didn't keep any of the ingredients a secret.  Hubs generally isn't big on cheese, but enjoyed it in this dish.  He even went so far as to say he would like me to make it again...the true sign of a successful dish in our house.


I don't have kids, but would imagine if my picky particular Hubby likes this, so would my nieces and nephews.  Zucchini has a very mild flavor and brings a nice texture to the rice.  You get to sneak in some veggies but still lure them in with the cheesy rice. 

Good stuff for kids and adults alike!


Cheesy Zucchini Rice
from Pink Parsley adapted from Comfort of Cooking

Serves 4

Ingredients:

1 cup long grain white rice (I used basmati)
2 cups chicken broth (use vegetable broth for a vegetarian version)
2 tablespoons butter (optional)
1 medium/large zucchini, grated on the large holes of a cheese grater
1 cup grated white cheddar cheese (or your favorite cheese)
Salt and pepper to taste

Getting ready:

Thoroughly rinse rice under cold water to remove excess starch.  Measure out chicken broth and butter. 

Start cooking:

In a medium saucepan bring rice, chicken broth and 1 tablespoon of butter to a rolling boil.  I also added in a 1/4 teaspoon of salt.  Turn heat to low and cover rice tightly and cook for about 20-25 minutes until the chicken broth is fully absorbed. 

While rice is cooking grate your cheese and zucchini.

Once rice is cooked, remove from heat and add grated zucchini and remaining tablespoon of butter on top of the cooked rice, re-cover and let stand for 5 minutes.  The steam from the rice will cook the fine slivers of zucchini.  Transfer rice to a serving bowl and stir to mix in zucchini.  Add cheese and salt and pepper to taste and stir until well combined.  Serve immediately.

Thursday, July 28, 2011

Zucchini Parmesan Crisps


Zucchini is in full swing.  If you have a few plants in your garden, you know that it produces heaps and heaps that one family can hardly keep up with.  Unfortunately we didn't plant any this year, but we have been picking it up from our local farmer's market.  We eat zucchini at least a couple of times a week and I've always got my eyes peeled for a new zucchini recipe.
This one happens to be one of my favorites. 


This recipe comes from Ellie Krieger's The Food You Crave cookbook.  Zucchini rounds (or ovals in this case) are engulfed in a crispy panko and Parmesan cheese coating.  These delicious little chips brown beautifully in the oven with a nice crunch, similar to a crispy fried zucchini stick....but you don't have to feel guilty eating these since they are baked.  I like to dip mine in a little (light) ranch dressing which you can easily omit if you are counting calories.  They are delicious all on their own.

 
If you've got some zucchini laying around and you can stand to turn on your oven, this is a great way to use some of it up.

Enjoy! 

Zucchini Parmesan Crisps
adapted from Ellie Krieger's The Food You Crave

1 pound of zucchini (about 2 medium)
1 tablespoon olive oil
1/2 cup fresh grated Parmesan cheese (I use the small grater on my box grater or you can use a zester)
1/2 cup panko breadcrumbs
1/4 teaspoon salt
Freshly ground black pepper
1/4 cup ranch dressing (optional)

Preheat oven to 450 degrees.  Line a baking sheet with foil and spray with cooking spray.

Prepare bread crumb mixture.  Place Parmesan cheese, bread crumbs, salt and pepper in a medium bowl and mix.  Wash and dry zucchini.  Slice into 1/4 inch rounds and place in a medium size bowl.  Drizzle zucchini with olive oil and toss to evenly coat all the slices.  Coat each slice generously with the bread crumb mixture.  Pat crumbs into the slices to get a good even coating.  Place each slice on the prepared baking sheet leaving a little bit of room in between each slice.  Bake 25 - 30 minutes until zucchini is tender and breadcrumbs are golden brown and crisp.

Serve while still warm with ranch dressing.

Monday, July 25, 2011

Summer Tomato Salad with Basil, Goat Cheese and a Balsamic Reduction


Have you ever had a caprese salad?  Thick sweet juicy tomatoes topped with basil leaves, soft creamy fresh mozzarella and finished off with balsamic vinegar and olive oil.  It's one of my favorite salads and one of my favorite ways to enjoy ripe summer tomatoes.  I decided to do a play on this delicious salad and twist it up just a bit using some fresh made basil goat cheese that Hubby and I picked up at last week's farmer's market in place of the mozzarella.  The other twist was to use a balsamic vinegar reduction that I saw recently on the The Pioneer Woman Cooks (check our her site to see a gorgeous caprese salad).  The balsamic reduction is so sweet and lovely and perfectly compliments the basil goat cheese, fresh basil and luscious tomatoes.


This summer tomato salad with basil, goat cheese and balsamic reduction is the final salad in the Trio of Summer Salads that Hubs and I enjoyed last weekend.  Since I love caprese salad, it's no surprise this was one of my favorites in the trio.  This salad is all about the tomatoes.  Maybe you have some nice ripe fat sweet tomatoes growing in your garden, or available from your local farmer's market? 

I really loved how the creamy mild basil goat cheese enhanced the tomatoes and balsamic reduction.  Simple ingredients, yet bursting with flavor.


One note about the balsamic reduction.  It thickens quite a bit after it cools...so be careful not to overcook.  I started with 1/2 cup if balsamic vinegar and ended up with way more than I needed.  I recommend using 1/4 cup and cooking it no more than 3 - 5 minutes if you don't want your balsamic to turn into tar. You can make more reduction if you have other dishes to use it on and you can store it in the fridge.

This salad is easy to make and incredibly delicious!  Give it a try!


Summer Tomato Salad with Basil, Goat Cheese and Balsamic Reduction

Serves 2

2 large ripe tomatoes
6-8 medium/large basil leaves
1/4 cup balsamic vinegar
1 ounce of goat cheese (you can use an herb cheese or plain chevre as well)
2 teaspoons of good extra virgin olive oil
Sea salt and fresh cracked black pepper to taste

Using a small sauce pan on medium low heat, cook down balsamic vinegar until slightly thickened, stirring with wooden spoon frequently, about 3-5 minutes.  Remove from heat and set aside to cool.  Stack basil leaves on top of one another and starting at one end, roll the stack up into a little mini cigar.  Using your knife cut 1/4 inch thick ribbons starting at one end of the roll until you make your way all the across.  Wash tomatoes and dry.  Slice tomatoes 1/2 inch thick, discarding the slice containing the stem end of the tomato.  Place tomatoes on serving plate and season the top side of each tomato slice lightly with sea salt and fresh cracked pepper.  Using a fork, crumble generous bits of goat cheese on top of the tomato slices, ensuring that each slice has least a teaspoon of cheese.  Drizzle the balsamic reduction over the tomatoes.  Use as much (or little) as you like.  Drizzle olive oil over the tomatoes and lastly, top with the ribbons of basil.  Serve immediately.

Sunday, July 24, 2011

Grilled Corn Summer Salad


Grilled Corn Summer Salad is part 2 in the Trio of Summer Salads.  To see part 1 click here.  Summer is the perfect time to take advantage of the array of wonderful vegetables that are in season.  I love to pick up fresh fruits and veggies from our local farmer's market.  The bounty of goods we brought home were the inspiration for this and the other salads in our trio. 

Grilled Corn Summer Salad is tasty and easy to  make.  We grilled our corn and some sweet onions on the barbecue.  But you could easily cook your corn indoors on a grill pan or even in a regular non stick pan.  I love the addition of the smokey grill flavor in the salad.  The other ingredients in this salad were inspired by what was fresh from the market, but you could easily use other veggies or fresh herbs that inspire you.  Maybe some roasted red peppers or cilantro and minced jalapeno?

This salad is sweet, simple and light.  It would make a great side dish for your next summer BBQ!  The recipe can easily be doubled or tripled depending on the size of your crowd.  Enjoy!


Up next in the final part of the Trio of Summer Salads is Tomato Salad with Basil, Goat Cheese and Balsamic Reduction. 


Grilled Corn Summer Salad

Serves 3-4 small portions

3 ears white or yellow fresh corn, husks and silk removed (we used white corn)
1 inch thick slice from a large sweet onion (any other onion type is fine too)
2 scallions, thinly sliced
2 tablespoons chiffonade of basil (chopped into long thin ribbons)
1/2 cup grape or small cherry tomatoes, cut in half
Juice from 1/2 lime (or more to taste)
1 tablespoon melted butter
Salt and fresh ground pepper to taste
Olive oil

Preheat your barbecue to medium/high heat.  Rub olive on husked corn and onion to lightly coat. Note: we grill a whole onion cut in 1 inch thick slices and use the extra onion for other meals during the week.  Place onion on the grill turning every few minutes until tender and lightly charred.  At the same time place corn on your grill and cook on all sides turning every couple of minutes, for about 10 minutes.  Once the corn onion are nicely browned from the grill remove and set aside to cool.Once corn is cool enough to handle use a large chef's knife to slice off the bottom where the husk was attached so that corn stands up flat when turned on it's end..  Position your ear of corn standing in a wide somewhat deep bowl and use a sharp knife to slice off the kernels as closely to the cob as possible.  The corn tends go flying and the bowl catches the strays.  Repeat with all your ears of corn.

If you don't have a barbecue you can use a grill pan following the same instructions above.  Or you can cut the raw corn off the cob (getting as close the cob as possible to extract all the sweet corn nectar) and heat 2 teaspoons of olive oil in a non stick pan on your stove stop to medium/high heat.  Saute the raw corn in the pan, stirring occasionally, until it is cooked through and some of the corn looks lightly browned.  You can put the onion in the pan at the same time as the corn and flip using a spatula, cooking until onion is tender all the way the through and lightly browned.

Chop the grilled onion into 1/4 - 1/2 inch pieces and add to the corn.  Add the tablespoon of melted (still warm) butter and stir to evenly distribute.  Add chopped green onions, basil, tomatoes and lime juice and stir.  Season with salt and pepper to your taste.  Add additional lime juice if you like a little more acidity. 

Serve at room temperature.

Saturday, July 23, 2011

Shaved Zucchini Summer Salad


Hubby and I are lucky enough to have a fabulous small farmer's market just a few miles from our home.   We went for the first time this season last weekend and the market was in full swing with the delicious fruits of summer.  And veggies of course.  Zucchini and other squash was available in abundance and we brought home an armful!

Zucchini usually gets prepared just a handful of ways at our house.  GrilledBaked with Parmesan cheeseStuffed.  Cut into discs and coated with crispy panko breadcrumbs and Parmesan cheese and baked (hopefully a future blog post).  And now I have a new preparation to add to the rotation.  Shaved (raw) zucchini salad with fresh Parmesan, almonds and lemon dressing.  I shared a preview on Thursday with the Trio of Summer Salads.


I first saw this salad on Paige's blog, A Cooking Life and I was immediately intrigued.  Paige is a professional chef and cooking teacher and provides wonderful posts chalked full of detailed instructions on how to prepare her recipes along with a wealth of food knowledge weaved in.  Her dishes often focus on what is in season, making her zucchini post very timely!  (She has several other zucchini recipes too if you are looking for ways to use up your zucchini and squash...but I have my eye on Summer Squash Gratin to try next).

What I love about this salad is the zucchini is raw, yet is so tender it is as if it were cooked.  The key to this salad is choosing squash on the small side as well as getting a very thin shave on your zucchini, 1/16 of inch thick.  I think the only way to really achieve this with any consistency is by using a mandoline slicer.  A basic mandoline can be purchased for between $20 - $40.  I acquired a mandoline from my pal Amy for Christmas this past year and I haven't had a chance to really break it in yet, so I was thrilled to use it for this salad.  It worked like a charm.  Though it took me a good solid 10 minutes to figure out how to disassemble it to wash it and just as long to put it back together again! 


Paige's post talks about 2 different approaches to dressing the salad.  The recipe featured on Paige's blog comes from the cookbook The Vineyard Kitchen by Maria Helm and uses the method of squeezing fresh lemon juice straight onto the salad and then finishing the salad with olive oil.  The other method is to prepare a lemon vinaigrette and then dressing the salad.  I followed Paige's recommendation to go with the method from The Vineyard Kitchen.  It allows the lemon to really soak into the squash without the oil being a barrier.  It was delicious and the lemon brings a wonderful bright flavor to the salad without being overly lemony. 

I made only 2 minor modifications.  I used fresh basil rather than flat leaf parsley.  And I added yellow summer squash in addition to the zucchini.  I love the sunny yellow splash the squash brings to the salad.  The ingredients are simple and really sing when brought together--the tender zucchini softened by the lemon, with a nice crunch from the toasted almonds and saltiness of fresh shaved Parmesan cheese tied up with sweet ribbons of basil.  I absolutely loved this salad.  It's light and refreshing and perfect for a summer day. 

A couple of notes.  The zucchini releases quite a bit of water as it marinates in the lemon juice and olive oil.   That being said, you can really be generous with the lemon juice so that it retains it's flavor.  Leftovers don't do so well the next day.  This salad is best eaten shortly after it's made.

Thanks for sharing such a great recipe Paige!

Shaved Zucchini with Toasted Almonds, Parmesan and Basil
Adapted from The Vineyard Kitchen via A Cooking Life

Serves 6 to 8

2 pounds small (3 to 4 oz. each) zucchini and or yellow squash, washed and ends trimmed
3 ounces of fresh Parmesan cheese, shaved with a vegetable peeler
1/2 cup sliced or slivered toasted almonds (toast lightly in a pan on the stove over medium heat for 5 minutes stirring occasionally)
2 - 4 tablespoons fresh squeezed lemon juice
2 - 4 tablespoons extra virgin olive oil
Salt and pepper to taste
1/4 cup thinly sliced fresh basil

Slice zucchini/squash lengthwise 1/16th inch thick using a mandoline slicer.  Place shaved zucchini in a medium/large bowl.  Add 2/3 of the shaved Parmesan, the toasted almonds, basil and season (generously) with salt and pepper.  Drizzle with 2 tablespoons of lemon juice and toss gently and taste for seasoning. Add more lemon juice and salt as needed.  The salad should be a bit tangy.  Add 2 tablespoons of the olive oil and toss again and taste and adjust the seasoning as needed.  Serve salad and finish with a drizzle of olive oil remaining Parmesan.

Thursday, July 21, 2011

Trio of Summer Salads


I heart farmer's markets.  Hubby and I made a trip to our local farmer's market this past Sunday morning.  The market was bustling with people and bursting with abundant colorful harvests of summer.  We picked up a few things, with no particular recipes or meals in mind.  We selected our small bounty based on what looked most ripe and delicious!  They had stunning large red tomatoes, a mountain of zucchini and yellow squash, fresh herbs, corn on the cob and perfectly sweet white nectarines that all made it into our bags along with small container of fresh made goats cheese seasoned with basil. 

Both of us were recovering from a completely glutenous and indulgent meal from the previous day.  See, we had gone to a new gourmet burger restaurant and started off with a truly evil appetizer called "Vampire Dip" which is served in a toasted bread bowl alongside hunks of fresh crusty bread and fried pita wedges.  The vampire dip is a super cheesy, creamy concoction laced with an obscene mount of garlic (which we love) and diced artichoke hearts.  It was insanely delicious.  We devoured it and only a couple of hunks of bread and 1/3 of the bread bowl remained on the plate. 

Then....let's just say I ate (half of) their famous 50/50 burger (50% ground beef and 50% ground bacon).  Yes, ground bacon!  That was a first for me.  The burger was topped with avocado mash, pepper jack cheese and chipotle mayo all nestled between a warm, soft brioche bun.  Wow.  It was pretty tasty, but was almost too decadent.  I think my tummy went into shock after all that crazy rich food.  I shudder to think about the number of calories we consumed!  I am certain we set some type of record!

Needless to say, we had been detoxing from that ridiculous meal for the next 24 hours and a light farmers market meal seemed like the right thing to do for the following night's dinner.  As I inspected our farmers market haul I started thinking about fresh summer salads.  And the trio of salads was born... 


3. Tomato salad with basil, goat cheese and balsamic reduction


It was a delicious meal.  Light.  Refreshing.  Yet satisfying (despite the absence of meat/protein).  And healthy to boot!  A chiffonade of basil tied all three salads together beautifully.  Hubs didn't care for the shaved zucchini salad for reasons he can't quite put his finger on.  Not to worry, I ate his portion.  He did, however like the others.  I really enjoyed all the salads and would make them all again.  Though they all ranked highly in my book, my favorite salad by a hair was the shaved zucchini (went back for thirds), followed by the tomato salad (went back for seconds) and then the corn salad (also went back for seconds).  Good stuff!  And my conscience was magically cleared (after the dip and burger induced food coma), so I finished off my meal with a generous scoop of homemade strawberry ice cream. What's a meal without dessert?

Check back over the next several days to see individual posts featuring each salad and the recipes.

Have you been to your local farmer's market this summer?  Let the market tell you what yummy dishes to create in your kitchen.  :)

Monday, July 18, 2011

Secret Recipe Club: Summer Gazpacho with a Nutty Twist


A cool refreshing soup bursting with flavor is perfect on a hot summer day.  Especially one that requires no cooking.  Gazpacho is a delicious chilled vegetable soup that originates from Spain.  I found this recipe for Summer Gazpacho with a Walnut Twist from Cheap Ethnic Eatz.  I had a blast browsing through Evelyn's blog as my first assignment with the Secret Recipe Club! 

What is the Secret Recipe Club you might ask?  It's a very cool online group founded by Amanda of Amanda's Cookin'.  Each month the participating food bloggers are each assigned another persons blog in the group to make a recipe from.  Everyone posts the recipes they made on the same day at the same time. The cool part it is a secret and you don't know who has been assigned who's blog until the post date.   It's a great way to get to know other food blogs, take on new recipes and increase exposure for everyone.  If you are interested in joining or just learning more head over the Secret Recipe Club.  And don't forget to scroll all the way to the end of this post to see the blog hop linking to what everyone made this month.

I have spent quite a bit of time perusing Cheap Ethic Eatz over the past month.  Though I'm a big fan of cheap (and delicious) food, I have to admit I'm not overly adventurous when it comes to ethnic cuisines.  I guess compared to my mom I'm a word traveler of cuisine, but compared to the truly adventurous, like Evelyn, I'm pretty basic.  I like, Italian, Greek, Persian, Lebanese, Japanese, Chinese, Mexican, French (to a certain extent).  I'm bit more leery of other types like Ethiopian, Korean, Thai or Indian.  The great thing about Evelyn's site is she has a range of diverse dishes.

When deciding which recipe to make, I must have changed my mind at least 56 4 or 5 times.  Some of the recipes I was debating on were homemade jalapeno hot sauce, aranci (Italian fried rice balls), peach salsa and fig ice cream.  In the end I went with Summer Gazpacho with a Walnut Twist.  I admit, I played it a little safe by making gazpacho....but I couldn't resist.  I came across it when we were in the middle of a mini heat wave here in Southern California and this no cook soup sounded like a perfect accompaniment to grilled mahi mahi I was planning to make.


The gazpacho was wonderful and this offered a twist I haven't seen before...topping your soup with herb toasted walnuts.  I didn't have walnuts on hand, but I had some pecans and they were a great addition to the soup, adding a nice texture and flavor.


The nuts give a little extra heartiness to this very light soup.  Hubby is not a fan of nuts so I also did a version with garlic croutons so his soup would have a little extra crunch.  And that was delicious too! 


If you have never tried gazpacho before, I highly recommend it.  Thanks for sharing a great recipe Evelyn!

Summer Gazpacho with a Walnut Twist
from Cheap Ethnic Eatz

For the gazpacho:
5 ripe tomatoes, peeled and chopped
1 cucumber, peeled and coarsely chopped (I left the skin on as I was using an English cucumber)
1 small red or green bell pepper, chopped
1 clove garlic, minced
1 small onion, finely chopped (I used red onion)
1/4 cup white vinegar
1 1/2 cups tomato juice
3 tablespoons chopped cilantro
Salt and freshly ground black pepper to taste

For toasted walnuts:
2/3 cup coarsely chopped walnuts (I used walnuts)
1 teaspoon olive oil
3/4 teaspoon finely chopped herbs (I used fresh flat leaf parsley and a bit of minced garlic)
Pinch of cayenne pepper
Salt (optional)

To make soup:
Combine tomatoes, cucumber, pepper, garlic, onion, vinegar and tomato juice in a large bowl.  Transfer batches of the mixture to a food processor and pulse until coarsely pureed.  Transfer pureed soup into another large bowl and stir in salt and pepper, cover and chill in the refrigerator.  When serving if soup seems too thick, stir in more tomato juice.  Top with toasted nuts and serve.

To make herb walnuts:
Preheat over to 350 degrees Fahrenheit.  Line a small baking sheet with aluminum foil and toss nuts, herbs, cayenne and salt and pepper with your finger to coat.  Bake 5 to 7 minutes or until nuts are lightly toasted. 

Thursday, July 7, 2011

Grilled Veggies


Is it bad that every night after dinner I want to go to Yogurtland?  There's one way too close to our house that is continually calling my name.  Bad Yogurtland. Do you all have these serve yourself yogurt shops in your area?  With 10+ frozen yogurt flavors to choose from and a bounty of toppings (from nuts, to crushed candy bars, to mochi, to captain crunch and fresh fruit)?  The possibilities are endless!

One of my favorites is devils food cake batter frozen yogurt topped with toffee bits, reeses's peanut butter cup chunks and why not throw in some juicy strawberry slices?  Also loving strawberry cheesecake and cinnamon graham cracker yogurts topped with graham cracker crumbs, crushed oreos, a little dragon fruit and more fresh strawberries.  So good.  Especially on a hot summer night.

What does delicious frozen yogurt have to do with grilled vegetables?  Nothing, really.  Except that I wanted to venture out for a yogurt after our grilled steak and veggie dinner last night.  But that happens a lot of nights.  Instead of succumbing to frozen yogurt and topping temptations, I ate a handful of chocolate chips to get my sweet on (yeah, I did....and no it wasn't the first time).

I don't feel too bad eating something sweet after a meal consisting mostly of vegetables.  Grilled veggies are another favorite summer food (after frozen yogurt of course).  They are easy to prepare and have that tasty browned grilled goodness that only a barbecue can produce. 

For last night's dinner we had asparagus, zucchini and onion that needed be used up and the grill was the perfect cooking vehicle.  A little olive oil, sea salt and pepper and your veggies are ready to go.  For a special twist, use a flavored olive oil.  I used regular extra virgin olive oil on the onion and asparagus and basil olive oil on the zucchini.  The mild flavor of the squash really allows the basil to come through.  Delicious! 

Don't limit yourself to just these veggies.  Most anything is fair game...including corn on the cob, bell peppers, yellow squash, whole tomatoes, chiles, portobello mushrooms, green onions and cabbage (this one requires a foil pouch and butter instead of olive oil).


Grilled Vegetables

1 large bunch of asparagus, washed and woody ends trimmed off
3-4 small zucchini, sliced length wise in 1/4 thick slices
1 large sweet onion (or red or white), sliced across the onion in 1/2 inch slices
2 tablespoons olive oil
1/2 teaspoon sea salt
1/4 teaspoon fresh group pepper

Working by veggie type, drizzle with 1 tablespoon of olive oil until glistening and lightly  coated.  Sprinkle generously with and salt and pepper.  I like to use my hands to toss the veggies in the oil salt and pepper to ensure and even distribution of ingredients.

Fire up your grill on medium high heat.  Different veggies have different cooking times.  Start with the thickest veggies first (that will require most cooking time), in this case put the onion on first and cook for 5-7 minutes.  Flip the onion using a grill safe (metal) spatula.  Then add the zucchini and cook for about 3 minutes and flip and cook for 3 more minutes.  Lastly, lay asparagus on the grill perpendicular to the grates when you have 3 minutes left to cook your veggies.  After a minute, begin to roll the asparagus so that it gets evenly cooked on all sides. 

Serve alongside your favorite grilled chicken, fish or steak.