Saturday, April 23, 2011

Chewy Chocolate Chip Cookies


What is it about a chocolate chip cookie that is so enticing?  With hundreds of varieties of cookies out there, chocolate chip has to be the most talked about cookie (you know this is based on my extensive research...or...my best guess).  The chocolate chip cookie is an American classic.  I've relied on the Nestle Tollhouse recipe as my standby cookie for years.  It's still a favorite, but I'm looking for something more...the ultimate chocolate chip cookie.  A few recipes that have received a lot of acclaim from food bloggers are The Perfect Chocolate Chip Cookie from Cook's Illustrated, The New York Times Chocolate Chip Cookie from David Leite and Jacques Torres and the Chewy Chocolate Chip Cookie from Alton Brown.

I decided to embark on an official quest, and started my research off with this cookie, which is a variation on Melissa Murphy's Chocolate Chip Cookie with Toasted Almonds that my friend Crystal accidentally put a wonderful twist on.  What better way to get perspective on a chocolate chip cookie then to put two up against each other in a side by side taste test?  I decided the challenger cookie would be Alton Brown's Chewy Chocolate Chip Cookie recipe.


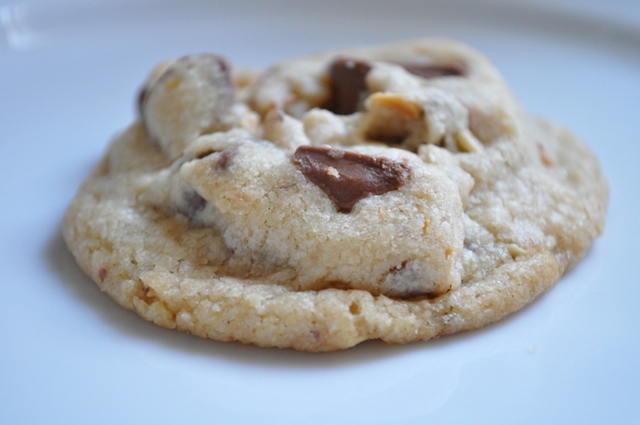
These are two very different cookies.  Crystal's Oops cookies are smaller in diameter (3 inches) but thick (3/4 inch), with a tender bite and sweet milk chocolate and crunchy toasted almonds.  The Alton Brown cookie is large (4 inches) and on the thin side (just under 1/2 inch) with semi-sweet chocolate chips.  But I thought since these cookies were so different I would get a good barometer of people's cookie preferences. 

I had a very unbiased group of folks take the cookie taste test...my co-workers (and one random vendor who happened to drop by the office that day and the husband of one my co-workers).  Ok, so this probably isn't the most unbiased, objective group since I feed them regularly with treats (some good, some that are only so-so).  But I put together a cookie survey and told them I really needed their HONEST opinions to help me in my quest for the ultimate cookie. 

How did these two stack up cookie to cookie?  The results were close....less than one point apart.  The guinea pigs, I mean my co-workers/taste testers, were asked to rate various components of the cookie, including texture, taste, appearance, color, size and overall satisfaction on a scale of 1 to 10.

Crystal's Chocolate Chip Chip Cookie received.....8.0!


Alton Brown's Chewy Chocolate Chip Cookie received.....8.6!


The Chewy Chocolate Chip came out just ahead on overall scoring.  75% of the group selected the Chewy Chocolate Chip Cookie when asked which cookie they preferred.   Some factors that came into play on people's preferences were the nut/no nut factor, either you like them or you don't.  Also there is a debate on milk chocolate versus semi-sweet.  I think the Chewy Chocolate Chip cookie fared slightly better because it more closely resembles a "classic" chocolate chip cookie. 


I want to extend my sincere thanks to all taste testers that helped me in this very important quest! I even got one person to participate who normally refrains from all treats brought into the office. He said he had to do it in the name of science! Word.

A couple of baking notes about the Chewy Chocolate Chip Cookie.  I thought the cookie had a nice color but was a hair too large at just over 4 inches round...using a full size ice cream scoop (4 tablespoon size).  When I attempted to make a smaller cookie, they turned out darker than I hoped.   I attempted to adjust baking time and temp, but wasn't successful in getting a smaller version with the right color and doneness.  I loved the Alton Brown cookie on day one...it had that slight crunch on the outer edges, yet chewy inside.  The crisp/chewy ratio is key for me in a good chocolate chip cookie.  On day 2, these cookies lose the crisp factor.  I thought Crystal's Chocolate Chip Oops Cookie held up better on days 2 and 3, maintaining the same texture as the day it was baked.  The test group ate both cookies on day 2.


I really liked both cookies, each offering different elements of a great cookie.  Alton Brown's cookie is more along the lines of a traditional chocolate chip cookie and Crystal's cookie puts a different twist on the classic.  What I want to do is come up with a cookie that incorporates a combination of milk and semi-sweet chocolates.  I love the contrast of sweet milk next to deep dark chocolate.  Put that together with a crisp chewy texture and I envision getting a step or two closer the ultimate chocolate chip cookie!

Alas, the quest continues.  What would your ultimate chocolate chip cookie be like? 

Next up on the test roster is the Perfect Chocolate Cookie from Cook's Illustrated.
 

Chewy Chocolate Chip Cookie
by Alton Brown

Ingredients:

2 sticks unsalted butter
2 1/4 cups bread flour
1 teaspoon kosher salt
1 teaspoon baking soda
1/4 cup sugar
1 1/4 cups brown sugar
1 egg
1 egg yolk
2 tablespoons milk
1 1/2 teaspoons vanilla extract
2 cups semisweet chocolate chips

Pre-heat oven to 375 degrees and line 2 baking sheets with parchment paper.  In a separate bowl sift the bread flour, salt and baking soda and set aside.  Melt butter in a small saucepan on low heat or you can melt it in the microwave heating for 1 minute and then 30 second intervals until melted.


Cream the butter and both sugars in a stand mixer on medium speed. Add the egg, the yolk, milk and vanilla and mix until well combined. Turn your mixer to low and add the flour mixture in 3 batches until just incorporated.  Don't over mix. Stir in the chocolate chips.

Chill the dough for about an hour.  Using a 3-4 tablespoon ice cream scoop, scoop 6 cookies onto each baking sheet. Bake for about 14 minutes or until golden brown.  Rotate baking sheets in the oven after 7 minutes of cooking. Cool on the baking sheets for 15 minutes and remove to wire rack to cool completely.  Cookies can be stored for up to 3 days in an airtight container.

Sunday, April 17, 2011

Sweet Melissa Sundays: Strawberry Rhubarb Preserves and How to Can


Last year I made my first homemade jam (preserves) with the Sweet Melissa Sundays baking group.  I was very impressed at how easy it was to make and how awesome the end product turned out.  Who needs store bought jam when you can make your own?  Some of the girls in the group had canned their jam and I was determined to can my own next time the group made preserves. 


I couldn't be happier with this month's pick by Tracey of Tracey's Culinary Adventures to make Strawberry Rhubarb Preserves.  Both strawberries and rhubarb are in season and I love how these two flavors compliment each other.  Rhubarb is actually quite tart on its own...but pair it with strawberries and bit of sugar and it adds a wonderful zing to the preserves.  This recipe also has orange juice, orange zest and granny smith apples in it.  The juice and zest (I also added lemon zest) add another depth of flavor and the apples serve as a natural pectin, or thickener, and the taste of apple is really undetectable in the end product.


The jam is amazingly delicious and very easy to make.  It just takes a little peeling, chopping, slicing and zesting. 


All the ingredients go into a large pot and come to a boil.  Once the mixtures comes up to 212 degrees on a candy thermometer (mine only took 5-7 minutes to reach temperature) you continue cooking at that temperature for 25-30 minutes, or until the jam is thickened.  To test the thickness of the jam, Melissa Murphy offers an easy tip.  Spoon a small dollop of jam on a small plate and place it in the freezer for about a minute.  Once the jam is just cooled, if it runs down the plate, it's not ready yet.  If it holds it's shape it is good to go.  It's important not to overcook the jam because you can end up with an overly thick texture once the jam chills in the refrigerator.  Since I planned to can the jam I made the full recipe and it took about 25 minutes to get to the right thickness.  Check out that gorgeous ruby red color.  It has a bright lovely flavor and if you are hesitant about trying rhubarb this is a great way to do it.
 

So that's the easy part. If you want to stop there you can store your jam in an airtight container in the refrigerator for up to 2 weeks.

Or you can preserve your preserves and take on canning.  Have you ever canned anything before?  It is a little more involved than I realized.  Probably didn't help that I don't have any canning tools and I just made do with what I had in the kitchen.  If I had to do it again I would at least invest $6 in jar tongs.  There are many other tools to simplify canning, but if you are only going to do it on rare occasion, you may able to get by without most of them depending on what you have in your kitchen.  Check out  http://www.canningsupply.com/  for every canning accessory you could ever want. 


The key to successful canning is good preparation.  The preserves need to be canned while they are still hot so this means there is some serious coordination involved.  Don't get me wrong, it's not difficult.  But if you are a procrastinator like me, planning ahead might not be your forte.  The whole process took me about 2 hours and 45 minutes from start to final clean up (including time for dishes).  Some of that time was devoted to reading and re-reading the instructions about 42 times because I didn't really know what I was doing.

My stove was was at maximum capacity.  In the photo below the lids were heating in the small pot on the back left burner, the jars were heating in the skillet on the back right burner, the water was simmering in the canning pot on the front right burner and lastly, my preserves were cooking on the front left burner.


If you are thinking of taking canning on, below I've detailed what you need to can, what you need to make the preserves and how to bring it all together.  I didn't fully grasp all that needed to be prepped ahead of time, so I thought it would be helpful for those new to canning to see it all laid out from beginning to end.  For the preserve recipe head over to Tracey's site.  Check out the SMS blogroll to see how everyone else did with their preserves.


Here's what you need for the canning process:

UPDATED 4/19/2011 with some tips I learned from my fellow bloggers and some additional thoughts I had after the original post.
  • Jars, lids and rings washed (only the rings need to be dried)...these can be bought in a flat of 12 at your local grocery store for $8.50 - $12.00 depending on what size jars you get.  I used 1/2 pint, or 8 ounce jars.
  • Small sauce pan to heat the lids
  • Pot or deep skillet to heat jars in (jars don't need to be steralized if the processing time in the water bath is at least 10 minutes according to this site) OR you can wash and heat your jars in your dishwasher, however, this process must be timed with when your preserves will be finished cooking)
  • Large (canning) pot with a lid to fully submerse jars in
  • Jar rack (I didn't have one so I used my multi pot with a pasta drainer insert which worked just fine...see photo above)
  • Tongs (preferably jar tongs...which I didn't have and used standard kitchen tongs that proved difficult to handle and not disturb the seal on the jars)
  • Magnetic lid lifter (I didn't have one so I used kitchen tongs to handle the hot lids which worked well)
  • Ladle to spoon the preserves into the jars (I used a 1/4 cup ladle)
  • Spatula to stir and remove air pockets in the jam
  • Wide mouth funnel if you have it (I didn't have one and didn't have much trouble getting my jam into the jars since my ladle was relatively small)
  • Several kitchen towels (to place hot jars on and use to hold hot jars while you fill them)
Here's what you need to make the preserves:
  • Preserve ingredients
  • Cutting board and knife
  • Measuring cup
  • Zester
  • Candy thermometer
  • 8 quart pot
  • Wooden spoon
  • Potato masher
Here's an overview of what I did:
  • Washed the jars, lids and rings and dried the rings (the jars and lids go into pots to get heated prior to filling so no need to dry them)
  • Washed my strawberries, rhubarb, orange and lemon and set aside on a cutting board
  • Filled a small saucepan with water and put in the lids and placed it on the stove on low heat
  • Filled a large pot with water and placed it on the stove on medium high heat....I used my "multi-pot" which has an insert for pasta.  This served in place of a canning rack.
  • Filled a deep skillet with enough water to go halfway up the sides of the jars and placed it on the stove on medium/low heat.
  • Filled 7 jars (only ended up using 5 for this recipe) with an inch or two of water to keep them from falling over and placed them in the skillet of water to heat.  The jars need to be hot so they can accept the hot preserves without cracking
  • While all my pots and pans were heating I turned to preparing the preserves and...
  • Hulled and sliced strawberries and sliced the rhubarb
  • Peeled and sliced granny smith apples
  • Zested and orange and lemon and juiced the orange
  • Measured out sugar
  • Placed my fourth and final (8 quart) pot on the stove using the last available burner on my stove and turned it on high.
  • Secured the candy thermometer to the 8 quart pot and added all the ingredients
  • Stirred occasionally and let the ingredients reach 212 degrees then cooked for an additional 25 minutes
  • Halfway through the cooking time I used a potato masher to mash and break down the fruit to make for a smoother jam.  Note...this is where I tasted the jam.  I decided to add an additional 1/4 cup sugar because it was more tart than I like.
  • Tested the thickness by placing a dollop on a plate and putting it in the freezer for about a minute...the jam was not runny and had a nice thickness, meaning it was done!
So here's where the coordination comes in....at this point your lids should be submersed in hot water and ready, your jars should be partially submersed in hot water and ready and your large canning pot should be simmering and ready for the jars of jam.  You should have your spatula and tongs ready and your kitchen towels laid out.  Your ladle should be ready and all the pots and tools should be placed on your stove and workspace where you can easily access everything.  Back to the steps...
  • Used tongs to empty the water from the first jar and moved it over to my kitchen towel
  • Held onto the hot jar using another kitchen towel and ladled jam into the jar until about 1/4 inch from the top
  • Removed air bubbles with a few turns of the spatula in the filled jar
  • Cleaned any excess jam from the jar rim and groves with a damp paper towel
  • Removed a hot lid from the lid pan using tongs and placed it over the jar allowing the sealing element on the lid to come in contact with the rim of the jar
  • Twisted on a ring to close the jar and placed it to the side while I repeated the process with the remaining jars
  • Transferred filled and sealed jars to the canning pot for submersion, making sure there was 1 inch of water covering the jars....what I actually did was use my tongs for this....what I should have done was to remove the pasta insert and place the filled sealed jars in the bottom and returned it to the simmering water
  • Turned heat up on the canning pot to bring water to a full boil and let the jars "process" for at a full boil for the time specified on the instructions that come with your jars or listed in the recipe you use.  I only processed for 5 minutes, but think it should have been 10.  Once processing time is finished, turn off the heat and let jars stand in the hot water for 5 minutes before removing.
  • Lastly, I removed the jars from the pot by pulling out the pasta insert and used a kitchen towel to grab each jar at the base and moved to a kitchen towel to set.  I attempted to use tongs at first, but I realized this may disturb the seal on the jar.
  • The jars need to rest undisturbed for 12-24 hours.  I let mine rest for 12 hours and tested the lids to ensure a proper seal.    
  • If the lids don't flex when pressed in the center, the seal is good.  You should also try to remove the lid with your fingertips.  If the lid stays in place the seal is good.  If the lid flexes up or down when pressed in the center the seal is not good.  If the lid is not sealed within 24 hours you can reprocess the jar using the instructions in the step by step guide link just below or you can refrigerate it.
  • Sealed jars can be stored for up to one year in cool, dark place.
For a step by step guide on how to can preserves click here.  The site also has a link for you to download a PDF to print off, which I highly recommend. 

With a little planning and preparation canning can be easy and very rewarding.  I understand why people can mass quantities...next time I would double the recipe.  Happy canning!

Tuesday, April 12, 2011

Crystal's Chocolate Chip "Oops" Cookies


Have you ever flubbed up a recipe?  Left out a key ingredient?  Added too much or too little of something?  I certainly have.  In cooking you can most times get away with it.  In baking a major diversion from the recipe can result in a vastly different product.  My first attempt at making Grammy's Chocolate Cookies a couple years back resulted in an incredibly thin cookie....because I added an extra 3/4 stick of butter.  It was still tasty as you might imagine but not the result I was expecting. 

My best friend Crystal (pictured on the left) recently had her own "Oops" recipe.  She was making Melissa Murphy's Chocolate Chip Cookies with Toasted Almonds and noticed the baked cookie didn't match up with the "chewy" description in Melissa's recipe.  After thinking back on her steps she realized that she added an extra 3/4 stick of butter and forgot to add in the one and only egg called for in the recipe.  She made a couple of intentional changes too.  She replaced the semi sweet chocolate chunks with large milk chocolate chips and formed the dough into two 10 inch rather than 12 inch logs, still slicing off 1 inch cookies. 


Her "Oops" cookies turned out to be what she thinks might be the "one".  You know that special cookie that knocks your socks off, makes you say, "wow" and keeps you coming back for more.  She said to me, "You have to try these!"  I had made Melissa Murphy's original version a while back and wasn't wowed.  But the Oops version sounded pretty enticing.


I replicated Crystal's version to the tee (despite my urge to use semi-sweet chips and keep the egg as I did here).  These really are special cookies.  The milk chocolate is sweet with caramel undertones.  The crunch of the toasted almonds adds a nice layer of texture to these thick yet tender cookies.  They are a bit pale in color for a chocolate chip cookie (turns out that eggs help achieve that nice golden brown color, something I didn't know until researching what an egg contributes to baking).  I enjoyed these cookies A LOT and felt that wow factor after biting into one.  They had a gourmet quality about them in taste and appearance.  I think I would enjoy them even more with semi-sweet chocolate chips or chunks, but that's just my preference in chocolate. 


I am officially on a quest to find my perfect chocolate chip cookie.  Though this cookie was impressive, my quest continues.  This weekend I also made Alton Brown's Chewy Chocolate Chip recipe which is highly rated by many food bloggers.  I took the two cookies to my office for a head to head cookie face off today.  Check back in a couple of days to see the Chewy Chocolate Chip cookies and find out how they stacked up with Crystal's Chocolate Chip "Oops" cookies. 


To be continued...

Chocolate Chip Cookies with Toasted Almonds
by Crystal adapted from Melissa Murphy

Makes 20 three inch cookies

1/2 cup whole natural (or slivered) almonds, toasted (see below)
2 sticks unsalted butter, softened
1/2 cup granulated sugar
1/2 cup firmly packed light brown sugar
1/2 tsp pure vanilla extract
1 2/3 cups all purpose flour
3/4 tsp baking soda
1/4 tsp salt
8 oz. best-quality milk chocolate chips (Crystal and I used Ghiradelli's large milk chocolate chips)

Preheat the oven to 350 degrees and line two cookie sheets with parchment paper or foil.  Chop almonds and set aside (we used slivered toasted almonds).

In a medium bowl whisk together the flour, baking soda, and salt. In a stand mixer or using a hand mixer, cream together the butter, both sugars and vanilla until light and fluffy for about 3 minutes at medium speed.  Turn the mixer on low speed and add the flour mixture in three batches, mixing each batch until flour is no longer visible.  Stir in the chopped almonds and chocolate chips or chunks.

Place 2 large pieces of plastic wrap on your work surface and dump the dough out onto the first piece of plastic wrap.  Form dough into square and then divide the square in two equal pieces.  Place one piece on the second sheet of plastic wrap, form it into a 10 inch log and wrap tightly in the plastic.  Repeat with the other piece of dough and plastic wrap.  If the dough is too warm to form into logs, refrigerate for 30 minutes to an hour until dough firms up.  Place wrapped logs in the refrigerator for about an hour until dough is firm enough to slice without smashing the log.

Remove the logs from the refrigerator and slice them into 1 inch cookies and place them 1 1/2 inches apart on the prepared cookie sheets.  Bake at 350 for 12 to 14 minutes or until thethe bottom edge has a lightly browned appearance and the dough in the center no longer has a raw appearence.  Note, this eggless version will be pale in color, so be sure not to overcook.

To toast nuts:  Preheat the oven to 350 degrees and spread the almonds in a single layer on a foil lined cookie sheet. Bake for 10 to 12 minutes, or until lightly browned and you can smell them. Set aside and cool before adding to cookie dough.

Tuesday, April 5, 2011

Chocolate Chip Cookie Dough Cupcakes


Do you all remember the cookie dough ice cream craze back in the 90's?  People couldn't get enough of Ben & Jerry's Cookie Dough ice cream.  I, however, was not one of those people.  I thought it was okay, but definitely not in my top 10.  It probably had to do with the fact that the chunks of cookie dough were nestled in vanilla ice cream.  If you haven't already figured it out by now, I am a chocolate girl through and through.  Now, wave a pint of a Ben & Jerry's Chocolate Fudge Brownie under my nose and I'm yours!  At least long enough to pry the pint out of your hands and get my spoon in there.

Even though I'm not a cookie dough fanatic, I have been intrigued by the cookie dough cupcakes I've seen on some of my favorite food blogs.  The cookie dough cupcake over at Tracey's Culinary Adventures is downright adorable.  Kevin and Amanda's blog features a cookie dough filling that is actually baked in the cupcake.  But it seems all the recipes I found online, at least in some part, center around the one found on Annie's Eats (which came from a few different sources). 

My brother and his 3 kiddos came over for a barbecue this past weekend and I thought they would be the perfect taste testers for the chocolate chip cookie dough cupcakes.  What kid doesn't like cookie dough? 

I did switch up the recipe a bit and used a chocolate cake base instead of a white cake base.  Had to get in  a little something for us chocolate lovers.  Okay, it was for me.  And....the kids too....yeah.  The chocolate cake was filled with chocolate chip cookie dough (an eggless version so that you can enjoy that raw cookie dough texture without fear of salmonella), frosted with cookie dough buttercream and topped with a homemade chocolate chip cookie.  This cupcake is not for anyone watching their calorie or sugar intake.  I cannot even fathom how many calories are in just one of these little babies.  It's a rich and decadent treat and there's no doubt it's all about the cookie dough.  Prepare to indulge!


I have to pause to give a shout out to my awesome new cupcake stand.  My gal pals gave me this really cool display for my birthday.  And they also gave me this cupcake carrier that I keep meaning to photograph and share here...because I've already used it 3 times in the last 2 months.  What's so cool about the carrier is you can bake cupcakes in it and then transport them.


Back to the cookie dough cupcakes....In my research I found 2 approaches for the filling.   The most common was to bake the cupcake and then cut out cone shape from the top and fill it with cookie dough.  The other option was to make cookie dough into balls or tube shapes and then freeze them (overnight if possible) and place the frozen dough in your cupcake batter and bake away.  I went with option 2.  On a side note, my cupcakes almost ended up with no filling because I popped these babies into the oven and about 90 seconds later realized they were missing their cookie dough filling.  Whoops!  I quickly pulled the cupcakes out of the oven and dropped in a ball of frozen dough.  Because the dough is frozen it doesn't bake through and retains its cookie dough consistency.  If you like a really soft cookie dough, you might try the bake and fill option instead.

Check out the inside! 


Now, let's talk frosting.  It is just like cookie dough in taste and texture.  This buttercream has confectioner's sugar and brown sugar, vanilla, salt and a bit of milk (if you need it to get to the right consistency).   The brown sugar provides that slightly gritty texture that you get from cookie dough.  The frosting is a pure sugar rush. 

Don't forget to top it off with a chocolate chip cookie!


I did a little experimenting with the chocolate chip cookie.  I adapted Melissa Murphy's chocolate chip cookie recipe and added a little extra butter and some toffee bits with milk chocolate.  The cookie wasn't quite where I wanted it to be so I won't share the recipe today...but I have some ideas on how to get it closer to my ultimate chocolate chip cookie. 

The cupcakes were a hit with the kids!  I've enjoyed a few over the last 3 days.  Ate it for breakfast (maybe twice)....with a big glass of milk.   


Check out Annie's Eats for the buttercream frosting and her cookie topper recipe.  You can find the chocolate cake recipe I used here and lastly, check out Kevin and Amanda for the chocolate chip cookie dough filling.

Enjoy!

Sunday, April 3, 2011

Sweet Melissa Sundays: Honey Cream Caramels


My Kitchen Aid stand mixer and I are best friends.  We hang out together often and know each other well.  We've been together for 9 years now, so we have had a lot of time to learn all the little intricacies of one another.  I can whip up a batch of cookies in no time at all with my trusty friend and sometimes I feel like I could do it with my eyes closed.   We are pretty tight. 

My candy thermometer and I on the hand, are just getting to know each other.  We've only been together less than a year and I'm still a little leery of this guy.  I'm not quite ready to go steady yet, but I look forward to an occasional date.  The dates are usually fun (but sometimes are a flop) and always involve something new and exciting!  This week we had an awesome date making Honey Cream Caramels. 

The date got off to a slow start.  Boiling sugar is always a little scary and it involves an incredible amount of patience and attention.  Sounds like like a typical man, right?  Anyway, the ingredients are simple.  Sugar, honey, heavy cream, salt, corn syrup and a tiny bit of butter come to a ferocious boil in medium to large heavy bottomed saucepan.  Make sure your pan is big enough because you don't want this magma like sugar to boil over.  My, gurgling, bubbling, sometimes sputtering, caramel lava took about 25 minutes to come up to "firm ball" temperature (250 degrees) on the candy thermometer.  All the while you have to stir the mixture continuously.  I was beginning to wonder if it was ever going to make it.  I'm not very patient.  Plus I always think my candy thermometer is playing hard to get by laying low.  But then our date took an exciting turn and finally my guy came through and delivered those last 15 degrees!  The minute the caramel hit 250 degrees I removed the pan from the heat, stirred in some vanilla extract and poured the delicious golden magic into a prepared 8x8 ceramic baking dish.  Wow!  We did it! 

Okay candy thermometer...I'll think about taking our relationship to the next level.    

Meanwhile I had to exercise more patience as the caramel cooled and set up.  I decided the best thing to do was wrap it up and let it sit overnight because I didn't have good lighting to take photos anyway.  My giant caramel took a little coaxing to release from the buttered pan.  I also buttered my cutting board and my knife and got to work cutting it into bite size pieces.


I found it easiest to pull a very sharp chefs knife through the caramel (instead of using a chopping motion).  Once it was in strips, it was easy to cut into about 1 inch pieces.  I used the width of my thumb as a general guide to cut each piece.


8 strips of caramel quickly multiplied into about 82 pieces of caramel!


I cut 4 1/2 by 4 inch pieces of wax paper to wrap each caramel in.  It was a bit time consuming wrapping 80+ pieces of candy, but I also found it therapeutic and satisfying to hand wrap each treat.  There's something nice about it that I can't quite find the right words for, so you'll just have to take my word for it.


So the most important question has finally arrived....how did the honey cream caramels turn out?  Pretty fabulous.  The caramel is soft, but not too sticky, and it practically melts in your mouth.  The honey flavor comes through and blends beautifully with the creamy caramel.  You could easily turn this into a salted caramel with a sprinkle of fleur de sel before the caramel fully sets. 


What's nice about these is you can make about 7 dozen in one batch and package them up in little cellophane bags and give them away as gifts.  They keep up to 2 weeks wrapped and stored in an airtight container.  This recipe is a winner and will be making it into my holiday treat rotation. 


Thanks to Carmen of Baking is My Zen for this week's Sweet Melissa Sundays recipe pick.  You can get the recipe over on her site.  To see how my fellow SMS bakers did with their caramels click here.