Showing posts with label brownie. Show all posts

Thursday, May 10, 2012

Operation Baking GALS


If you're a regular reader here, you probably know I've joined a few online cooking and baking groups along the way.  It all started two years ago when I stumbled upon the Sweet Melissa Sundays  baking group.  I did a brief stint with French Fridays with Dorie.  I'm currently baking out of the Baked Explorations cookbook with Club: Baked once or twice a month and cooking/baking along monthly with Secret Recipe Club.  I love all these groups because a.) I learn things I didn't even know I wanted to learn, b.) I connect with fabulous food bloggers, many who are now friends, and c.) I get to eat some tasty stuff.

I'm pretty excited to tell you about a new baking group that is a little different than the rest.  This month I joined Operation Baking GALS.  Baking GALS (GALS stands for Give a Little Support) is a group of volunteers that bake and ship home baked treats to soldiers deployed in a war zone. "Our goal is to show our support and send a little bit of home to remind them that we appreciate all that they do for our freedom."  Pretty darn cool.

The GALS started back in 2008 and have been baking ever since.  You don't have know someone in the military to join.  Though if you do know someone, you can nominate that person to be a recipient of the Operation Baking GALS goodies.  Every month teams are formed, each representing a solider or soldiers to bake for.  Baking GALS read about each team and choose one or more teams to join. Up to 20 people can join each team.  All the teams bake and ship within the same 10 day period with the idea that the solider(s) get showered with all sorts of treats that they can share with the rest of the their unit.

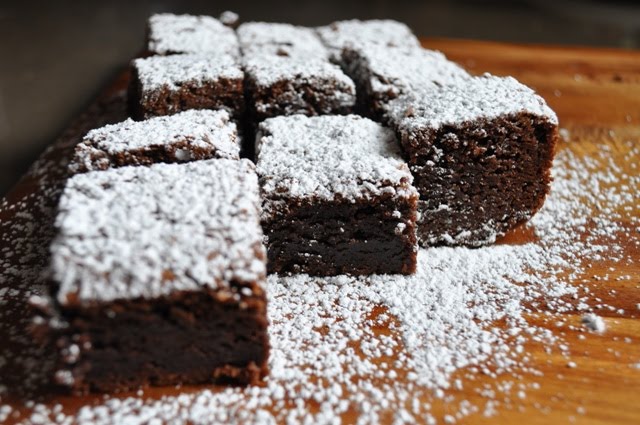
I sent my first box out on Tuesday to a solider overseas in the Air Force.  The box included these homemade brownies and homemade ginger snaps.  With a little extra room in the box I filled in the gaps with gum, candy, cornnuts and cup of noodles.  It was a fun project to put everything together.  Hopefully it brings a little taste of home to some of the brave soldiers who make freedom possible for all of us. 

If you are interested in joining, head over to the Operations Baking GALS website and read through the FAQ's.  The next round of baking will take place in June.  Come and join the fun!


On completely unrelated note, you might have noticed that today I've posted my first photo collage! Woo hoo! I've always admired blogs with a snazzy collage. A quick web search led me to easy breezy instructions on how to do it with my Lightroom 3 software. I'm looking forward to playing around with it. Meaning you can totally expect to see more photo collages here.

P.S. Do something special for your the moms in your life on Sunday, May 13th, Mother's Day!

Monday, April 23, 2012

The Last Brownie


Have you ever been on a quest to find the perfect ______?  Finding the ultimate version of a recipe is not easy.

I discovered that last year when I made an attempt to find the perfect chocolate chip cookie.  I learned two things from that exercise.  The first is to truly stack up one cookie against another, you really have to taste them side by side.  I found each time I would bake a new version, I would like it.  I made notes on what I liked about it, how the cookie held up after being stored for a day or three, the size, texture, flavors, etc.  But without tasting them side by side it was hard to compare and I realized I liked them all for different reasons.  The second thing I learned is the process of trying different recipes is really half the fun of the finding the best one.  I have yet to get sick of trying a new chocolate chip cookie recipe. 

Though I've made quite a few chocolate chip recipes, I've barely dipped my toe in the water on brownies.  Luckily for this month's Secret Recipe Club assignment I was assigned Cindy's blog, Everyday Insanity.  And Cindy has tested a lot of brownies.  In fact the tag line on her blog header is, "Tackling Life one Brownie Recipe at a Time!" 

Cindy and I have been in SRC together for quite a while now and she has become one of my blogging friends.  We frequently visit each other blogs and leave comments.  So I was excited when I was assigned her blog as I had already bookmarked several recipes I wanted to try.  Not surprisingly, they were all sweet recipes. 

In the end, I couldn't resist trying the recipe Cindy calls the "last brownie."  Meaning there is no need to try other recipes because this is the one.  Cindy says she's been on her journey to find the perfect brownie for about the last 35 years.  Though she deems this one to be perfect, I would bet this probably will not be the last brownie recipe she'll try. ;) 

The last brownie is my kind of brownie.  It's rich and chewy with a deep fudgy flavor.  That pretty much says it all.  I already have plans to make these again. 

I have to come clean though and tell you about a little tactical error that I made.  I did a trick my aunt does with brownies and sprinkled chocolate chips on top of the warm brownie right out of the oven.  The chips melt after a few minutes and then you spread them around to make a chocolate frosting of sorts.  But I realized after tasting these brownies that they didn't need a frosting.  In the photos on Cindy's blog you can see they have a bit of crackly top...which is just how I like them.  So I'm not sure what prompted me to add chocolate on top.  Next time, I'll leave them naked.  At least long enough to try one.  Then I might have to top it with some bright strawberry sauce (recipe also courtesy of Cindy) finished off with fresh whipped cream.

Check out the pretty sauce....


I decided to go big with these brownies, cutting them into 4 massive, 4 inch square, multiple fork, totally sharable, dressed up, brownies. 

And check it out after a bite...


After this little taste, I put the camera down and sat down to write the rest of this post while I dutifully had many more bites of this decadent dessert.  Unfortunately Hubs didn't want to help me out.  Mostly because he doesn't like chocolate or strawberries.  What?  He totally missed out!  This dessert is intense and is a bit much for one person. I ate half and put the other half in the fridge.  Guess what I'm having for breakfast?  Thanks for two great recipes Cindy!

Oh, and rest assured, this will not be my last brownie.  It's way too soon for my brownie journey to be over.

Enjoy!

The Last Brownie
slightly adapted from Everyday Insanity

1/2 cup butter (1 stick), cut into 1/2 inch pieces
8 ounces semi sweet chocolate, roughly chopped
1 1/4 cups sugar
1/2 teaspoon salt
3 large eggs
2 teaspoons pure vanilla extract
3/4 cup of flour
1 cup chopped walnuts or pecans (optional) - I omitted

Preheat oven to 350 and grease 9x9 square pan with butter or cooking spray.  (I used an 8x8 pan and baked it for about 43 minutes)

Heat an inch of water in a small to medium sauce pan until simmering.  Place a medium heat proof mixing bowl (large enough to hold all the ingredients) over the simmering water and place the butter and chopped chocolate in the bowl.  Stir occasionally with a rubber spatula until the butter and chocolate are melted.  Remove the bowl from the heat and continue to stir for another minute to release heat.  Stir in sugar and salt.  Once batter is tepid or cool, add eggs and vanilla and stir to fully combine (don't add the eggs while the batter is hot or you'll end up with scrambled eggs).  Gently fold in the flour until it's just incorporated.  Be sure not to over mix.

Bake for 35-40 minutes or until brownie starts to pull away from the sides of the pan and a toothpick inserted has a few crumbs attached.  Cool in the pan.


Strawberry Sauce
adapted from Everyday Insanity

1 cup chopped strawberries (chopped in 1/4 inch to 1/2 pieces)
1/2 cup sugar (if your strawberries are very sweet you could cut sugar in half)
1 1/2 teaspoons cornstarch
1 teaspoon lemon zest

Combine all ingredients and small saucepan and heat on medium high.  Bring to a rapid boil and stir for one minute at rapid boil.  Remove from heat and allow sauce to cool.


Monday, April 16, 2012

Grasshopper Bars


Its already time for the latest installment of Club: Baked.  For those of you who don't know, Club: Baked is a small group of bloggers baking our way through the book Baked: Explorations by Matt Lewis and Renato Polifito.  We bake twice a month, on the 1st and 15th (don't tell anyone that today is the 16th).  Each week, one of the Club: Baked members is the hostess and picks the recipe that the whole group will make and we all post our results on the same day (or maybe some people post a week late sometimes, maybe).  Anyway, it's always fun to see everyone's posts and how they fared with the recipe.  This week's recipe for grasshopper bars was selected by Kirsten of The Sweet Swiper.

I had high hopes for this...I'm a big chocolate mint fan.  I really enjoyed the Chocolate Mint Thumbprint cookies when the group made them last year.  I have no will power when it comes to Girl Scouts Thin Mint cookies and I think mint chip ice cream is the bomb.  So I was pretty excited to see this recipe come up on the roster. I stuck to the recipe pretty closely, even resisting my normal temptation to half it.  My only changes were to use a teaspoon of peppermint extract in place of the cream de menthe called for (couldn't find it at my local grocery store) plus a few drops of green food coloring to get that pale minty color.  I also cut the amount of butter in the chocolate glaze in half (mostly because I was too lazy to get another 1 pound butter packet out to cut some more).

Here's what I liked about the recipe.  The frosting is where it's at!  It is smooth, silky and minty.  It's an unusual (to me) butterceam frosting method that starts with boiling milk, cream, sugar and flour together in a sauce pan and then once thickened, it gets transferred to a stand mixer and you beat on high until all the heat has been released and the mixture is fully cooled. Toss in the butter and beat it until you have a magical fluffy frosting.  The Baked boys use this same method in other recipes, like this absolutely delicious caramel buttercream.  What I like about this buttercream method is the frosting isn't overly sweet and it's really light and and airy (traditional buttercream is too sweet and heavy to me). 

Look how dreamy the frosting is...


I didn't love the brownie base.  I'm not sure if I overcooked it...they actually recommend under baking it to give it a fudgy texture.  It just didn't have a that deep fudgy flavor I was looking for.  Though these didn't turn out perfectly, I would like to give them another go because the frosting is so stinkin good and I'm total sucker for chocolate mint desserts.

To get the recipe head over to Kirsten's blog.  To see how other Club: Bakers grasshopper bars turned out, click here.

Sunday, November 13, 2011

Ooey Gooey Caramel Pumpkin Blondies


See that caramel peeking through the top?  That's ooey gooey goodness.  I was completely mesmerized by the words "ooey gooey" when I spotted this recipe on the Tasty Kitchen site about 2 weeks ago.  I bookmarked it and like many things, promptly forgot about it.  Sometimes I worry about my memory, or lack of.  Fast forward 2 weeks.  I picked up a large can of pumpkin puree at the store over the weekend, not sure what I would use it for.  But I figured a girl should have some pumpkin on hand in the month of November, you know, just in case.  Combing the depths of my memory did not send the light bulb off that I should make this recipe.  I was actually thinking a brownie might be nice on a cool Sunday afternoon.  I pulled up my brownies/blondies favorites folder online and that's when I saw the "ooey gooey" recipe.  The minute I spotted it, I knew these had to be made.  Especially since I had a hefty portion of caramel sauce left over from the previous week's caramel apple cupcakes.

I wouldn't necessarily describe this as a blondie.  It's more like a snack cake.  It's soft and cakey and has that ooey gooey caramel layer running through it.  The original recipe calls for chocolate chips and walnuts to mixed in with the ooey gooey layer, but I opted just for the chocolate chips.  I also added chocolate chips on top.  If you are a nut person, I think pecans would be great in this (I'm not really a walnut fan).  Though I generally avoid nuts in most desserts, I almost wished I had added pecans to at least half the pan.  These snack cakes are so soft and tender that a little crunch would bring a nice texture crunch. 

These keep well for about 5 days stored in an airtight container.  This served as my breakfast for at least 4 days this week.  Good stuff!

Enjoy!

Ooey Gooey Caramel Pumpkin Blondies (with Chocolate and Walnuts)
from Lauren's Latest via Tasty Kitchen

Ingredients:

For the blondies:
3/4 cup butter, softened
1 cup packed brown sugar
2 eggs
1 teaspoon vanilla extract
1 cup pumpkin puree
1 teaspoon cinnamon
1/2 teaspoon nutmeg
1 3/4 cup all purpose flour
1 teaspoon baking soda
1/4 teaspoon salt

For the filling:

1/2 cup chopped walnuts
1/4 cup semi sweet chocolate chips
1 – 14 oz. package caramels, unwrapped
1/4 cup heavy cream

Preheat oven to 350 degrees F. Lightly grease 9×13 pan with non stick cooking spray and set aside.

In a medium bowl whisk the flour, cinnamon, nutmeg, baking soda and salt together.  Using a mixer, cream butter and sugar until light and fluffy. Add in eggs, vanilla and pumpkin and mix on low until combined. Slowly incorporate the dry ingredients into the batter. Mix until just incorporated. Spread 2/3 of the batter into the prepared pan and spread evenly. Sprinkle nuts and chocolate chips on the batter.

Make the caramel filling by placing the unwrapped caramels and the cream into a medium heat proof bowl. Microwave on high in 20 second intervals until caramel is smooth and completely melted, stirring in between intervals.

Pour melted caramel over the chocolate and nuts. Spread the caramel layer evenly with an offset spatula, butter knife or spoon.  Place dollops of remaining batter on top of the caramel layer. Gently spread the dollops out to try and get a smooth layer of batter. Don't worry if some of the caramel is showing though.

Bake for 25 minutes or until edges are golden and toothpick comes out clean when inserted.
Cool completely before serving. Serve with vanilla ice cream or whipped cream.

Sunday, July 18, 2010

Sweet Melissa Sundays: Chocolate Brownies


For once I baked a Sweet Melissa Sundays recipe ahead. And thank goodness because the heat has been sweltering this week. My oven is officially on hiatus.

Here's what I liked:
*Yielded a reasonable quantity of brownies
*Texture was nice....a little fudgy, but not too fudgy
*Super easy to make


Here's what I thought was ok:
*The taste didn't wow me. They weren't chocolaty enough. I did make a sub on the chocolate using 70% dark instead of unsweetened (my fault, I misread the recipe). I tried to make up for it by adding some unsweetened cocoa powder but it didn't do the trick.

Here's what I didn't like:
*2 sticks of butter might have been overkill. I almost felt like I could taste the butter in the finished product when I wanted to be tasting more chocolate. I added chocolate ganache to half the brownies to pump them up. But it still didn't move these any closer to the "wow" category.


The quest for the perfect brownie continues. I was checking out Tracey's Culinary Adventures and I want to try Dorie Greenspan's recicpe. This one looks like my kind of brownie.

Thanks to Tiffany at A Spoonful of Laughter and a Heap of Love for choosing this week's recipe. See the tasty creations of other SMS Bakers here.