Showing posts with label frosting. Show all posts

Tuesday, January 24, 2012

Spice Cake with Orange Cardamom Cream Cheese Frosting


I remember my Grandma making two kinds of cakes when I was growing up.  Chocolate cake and spice cake.  Both were from a box mix.  And both were topped with creamy fluffy white frosting laced with fresh orange zest.  I think it was cream cheese frosting, but I really don't know for certain.  Maybe she made other kinds of cakes too.  I'm sure she did.  But only these two stand out in my memories. 

Thinking of my Grandma's cakes makes me smile.  Her cakes mostly made appearances for birthdays.  When I was kid I was always excited to arrive at her house and see a frosted cake sitting on the counter top, but knowing the cake was not yet in my reach.  I had to patiently wait for dinner to be served and finished before the cake was adorned with birthday candles.  The hardest part was making it through the last stretch...my families rendition of the "Happy Birthday"song.  We are not singers.  Finally the candles were blown out and the round, stacked, two layer cake was cut into wedges.  Everyone received an enormous portion to savor.  Ah!  So light and moist and coated in a generous layer of orange frosting.  How could that not make you smile?


To date orange cream cheese frosting is one of my favorite frosting flavors.  I adore it paired with both chocolate and spice cake.  It's been quite some time since I've enjoyed the spice cake/orange frosting combination.  Last year I picked up a box of spice cake mix that was on sale.  I didn't have a specific plan or occasion for it, but I when I saw it I thought about my Grandma's cake and that I should have it on hand for, you know, whatever.

Whatever finally came 2 weekends ago when Hubby's Dad was in town.  It was no one's birthday, but we needed something sweet to finish off our day of football watching and appetizers.  Oranges were in the fridge along with some cream cheese.  The spice cake box was in the cupboard.  It was meant to be.  I kept it simple and just did a single layer cake in a 9 x 13 pan.  I decided to put a little twist on my normal frosting recipe and added cardamom (a fairly new spice) to bring in another layer of spice. 

The cake turned out just right.  It was light, tender and incredibly moist (don't underestimate the power of boxed cake mix my friends!).  The frosting was perfumed with sweet oranges and warm spice notes with an ever so slight crunch from the specks of ground cardamom. 

I smiled when I took my first bite.  And every last bite.   

Enjoy!


Spice Cake with Orange Cardamom Cream Cheese Frosting

Cake:
Prepare a box spice cake mix according to package instructions or use your favorite homemade spice cake recipe.  Use what ever size pan you like.  The frosting is enough to coat and fill two 8 inch round cakes.  If you bake a 9 x 13 cake, you could half the frosting recipe or have leftovers for another baking project. While cake is cooling prepare the frosting.

Frosting:
8 ounces cream cheese at room temperature
8 tablespoons (1 stick) of unsalted butter at room temperature
16 ounces (1lb) of confectioners (powdered) sugar
1 teaspoon vanilla
1/2 teaspoon ground cardamom
2 tablespoons of orange zest (about 2 large oranges)

In a stand mixer combine the cream cheese and butter and beat on medium until fluffy, about 1 minute.  Add the sugar in 3 batches on low speed until combined.  Increase mixer to medium high speed and beat until light and fluffy, about 2 minutes.  Add vanilla, cardamom and orange zest and beat until fully combined. 


Sunday, January 1, 2012

Devil's Food Cupcakes with Angel Frosting


2012 has arrived!  Happy New Year!

Did anyone else wake up this morning searching for the Rose Parade on TV, but didn't find it?  It took me about half hour to figure out that when new year's day falls on a Sunday, the Rose Parade and Rose Bowl actually take place on Monday.  With no Rose Parade to watch I decided this was the perfect time to bake the first Club: Baked recipe for 2012, Devil's Food Cake with Angel Frosting.

For those of you who don't know, Club: Baked is an online baking group where a group of us are baking our way through the book Baked Explorations by Matt Lewis and Renato Poliafito.  The group was founded last July by Karen of Karen's Cookies, Cakes and More.  The group bakes twice a month.  Each week we all make the same recipe which is selected by that particular week's hostess.  So far we've baked some pretty awesome treats.  A few of my 2011 favorites have been New York Style Crumb Cake, Buckeyes, Sunday Night Cake, the pastry cream from the Boston Cream Pie recipe and the Caramel Apple Cake.  You can join us on our baking adventure by getting in touch with Karen via the Club: Baked site.  The more the merrier!


I was excited to see the first recipe of 2012 was Devil's Food Cake with Angel Frosting chosen by Natalie from Just About Food.  Chocolate cake is one of my favorite desserts to eat.  This one is topped with "Angel Frosting", which is essentially homemade marshmallow fluff.  The silky sweet marshmallow frosting is a nice contrast to the deep dark chocolate flavor.  My Hubby, who you may recall is not a big dessert guy, and is especially not a big chocolate guy, declared the frosting a success!  Not surprisingly, he didn't care for the cake.  Luckily, I have a ton of frosting leftover as I made the whole frosting recipe, but only made half the cake recipe for my mini cupcakes.  Hubs can eat the frosting by the spoonful to satisfy his sweet tooth. ;)


A few baking notes.  The cake recipe calls for hot coffee, however I'm not a fan of coffee in my desserts (even though people swear the taste is undetectable in the final product--I can always taste it).  So instead I dissolved 1 teaspoon of cocoa powder with hot water.  It worked out fine and the cake still had a deep chocolate flavor.  I made mini cupcakes and they took about 17 minutes in a 325 degree oven.  I was worried I would have trouble with the frosting.  I have had some failed attempts in the past with frostings that call for a hot sugar mixture to be streamed into the frosting.  I followed the recipe exactly and I was pleased to see that it came together easily with no issues.  To see how other Club: Bakers cakes turned out click here.

Though I enjoyed this cake, the chocolate cake from the Sweet Melissa Baking Book is still my go to chocolate cake recipe.  The angel frosting recipe is, however, a keeper.  It would be great with a white cake and a lemon curd filling...almost like a lemon meringue cake.  Sounds like a good idea for Hubby's birthday in early March...

Here's to 2012!  I'd like to raise a cupcake to toast the start of a great year!

Devil's Food Cake with Angel Frosting
from Baked Explorations

For the Cake:

1 ounce good quality dark chocolate (60-72% cacao), broken into a few pieces
1/2 cup dark unsweetened cocoa powder
2/3 cup hot coffee (I used hot water with a teaspoon of cocoa powder dissolved in it)
1/3 cup whole milk
1 1/3 cups all purpose flour
1 teaspoon baking soda
1/2 teaspoon salt
10 tablespoons (1 1/4 sticks) unsalted butter cut into 1/2 cubes, softened
1 cup firmly packed dark brown sugar
1/2 cup granulated sugar
3 large eggs
1 teaspoon pure vanilla extract

Preheat oven to 325 degrees F.  Butter two 8-inch round cake pans, line the bottoms with parchment and butter and flour the pan, including the parchment, discarding excess flour.  Or make cupcakes by placing liner in the wells of a muffin tin. 

Place the cocoa powder and chocolate pieces in a medium heatproof bowl and pour hot coffee over them and whisk until combined.  Add the milk and whisk until combined.

In a medium bowl sift together flour, baking soda and salt and set aside.

In the bowl of a stand mixer fitted with the paddle attachment, beat the butter and 2 kinds of sugars on medium speed, about 3 minutes, until fluffy.  Add the eggs one at time, beating until each egg is fully combined.  Add the vanilla and beat until incorporated.  Scrape down the bowl and mix until for another 30 seconds. 

Add the flour mixture in three parts, alternating with the melted chocolate mixture.  You should begin and end with the flour mixture.

Divide the batter evenly among your cake pans or cupcake liners.  If you are making cakes, bake for 35 - 40 minutes, rotating the pans halfway through.  If you are making cupcakes, bake 18 - 20 minutes.  Test your cake or cupcakes with a toothpick.  If it comes out clean they are done.  Remove from oven and cool on a wire rack, until cakes or cupcakes are mostly cooled. 

For the Angel Frosting:

5 large egg whites, at room temperature
1 1/2 cups granulated sugar
1 tablespoon light corn syrup
1 teaspoon vanilla paste (or 1 1/2 teaspoons pure vanilla extract)

Place the egg whites in the bowl of a stand mixer fitted with the whisk attachment and set aside.

In a medium saucepan combine 1 1/4 cups of the sugar, the corn syrup and 1/4 cup of water and place over low heat.  Once the sugar dissolves increase the heat to medium-high and attach a candy thermometer to the side of the pot.   Heat the mixture WITHOUT STIRRING, to almost a soft-ball stage (about 235 degrees).  Mixture should not be heated above 235 degrees F.

While you are waiting for the syrup to reach the softball stage, whip the egg whites on medium speed until soft peaks form.  Do not beat beyond the soft peak point.

When the syrup mixture reached the soft-ball stage removed from heat. 

Sprinkle remaining 1/4 cup of water over the soft peak of the egg whites and turn the mixer to low.  Slowly stream in the the hot sugar syrup.  Once all the syrup has been added, increase the mixer speed to medium-high and beat the icing for about 7 minutes until it is thick and shiny.  Add the vanilla and  beat again until combined.

Assemble the cake (or cupcakes):

For cakes: place one layer on a serving platter and trim the top to create a flat surface.  Spread about 1 cup of frosting on top.  Place the second layer of cake on top and trim to create an even surface.  Frost the tops and sides of the cake.  Serve immediately.

For cupcakes: Simply top with frosting.  You can you use a decorative tip to pipe on the frosting or use a knife to spread it on.  For even more frosting, cut a cylinder shape out of the middle of the plain cupcake and remove the cake.  Fill with frosting (using a piping bag or a ziptop bag with the corner cut off) and replace the cake that you removed.  Proceed with frosting the top of the cupcake.

Tuesday, November 1, 2011

Caramel Apple Cupcakes


"It tastes like fall."

That is what my uber picky particular Hubby said when he tasted these cupcakes.  For those of you who don't know my Hubby or are new to the blog, that, my friends, is what I like to call a rave review!  Because tasting like fall is a good thing.  And he is absolutely right, these cupcakes do taste like fall.  The flavors have all the goodness of fall, with apples, cinnamon and other warm spices along with a delicious buttery caramel flavor pulling it all together. 

Caramel Apple Cake was Melissa from the Lulu the Baker's pick for this week's Club: Baked baking assignment.  And the timing couldn't be better coming right around Halloween.  Who doesn't love a caramel apple?  The recipe as written from Baked Explorations is a massive 3 layer cake that can be presented in a few impressive ways.  Below is a picture of how the cake appears in the book.


I also came across this amazing presentation from the Great Cake Company.   Jaime made the cake look like a giant caramel apple, stick included!  You have to pop over to her site to see her gorgeous cake.  It's really stunning.

If you have a party to go to this fall, this cake would surely be a crowd pleaser.  It would also make a nice addition to a Thanksgiving dessert round up.


This monster cake was too big for just Hubby and me so I halved the recipe and ended up 12 standard size cupcakes and 12 mini cupcakes...still way more than enough for the 2 of us!  I ended up giving some to my neighbor who has 4 year old twin girls and a friend helped take a few more off our hands. For the twins I decorated the tops of the cupcakes with caramel circles and made them look like spider webs (much like the photo above from the book).  I placed a spider ring in the middle of each cupcake.  Now I'm regretting that I didn't take any photos...laziness does not pay off!  Anyway, when I brought the cupcakes over the girls were immediately excited about the spider rings and licked the frosting off and put the rings on.  I chatted for a bit with my neighbor and her girls.  I had a conversation with one of the twins that went something like this,

Where do you live?
I live 2 doors down.

What's your name?
Gloria

Do you have any daughters?
No, sweetie, sorry I don't

Can you make some?
Um...I can make cupcakes 

Kids are hilarious. 

Now, on to the cupcakes.  Three components make up this tasty dessert.  Apple spice cake.  Caramel buttercream.  Caramel sauce.

The apple spice cake is soft, light and moist and really delicious.  It could stand all on it's own.  With a simple apple glaze or even a dusting of powdered sugar and this would be a great cake (you could do 1/3 of the recipe to get an 8 inch cake).  I do have one minor comment about the cake..the apple flavor seemed to fade a little bit the day after I baked it.  The apple flavor was very pronounced, no mistaking, this is apple cake on day one.  On day two, it was more like this is a really good spice cake...is there a hint of apple in there?  I used store bought apple sauce, instead of making my own.  I also substituted 1/2 cup (of the 2 cups) of the apple sauce, for homemade apple butter I had made the same day.  I wonder if the spices in the apple butter were too much?  I would have thought the apple butter would give it a more "apple-y" flavor.  Next time I might use the applesauce recipe posted on the Great Cake Company blog as she mentions the use of boiled cider in her applesauce and that it gives an intense fresh apple flavor.  There is also a recipe for homemade applesauce in Baked Explorations.


The caramel sauce was pretty dreamy.  I made the full recipe for this component figuring I might use the left overs to top ice cream. A few the other bakers in the group seemed to have issues with the sauce being a little on the thin side.  I found it to be somewhat thin, but after sitting on the counter for an hour or so it thickened slightly and was just right.  The only issue I had with the caramel sauce was one of my own doing.  I tend to read through recipes quickly and that's what I did here.  They recommend cooking the caramel until it is a rich amber color or you can wait until the mixture reaches 300 degrees on a candy thermometer.  I just saw 300 degrees, so I took the sauce off the heat once it reached 300 and added the butter and cream.  Then I realized that my caramel was very pale in color.  I hadn't waited for it to take on the right color.  So I threw it back on the flame and cooked for another 5 minutes or so and it gained a small amount of color.  I didn't want to risk overcooking it, so I ended up with a pale caramel.  Though pale, it's still super yummy.  I think you could get away with reducing the butter by half in this recipe and still get a good result.  Note, I'm saying that without actually having tried it.  But I might try that next time.

Lastly, there was caramel buttercream....this was like no frosting recipe I've ever made.  It started with boiling a mixture of sugar, FLOUR, milk and cream until thickened.  I would never imagine flour to be in frosting, but that's what I love about Club: Baked...learning new things.  And this was a great thing to learn, because this frosting was awesome.  It was smooth and silky with just the right amount of sweetness.  I generally don't care for buttercreams because I find them to be overly sweet and buttery tasting.  I'm all about butter, but I don't want my frosting to taste like butter. 

The trick to this frosting is patience.  I had read in the P&Q that some bakers had trouble with the frosting and others suggested continuing to beat the frosting until it reached the desired consistency.  So I took that into account when I made it.  The boiled sugar, flour, milk cream mixture goes from the stove top to your stand mixer where you mix on high until the frosting cools.  This took maybe 8 minutes or so....I kept feeling the outside of the bottom of the mixing bowl and when there was no more warmth, I moved on to adding the butter and caramel sauce.  Then I let it beat for probably another 6-7 minutes.  At first it seemed thin but, slowly, it became more and more fluffy and eventually resembled frosting!  Really delicious frosting.


I'm not going to lie, this cake is not a let's throw this together in a hour kind of cake.  It's quite a bit of work and a lot dishes.  But the result was absolutely worth the effort.  You could make it a little more palatable by breaking up the work and making the caramel sauce the day before (as well as the applesauce, if you are doing homemade). This recipe is moving into the keeper file for certain. 

To get the recipe, head over to Lulu the Baker. Thanks for choosing such a fabulous recipe! To see how other Club: Baked bakers did with their cakes, click here.

Thursday, September 15, 2011

Banana's Foster Fritters


The first time I remember having bananas foster was early on in my dating life with Hubby.  We went to a dinner party hosted by one of my co-workers at the time and they made it for dessert served over ice cream. As I watched my co-worker's husband make the dish, I was wowed by the drama of it.  The rum caught on fire lighting up the pan while the bananas flambeed amdist a gooey caramel like rum sauce.  What I was most impressed with was the simple ingredients involved and how quickly a delicious and impressive dessert came together. 

Baked Explorations Banana's Foster Fritters are inspired by the classic dish.  It's bananas foster meets donut.  I was worried this would be a lot more complicated than its inspiration dish.  But it really wasn't.  The dough is very simple and comes together quickly and easily.  The rum dipping sauce takes just a few minutes in a saucepan.  The most challenging part was the frying.  I still struggle with frying and getting oil to the right temperature.  The recipe recommends 375 degrees, but I found that too hot.  My first fritter was very dark on the outside but still raw on the inside.  I lowered the heat and found 350-360 worked best for me, however, the outside was still a tad darker than I would have liked it to be.  But at least the dough wasn't raw!  As you can see I gave these a solid dusting of  cinnamon powdered sugar.


The result?  A crisp texture on the outside with a moist cakey inside.  The bananas are incorporated into the dough and the dipping sauce is what makes this a "fosters" fritter instead of just a banana fritter.  With brown sugar, butter and a little rum, among other things, the sauce has the same flavor as the gooey goodness from a traditional banana's foster.  Seems like the sauce was a big hit with many of the Club: Baked bakers.  Some have even suggested this would be a good sauce/syrup for pancakes, waffles or french toast or a topping for ice cream.  All great ideas!

Oh, I almost forgot to tell you the best part!  You probably already noticed in the pictures, I added chocolate chips into the dough of a few of the fritters.  I love banana and chocolate together.  It was delicious!


Hubby enjoyed these (the ones without chocolate chips of course), which is always a pleasant surprise coming from my non dessert loving husband.  I made half a batch and ended up with 8 small fritters.

Thank you to Stephanie of Ice Cream Before Dinner for choosing this week's tasty recipe.  You can find the recipe over on her site.  To see how other bakers did with their fritters head over the Club: Baked site

Next up on the Club: Baked roster...Pumpkin Cheddar Muffins on October 1st.  I'm not gonna lie, this one sounds a little odd to me.  I have had mixed feelings about savory muffins in the past.  But I'm curious about the combination of pumpkin and cheddar.  This one is definitely outside my comfort zone--which isn't a bad thing!

Thursday, September 1, 2011

Boston Cream Pie


Pastry cream.  Pastry cream.  Pastry cream!

Boston Cream Pie (which is really in fact a cake, not a pie) is filled with sweet delicious vanilla and chocolate pastry cream.  I am super jazzed that I have finally made pastry cream.  I think my life has been incomplete without it.  Well maybe that's a slightly dramatic, but really I can't get over how much I love pastry cream.  Pastry cream is a pudding like filling often used between cake layers or to fill cream puffs or donuts.  I have eaten it before, but have never made my own.  Lucky (or perhaps unlucky) for me it is very easy to make.  I could not stop dipping my (of course impeccably clean) fingers into the bowls to get just another taste.  Then I did something I haven't done in years....I licked the bowl.  Well not really.  I used a spatula to scrape all the delicious remnants straight into my mouth.  I didn't let any of this precious magic cream go to waste.  I was little skeptical about using 2 flavors of pastry cream.  I believe traditional Boston Cream Pie only uses vanilla.  But the chocolate and vanilla pastry creams were equally delicious. 


Is it really obvious I adored the pastry cream portion of this dessert?  I guess I need to discuss the other components now.

Let's start with the milk sponge cake.  It had a slightly bizarre texture.  Almost a little tough?  But still moist?  Is that even possible? I don't know.  When you layer all that tasty pastry cream in there it's hard to tell.  I don't think I'd use this sponge cake recipe next time I make Boston Cream Pie (already planning for the next time!).

The cake is topped with rich chocolate ganache-like glaze/frosting.  I thought the topping was pretty delicious and love the contrast of the dark chocolate glaze with the soft luscious pastry cream.  See how I took it back to the pastry cream? 

Overall, this is a pretty special dessert.  Even hubby liked it....well sort of.  Guess what?  He only liked the (vanilla) pastry cream!  He said the cake was "weird" and he's not a chocolate fan.  But like me, he couldn't keep his (not so impeccably clean) fingers out of the vanilla pastry cream.  I am already looking forward to eating this again for breakfast!


Making a Boston Cream Pie is a bit involved with three (well technically four) separate components that have to be made then all assembled.  Consider making the pastry cream the night before you plan to serve the cake.  It needs to chill for 4 hours (or overnight).  You could also chop your chocolate for the chocolate glaze at the same time you chop the chocolate for the chocolate pastry cream and store it in a tupperware for use the next day.  The day you want to serve the Boston Cream Pie bake the sponge cake and once cooled store the layers wrapped in plastic wrap in the refrigerator while you make the glaze.  The cake is easier to slice in layers when it is chilled. 

I halved the recipe and baked the cake in 2 six inch cake pans.  My cake layers were on the thin side because of the size pans I used, but it worked out ok, because the layers of pastry cream were about equal in size to the layers of cake.  Can't get enough of that pastry cream.

Ok, this is ridiculous.  I have used the words "pastry cream" 20 times in this post thus far.  I will consider seeking help.  Right after I think of other ways to incorporate pastry cream into my life...


Boston Cream Pie marks recipe number 5 with Club: Baked.  You see, a group of food bloggers are baking our way through Baked Explorations by Matt Lewis and Renato Poliafito.  So far the recipes have been pretty darn impressive.  If you'd like to join our baking adventure head over to the Club: Baked site and get in touch with Karen.  It's a ton of fun, a great way to learn new things and meet some great people.  To see how the other bakers of Club: Baked did with their Boston Cream Pies, click here.  At a minimum, I am pretty certain your life would be enhanced by a little pastry cream.  ;)
     

Monday, August 15, 2011

Sunday Night Cake with Orange Cinnamon Glaze


Is anyone getting anxious for fall?  The weather has been pretty mild this summer in Southern California, and I doubt there will be a huge change when fall officially hits.  Just a few degrees cooler and it will signify it's time to start baking all the warm and wonderful fall flavors...cinnamon, ginger, cloves and allspice, pumpkin and apples.  Though I love the flavors of summer, like watermelon and sweet corn, I'm starting to get a little fall bug.  That's why I made a little twist on this week's Club: Baked pick by Julie of a Little Bit of Everything

This week marks the 4th recipe we are baking from Baked Explorations.  Julie picked Sunday Night Cake for the group to make.  The authors describe this cake as a "no frills-affair....it is an exceedingly, pleasing, simple and delicious gently spiced sour cream cake with easy chocolate frosting".  My eyes lit up when I saw the cake had cinnamon as one of the components.  My original intention was to make the recipe as is.  But earlier this week I made this chocolate cake recipe and this chocolate cream cheese frosting recipe for a co-workers send off party.  Then I used the leftover chocolate cream cheese to fill peanut butter whoopie pies (to be posted later this week). 


I can't believe I'm about to say this, but this chocolate girl was feeling a bit chocolated out.  The authors of Baked Explorations suggest you can make this cake even simpler by skipping the chocolate frosting and giving it a simple dusting of powdered sugar.  I contemplated that thinking Hubby would be more likely to help me eat it with powdered sugar.  Then I decided I wanted a something a little more....what could I do and still keep in the spirit of the "ease and comfort" of the Sunday Night Cake?


I looked over my fridge and saw that I had half an orange that needed to be used up.  And the orange cinnamon glaze was born!  This glaze is extremely easy and is delicious with the lightly spiced cake.  To make the glaze I started with powdered sugar, added in a bit of orange juice, orange extract, a pinch of cinnamon and a bit of heavy cream.  Sometimes when I make up my own recipes, I'm not always in love with the result.  But this was awesome.  I loved the flavors of the orange and cinnamon and how they paired with the moist buttery cake.  It was a nice preview of fall and has got my mind turning, thinking about the recipes I plan to make this season. 


Other notes about this recipe.  The original recipe makes a 9 inch square cake.  I halved the recipe and used a 6 inch round cake pan.  I was too lazy to half one of the eggs, so there is an extra half egg in my cake.  I added 1/2 teaspoon of vanilla extract because I couldn't resist.  And the last modification was I used dark brown sugar instead of light brown sugar (again, because I was lazy and didn't want to open the light brown sugar when the dark was ready to go).  While baking, the cake rose about 1/4 inch over the top of the cake pan.  But it shrank down a bit and ended up being exactly 2 inches tall.

And this will come as no surprise, but I've eaten this twice for breakfast already and loved it!
To get the cake recipe, head over to A Little Bit of Everything.  To see what other Club Bakers did with their Sunday Night Cakes, click here.  If you want to join our baking adventure through Baked Explorations, hop over to the Club: Baked site and reach out to Karen.  It's a lot of fun and you get to eat delicious treats, like this Sunday Night Cake.


Orange Cinnamon Glaze

2/3 cup powdered sugar
1 tablespoon fresh orange juice
1/4 teaspoon orange extract (more if you want extra orange punch)
Pinch (generous) of cinnamon
2-4 tablespoons heavy cream

In a medium bowl whisk powdered sugar, orange juice, orange extract and 2 tablespoons of the heavy cream until fully combined.  Add additional tablespoons of cream to get to a pourable yet slightly thick consistency.

Yields enough to generously glaze 6x2 inch cake.

Saturday, July 30, 2011

Vanilla Cupcakes


I love it when I have an actual occasion to bake for.  I find most of the time I am baking for a baking group assignment or just because I have a compulsion to bake every few days or so.  So when I saw my friend Sharon's birthday was coming up on the calendar my mind kicked into to gear to decide what  to make for the occasion. 

Cupcakes!  Everyone loves cupcakes right?

Sharon's favorite cake is vanilla cake with vanilla frosting.  I rarely make white cake (since I'm a chocolate girl through and through), so I went in search of recipe.  I added Martha Stewart's Cupcakes cookbook to my collection a few months back but had not had the opportunity to break it in.  If you can call making one recipe breaking it in...we are now broken.  I made her white cupcake recipe.  I cheated a bit on the frosting and used Trader Joe's white frosting box mix.  And to spruce it up I filled the cupcakes with raspberry jam. 

The cake was light and tender.  The frosting was super sweet...think buttercream.  And the tartness from the raspberry jam brought it all together.  Next time I would try a lighter frosting...like this whipped cream frosting.  When we ate them I think we all had a major spike in our blood sugar, but they were still tasty!

Enjoy!


White Cupcakes
from Martha Stewart's Cupcakes

3 1/4 cup of sifted cake flour (not self-rising)
1 1/2 tablespoons baking powder
1/4 teaspoon salt
1 tablespoon vanilla extract
1 cup plus 2 tablespoons milk
1 3/4 sticks unsalted butter at room temperature
1 3/4 cups sugar
5 large egg whites at room temperature

Preheat oven to 350 and line muffin tins with paper liners.  In a medium bowl, sift cake flour, baking powder and salt and set aside.  Stir vanilla into milk and set aside.

Cream butter with an electric mixer on high until smooth.  Slowly add in sugar and beat until the mixture is pale fluffy.  Reduce speed to low and add flour mixture in thirds alternating with the milk mixture until everything is just combined.

In separate bowl beat eggs whites on medium speed with an electric mixer until stiff peaks form.  Fold a third of the egg whites into the batter to lighten the batter.  Gently fold in the remaining egg whites in two batches until just incorporated.

Use an ice cream scoop or spoon to fill cupcake liners 3/4 full.  Tap muffin tins on the counter top to release any air bubbles.  Bake for 18 - 20 minutes, rotating the pans halfway through baking.  A toothpick should come out clean.  Cool on a wire rack. 

To fill cupcakes with raspberry jam, cut a cone shaped hole out of the top center of the cupcake and set it aside.  Fill with a teaspoon or so of jam and then replace the cut out piece of cake to fill the hole.  To see an example of filling a cupcake, click here.

Top cupcakes with a frosting of your choice.

Tuesday, April 5, 2011

Chocolate Chip Cookie Dough Cupcakes


Do you all remember the cookie dough ice cream craze back in the 90's?  People couldn't get enough of Ben & Jerry's Cookie Dough ice cream.  I, however, was not one of those people.  I thought it was okay, but definitely not in my top 10.  It probably had to do with the fact that the chunks of cookie dough were nestled in vanilla ice cream.  If you haven't already figured it out by now, I am a chocolate girl through and through.  Now, wave a pint of a Ben & Jerry's Chocolate Fudge Brownie under my nose and I'm yours!  At least long enough to pry the pint out of your hands and get my spoon in there.

Even though I'm not a cookie dough fanatic, I have been intrigued by the cookie dough cupcakes I've seen on some of my favorite food blogs.  The cookie dough cupcake over at Tracey's Culinary Adventures is downright adorable.  Kevin and Amanda's blog features a cookie dough filling that is actually baked in the cupcake.  But it seems all the recipes I found online, at least in some part, center around the one found on Annie's Eats (which came from a few different sources). 

My brother and his 3 kiddos came over for a barbecue this past weekend and I thought they would be the perfect taste testers for the chocolate chip cookie dough cupcakes.  What kid doesn't like cookie dough? 

I did switch up the recipe a bit and used a chocolate cake base instead of a white cake base.  Had to get in  a little something for us chocolate lovers.  Okay, it was for me.  And....the kids too....yeah.  The chocolate cake was filled with chocolate chip cookie dough (an eggless version so that you can enjoy that raw cookie dough texture without fear of salmonella), frosted with cookie dough buttercream and topped with a homemade chocolate chip cookie.  This cupcake is not for anyone watching their calorie or sugar intake.  I cannot even fathom how many calories are in just one of these little babies.  It's a rich and decadent treat and there's no doubt it's all about the cookie dough.  Prepare to indulge!


I have to pause to give a shout out to my awesome new cupcake stand.  My gal pals gave me this really cool display for my birthday.  And they also gave me this cupcake carrier that I keep meaning to photograph and share here...because I've already used it 3 times in the last 2 months.  What's so cool about the carrier is you can bake cupcakes in it and then transport them.


Back to the cookie dough cupcakes....In my research I found 2 approaches for the filling.   The most common was to bake the cupcake and then cut out cone shape from the top and fill it with cookie dough.  The other option was to make cookie dough into balls or tube shapes and then freeze them (overnight if possible) and place the frozen dough in your cupcake batter and bake away.  I went with option 2.  On a side note, my cupcakes almost ended up with no filling because I popped these babies into the oven and about 90 seconds later realized they were missing their cookie dough filling.  Whoops!  I quickly pulled the cupcakes out of the oven and dropped in a ball of frozen dough.  Because the dough is frozen it doesn't bake through and retains its cookie dough consistency.  If you like a really soft cookie dough, you might try the bake and fill option instead.

Check out the inside! 


Now, let's talk frosting.  It is just like cookie dough in taste and texture.  This buttercream has confectioner's sugar and brown sugar, vanilla, salt and a bit of milk (if you need it to get to the right consistency).   The brown sugar provides that slightly gritty texture that you get from cookie dough.  The frosting is a pure sugar rush. 

Don't forget to top it off with a chocolate chip cookie!


I did a little experimenting with the chocolate chip cookie.  I adapted Melissa Murphy's chocolate chip cookie recipe and added a little extra butter and some toffee bits with milk chocolate.  The cookie wasn't quite where I wanted it to be so I won't share the recipe today...but I have some ideas on how to get it closer to my ultimate chocolate chip cookie. 

The cupcakes were a hit with the kids!  I've enjoyed a few over the last 3 days.  Ate it for breakfast (maybe twice)....with a big glass of milk.   


Check out Annie's Eats for the buttercream frosting and her cookie topper recipe.  You can find the chocolate cake recipe I used here and lastly, check out Kevin and Amanda for the chocolate chip cookie dough filling.

Enjoy!

Saturday, March 26, 2011

The Ginger Snap Girl Turns 1!


About 2 months ago I realized that I was approaching the one year anniversary of The Ginger Snap Girl.  Had that much time passed already?  I remember last year when I accidentally stumbled into the food blogging world and thought I had struck the motherlode!  How were there so many talented cooks and bakers out there sharing their stories, recipes and stunning photos and I never knew stuff like this existed?  I felt a little like a kid in a candy store and couldn't wait to sit down in front of my laptop each evening to peruse the eye candy for the next cool sweet treat to try in my own kitchen.  It was a bit obsessive really.  My Hubby thought I had been abducted by aliens because my myriad of TV shows were piling up on the DVR, unwatched.  Gossip Girl would have to wait. 

After about a week of engrossing myself in my new playground I started thinking about starting my own blog.  Why not?  To be honest I was actually scared and nervous.  What would I make?  What would I write?  What if it required technical computer skills? Who would read it?  What if no one reads it?  That would be kind of sad.  Then I thought, it really doesn't matter since I was pretty sure at least my Grandma Jane would read it.  Ok, let's do it!  Plus I was super excited to join an online baking group--Sweet Melissa Sundays which required having a blog. And so The Ginger Snap Girl was born (check out my first post). 

I floundered a bit in the beginning.  Trying to figure out how to use Blogger to get things to look right with the right spacing between the photos and text was a challenge.  It took me about 3 whole days just to figure out how to link to another website within the blog (this was pre updated Blogger editor).  Thankfully I got past the technical difficulties and was able to focus on what tasty creations I would be sharing with my Grandma Jane.  ;)

This past year has been quite a journey.  Starting a blog.  Finding out that Grandma Jane isn't the only one reading it.  Building new cyber friendships.  Learning soooo much.  It feels like my skills have increased exponentially, but yet I still have so many more I want to tackle.  The year was filled with lots of delicious desserts, such as this one, some not so delicious desserts, a few tears and a swear word or two.  I have learned more than I would have ever imagined when I set out to start this blog.  I have been humbled by it as well.  Apparently the ability to bake a few kinds of cookies doesn't make one an experienced baker.  I didn't even realize how many facets of baking and confections there were to accomplish until I started this adventure!

This past year I also fought a personal battle that caused me to take a brief break from blogging.  I was diagnosed with breast cancer at age 36.  Thankfully it was a slow growing cancer, stage 1, and I was successfully treated with surgery and localized radiation.  I feel incredibly lucky.  No chemo was needed and I have been officially cancer free for 6 months.  I haven't talked about that part of my life much in this forum, but will be planning to give it a little more air time in the coming year.  Since my diagnosis last September, I know 2 other women who have been diagnosed during that time, both with far more aggressive cancers than I had.  It's something that can touch all of us...whether it's you, your friend, sister or mother.  I look forward to the opportunity to bring more awareness to this form of cancer that affects so many of us.      

With all that has been accomplished in the last year I'm excited to celebrate my 1 year blog birthday milestone today.  And this also happens to be my 100th post.  I look forward to what is to come in the next year for The Ginger Snap Girl. 

So let's get to the good stuff now and eat some cupcakes!


One type of cupcake just wouldn't do for this celebration.  I started with my favorite cake flavor--chocolate.  I decided to make 3 chocolate cupcake variations encompassing some of my favorite flavor combinations.  Chocolate and chocolate.  Chocolate and strawberry.  And chocolate and peanut butter.  And to make things even more exciting I decided this would be a true adventure by trying out all new (to me) recipes. 

I used a chocolate cake from Dorie Greenspan's Baking book called, "Cocoa Buttermilk Birthday Cake".  sounds fitting, right?  Another blogger, Laurie (founder of the online baking group Tuesdays with Dorie), described the cake as, "The cupcake as a whole is by far the best cupcake I have ever made. Ever."  I was sold!  I made the cake and frosting Laurie made as one of my 3 cupcake variations.  The frosting was great!  The cake didn't turn out like Laurie's I'm afraid.  It was too dense and was on the dry side.  I'm not sure where I went wrong with the recipe.  But this is the risk you run when trying a new recipe for the first time (a subject for future thought).

(For the best chocolate cake I personally have ever made click here or here.  Another top chocolate cake contender is this one.)

In the meantime, the real stars of today's celebration are the frostings. 

May I present you with.....

Mr. Whipped Chocolate Cream Cheese Delight


The chocolate cream cheese frosting is packed with chocolate (cocoa) and has a light silky texture, finished with a little tang from the cream cheese.  Yummy.

Mr. Peanut Butter Buttercream Dream


This frosting packs a solid peanut butter punch but has such a light, airy, texture.  It has enough body to pipe and holds its shape beautifully.  It is peanut butter frosting perfection and is begging to paired with chocolate.  In fact I was thinking this would make a great filling for a homemade oreo cookie. Really delicious!  

And finally, my personal favorite...

Ms. Sassy Strawberry Cream Cheese Queen


The strawberry cream cheese frosting is divine.  The strawberry flavor comes from homemade strawberry preserves, which really "make" this frosting.  The texture is soft and luscious.  It doesn't have as much body as most cream cheese frostings because of the moisture of the preserves. I wanted it to have a more than a "light" strawberry flavor, so I was generous with the amount of jam I used. 

All three of these frostings are definitely keepers and will go into the arsenal of make again recipes.  The recipes can be found at the end of the post. 

Since this was a special occasion I had to fill these cupcakes too...

Ms. Sassy Strawberry was filled with same homemade strawberry preserves used to make the frosting. 


Mr. Peanut Butter was filled with the chocolate cream cheese frosting and chopped bits of Mini Reese's Peanut Butter Cups.  Oh, and I almost forgot to mention, before the frosting went on, he got a coating of chocolate ganache after the cupcake was filled (you can see it clearly in the peanut butter cupcake photo up above).


And finally, Mr. Chocolate was filled with more chocolate cream cheese frosting inside.  My original intention was to fill it with ganache...but since the cake was on the dry side I decided the frosting would help add a little extra moisture that ganache would not.


I have to give a huge thanks to my sister Katie who helped me make all the elements of this cupcake trio.  And thankfully she helped me eat them too as did many of my co-workers.  Though they weren't perfect, they were the perfect way to celebrate The Ginger Snap Girl turning 1!


Thank you to each one of you that takes the time to read my blog (especially those of you that have made it all the way through this post--I'm quite certain it takes the prize for longest rambling to date).  I hope you are inspired to get into your own kitchen and make some tasty creations. 


RECIPES:

For the Cocoa Buttermilk Birthday Cake recipe seen in the post click here.

Whipped Chocolate Cream Cheese Frosting

8 ounces cream cheese, at room temperature
6 tablespoons butter, at room temperature
4 heaping tablespoons cocoa powder (I used regular unsweetened cocoa powder)
2 1/2 cups powdered sugar (about)
1-2 tablespoons heavy cream (I used 1)

Cream the cream cheese and butter until fully incorporated and smooth. Add the cocoa powder, mix to combine. Add the powdered sugar until desired sweetness and consistency is reached. Add 1 tablespoon heavy cream, whip until light. Yields enough to lightly frost 24 cupcakes.

Peanut Butter Frosting
by Ina Garten from her book Barefoot Contessa at Home

1 cup confectioners’ sugar
1 cup creamy peanut butter
5 tablespoons unsalted butter, at room temperature
3/4 teaspoon vanilla extract
1/4 teaspoon kosher salt
1/3 cup heavy cream

Place the confectioners’ sugar, peanut butter, butter, vanilla and salt in the bowl of an electric mixer fitted with a paddle attachment. Mix on medium-low speed until creamy, scraping down the bowl with a rubber spatula as you work. Add the cream and beat on high speed until the mixture is light and smooth.  Yields enough to frost 12 cupcakes.

Chocolate Ganache
from Sweet Melissa Baking Book by Melissa Murphy

6 ounces best-quality semisweet (58%) chocolate
1/2 cup heavy cream
1 tablespoon light corn syrup
1. Coarsely chop the chocolate and place it in a medium bowl.
2. In a small saucepan over medium heat, heat the heavy cream until scalding, or until the cream is steaming and tiny bubbles have formed along the edges. Do not boil.
3. Pour the hot cream over the chocolate. Let stand for 5 minutes, then whisk until smooth. Stir in the corn syrup.

Strawberry Preserves

2 cups hulled and sliced fresh strawberries
1/2 cup of sugar (or more depending on the sweetness of your berries)

In a medium saucepan bring the berries and sugar to a boil, stirring occasionally.  Reduce heat to a low boil or simmer and cook down berries until they are thickened...about 20 minutes or so. 

Strawberry Cream Cheese Frosting
Adapted from You Made That?

8 oz. of cream cheese, at room temperature
1/2 cup butter, at room temperature
4 cups powdered sugar
1/2 cup homemade strawberry preserves (see recipe above)

In a large bowl put room temperature cream cheese and butter together and mix until light and fluffy.  Add sugar 1 cup at a time and then add strawberry preserves and mix well.

Tuesday, February 8, 2011

Chocolate Cupcakes with Chocolate Ganache Filling and Orange Cream Cheese Frosting


A birthday isn't a birthday without chocolate cake with orange frosting. By those standards I almost didn't have a birthday this year. But never fear, the birthday was made complete almost a week after the fact. January is a busy birthday month for my family...2 cousins, my niece, my nephew, my sister and me. And though my own came and went without my favorite cake...I got together with my sister this past weekend to celebrate both our big days, which was the perfect opportunity to make our traditional cake.

My grandma made this cake for most family birthdays for as long as I can remember. It is truly my all time favorite. This year I made cupcakes and decided to try out a new recipe for the cake. Truth be told, grandma always used a boxed chocolate cake mix. And I had a box of Duncan Hines Devil's Food cake on hand. But I wanted to make it a little extra special and I found a version on Duncan Hines website that called for sour cream. (On a side note, I was browsing the Duncan Hines site and saw a lot of great recipes, several of which I bookmarked.)

The cupcakes baked up nice a full with a soft springy texture to the touch. My batch only made 18 cupcakes (rather than 24) because I think I was a little generous filling them. The sour cream makes the cupcakes incredibly moist. Though I thought the cake didn't have enough chocolate punch so I decided to make some chocolate ganache to fill them.

Filling a cupcake is easy (this was my first time). Cut a cone shaped cylinder out of the center of each cupcake and fill with your desired jam, frosting, ganache or other tasty filling.


Once filled, place the piece of cake you cut out back in.


Since this was my first time filling cupcakes I didn't think to keep track of which cut out went with which cupcake.


But it really doesn't matter because you are going to cover them up with delicious frosting.


The ganache sets up and the center of the cupcake is just like a soft dark chocolate truffle.


I didn't have enough ganache for all 18 cupcakes so 6 of them went ganache-less.


The frosting is homemade cream cheese frosting with the zest of two oranges mixed in. If you haven't had chocolate and orange together before, you must try it. So delicious!

Chocolate Cupcakes with Chocolate Ganache and Orange Cream Cheese Frosting Recipe
Cake:
from Duncanhines.com

1 box of Duncan Hines Devil's Food cake mix
1/4 cup water
1/3 cup vegetable oil
1 cup sour cream
4 large eggs

Blend cake mix, water, oil, eggs and 1 cup sour cream in large bowl. Beat at low speed until moistened (about 30 seconds). Beat at medium speed for 2 minutes. Fill cupcake liners 2/3 full of batter. Bake and cool according to package directions. Mine baked for 20 minutes at 350.

Filling:
Chocolate Ganache
from Sweet Melissa Baking Book by Melissa Murphy

6 ounces best-quality semisweet (58%) chocolate
1/2 cup heavy cream
1 tablespoon light corn syrup

1. Coarsely chop the chocolate and place it in a medium bowl.
2. In a small saucepan over medium heat, heat the heavy cream until scalding, or until the cream is steaming and tiny bubbles have formed along the edges. Do not boil.
3. Pour the hot cream over the chocolate. Let stand for 5 minutes, then whisk until smooth. Stir in the corn syrup.

Cut a 1/2 inch cylinder in the middle of the top of each cupcake and reserve the cut outs. Fill a pastry bag or ziploc bag with ganache filling and pipe about a tablespoon of filling into each cut out. Replace reserved cake cut out over the ganache filling.

Orange Cream Cheese Frosting:
1 stick of room temperature butter
1 8 oz container of room temperature cream cheese
1 teaspoon vanilla
1 lb of confectioner's sugar
Zest of 2 large navel oranges

Beat butter and cream cheese together. Add confectioner's sugar in batches until completely combined. Beat in vanilla and orange zest. Spread a generous portion of frosting over each cupcake.

Sunday, January 9, 2011

Sweet Melissa Sundays: Almond Cupcakes with Raspberry Buttercream and Lemon Glaze


Sweet Melissa Sundays is back! The group of online blogging bakers is almost done baking our way through the Sweet Melissa Baking Book...only 16 recipes left (15 after today). We've been on hiatus over the holidays. The new year is here and it's great to back baking with my SMS pals.

Even though I'm still winding down from the holiday sugar high...I was excited to make this recipe. Melissa Murphy's recipe is actually for Hazelnut Raspberry Layer cake. I changed things up a bit. I used almonds instead of hazelnuts....I burned my hazelnuts as I was trying to toast them. I halved the recipe and opted for cupcakes which are easy to take to the office and give away (the half recipe made 12 cupcakes).


The cake consists of nut flour (almond in my case), all purpose flour, baking powder, vanilla extract, browned butter and meringue. It is moist with a nice nutty flavor and comes together pretty easily with just a few steps.


The frosting on the other hand was not my friend today. The recipe calls for making a meringue and then streaming in hot sugar liquid (sugar and water that has reached 240 degrees on a candy thermometer). That step didn't happen for me. My sugar liquid did not stay in liquid form after 2 attempts. I couldn't bear the thought of dirtying yet another pan. I also didn't have raspberry liqueur on hand so I mixed (frozen) raspberries with a generous amount of sugar until they macerated and broke down into a liquidy state. Though I realized later that I should have cooked it down on the stove with the sugar to prevent the need for refrigerating the cupcakes. Melissa's original recipe calls for using raspberry preserves in between the layers of the cake. I thought about filling the cupcakes...but they were super tasty without it so I figured why not save a step. After my burned hazelnuts, and 2 pans of hardened sugar, I quite frankly didn't have the energy for another step.


Despite all my alterations, the frosting turned out pretty tasty. It had just the right amount of raspberry...which is a perfect compliment to the almond cake.

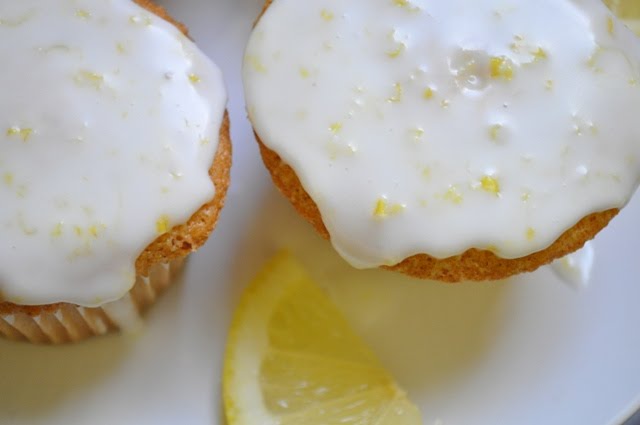
You know what else goes nicely with almond? Lemon. Mmmmm. I went a little more simple here and made a glaze to put on half the cupcakes.


It's just powdered sugar, lemon juice and lemon zest. Simple. Easy. And most importantly, delicious!


Thanks to Candy Girl for choosing such a delicious recipe! You can find the recipe on her site. To see how other SMS bakers cakes turned out click here.